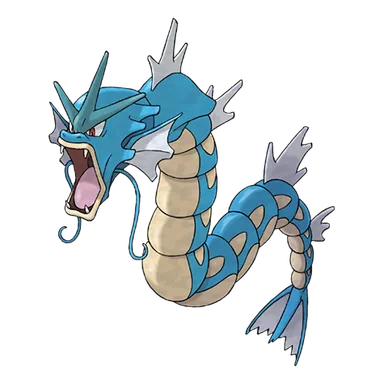
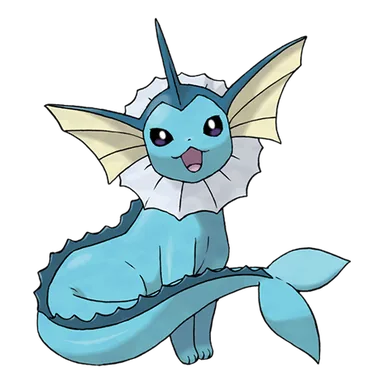
Gyarados is a Water/Flying-type Pokémon introduced in Generation I and a final stage of its evolution line, with a base stat total of 540.
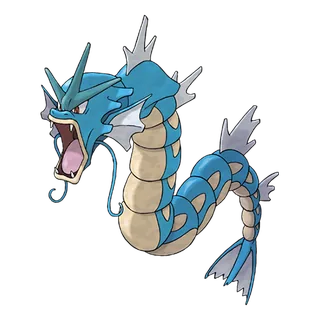
Gyarados

Gyarados

Abilities

Intimidate

Lowers the foe’s ATTACK.

Moxie

Boosts Attack after knocking out any Pokémon.

Hidden Ability

Base Stats

Total: 540
EV Yield: 2 Attack
HP: 95
Attack: 125
Defense: 79
Sp. Atk: 60
Sp. Def: 100
Speed: 81

Gyarados's Weaknesses and Resistances

Evolution Chain

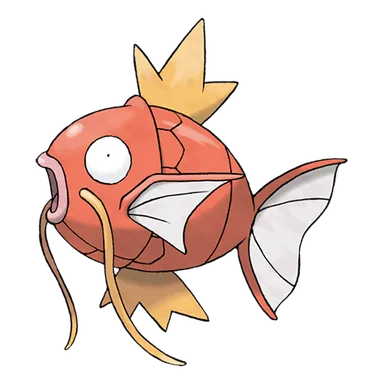
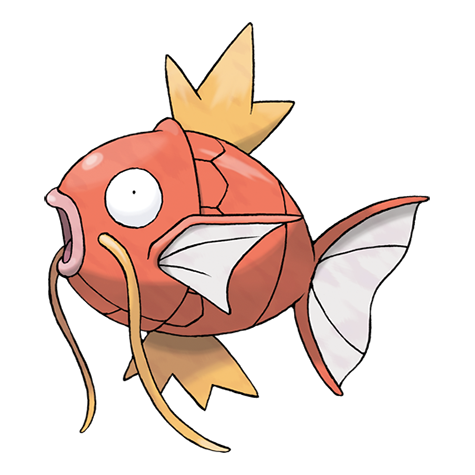
Magikarp evolves into Gyarados at level 20.
Forms

Gyarados Playthrough, Competitive, and Nuzlocke Usage

Using Gyarados in a Playthrough

Magikarp is intentionally one of the weakest combat Pokemon in the series, but it evolves at the very early level of 20 into Gyarados, producing one of the largest power spikes available in a normal playthrough. Gyarados has excellent Attack, good bulk, useful coverage, and from Generation III onward Intimidate, while Dragon Dance in later movepools can turn it into a sweeper; its Water/Flying typing also provides a Ground immunity but creates a quadruple Electric weakness. Before the physical/special split, Water STAB did not use Gyarados's much higher Attack, but strong physical coverage still kept it useful. Mega Gyarados becomes Water/Dark and trades the quadruple Electric weakness and Ground immunity for a different defensive and offensive profile.

Gyarados in Competitive Pokémon

Gyarados has been competitively relevant across many generations as an Intimidate pivot and Dragon Dance sweeper. Strong Attack, useful resistances, setup, and coverage let it convert forced switches into sweep attempts, while Moxie offers an alternative snowballing ability in formats where it is available. Mega Gyarados adds Mold Breaker, greater bulk and Attack, and Water/Dark STAB, allowing it to bypass some ability-based defensive answers. Its most recognizable weaknesses are Electric attacks in standard form, Stealth Rock chip, and the need to create safe setup opportunities.

Gyarados in Nuzlockes

The Magikarp line is one of the strongest Nuzlocke investments because Magikarp is frequently easy or guaranteed to obtain through fishing while Gyarados arrives at only level 20. Intimidate, good natural bulk, high Attack, and a Ground immunity create both offensive and defensive safety, making Gyarados useful even without setup. The quadruple Electric weakness is severe enough that an unexpected Electric move can still cause an immediate loss, so matchup knowledge remains essential. The short weak period before level 20 is usually a small price for the reliability of the final evolution.

Learnsets

73 moves · Scarlet Violet

Level Up

- Bite dark type 60 100 physical move
1 Tackle normal type 40 100 physical move
1 Leer normal type --- 100 status move
1 Splash normal type --- --- status move
1 Flail normal type --- 100 physical move
1 Twister dragon type 40 100 special move
4 Whirlpool water type 35 85 special move
8 Ice Fang ice type 65 95 physical move
12 Brine water type 65 100 special move
16 Scary Face normal type --- 100 status move
21 Waterfall water type 80 100 physical move
24 Crunch dark type 80 100 physical move
28 Rain Dance water type --- --- status move
32 Aqua Tail water type 90 90 physical move
36 Dragon Dance dragon type --- --- status move
40 Hydro Pump water type 110 80 special move
44 Hurricane flying type 110 70 special move
48 Thrash normal type 120 100 physical move
52 Hyper Beam normal type 150 90 special move

Machine

- Body Slam normal type 85 100 physical move
- Take Down normal type 90 85 physical move
- Double-Edge normal type 120 100 physical move
- Roar normal type --- --- status move
- Flamethrower fire type 90 100 special move
- Hydro Pump water type 110 80 special move
- Surf water type 90 100 special move
- Ice Beam ice type 90 100 special move
- Blizzard ice type 110 70 special move
- Hyper Beam normal type 150 90 special move
- Thunderbolt electric type 90 100 special move
- Thunder Wave electric type --- 90 status move
- Thunder electric type 110 70 special move
- Earthquake ground type 100 100 physical move
- Fire Blast fire type 110 85 special move
- Waterfall water type 80 100 physical move
- Rest psychic type --- --- status move
- Substitute normal type --- --- status move
- Spite ghost type --- 100 status move
- Protect normal type --- --- status move
- Scary Face normal type --- 100 status move
- Icy Wind ice type 55 95 special move
- Outrage dragon type 120 100 physical move
- Sandstorm rock type --- --- status move
- Endure normal type --- --- status move
- Sleep Talk normal type --- --- status move
- Rain Dance water type --- --- status move
- Sunny Day fire type --- --- status move
- Crunch dark type 80 100 physical move
- Whirlpool water type 35 85 special move
- Facade normal type 70 100 physical move
- Taunt dark type --- 100 status move
- Helping Hand normal type --- --- status move
- Endeavor normal type --- 100 physical move
- Muddy Water water type 90 85 special move
- Dragon Dance dragon type --- --- status move
- Water Pulse water type 60 100 special move
- Dark Pulse dark type 80 100 special move
- Dragon Pulse dragon type 85 100 special move
- Giga Impact normal type 150 90 physical move
- Avalanche ice type 60 100 physical move
- Ice Fang ice type 65 95 physical move
- Iron Head steel type 80 100 physical move
- Stone Edge rock type 100 80 physical move
- Scald water type 80 100 special move
- Bulldoze ground type 60 100 physical move
- Dragon Tail dragon type 60 90 physical move
- Hurricane flying type 110 70 special move
- Scale Shot dragon type 25 90 physical move
- Lash Out dark type 75 100 physical move
- Tera Blast normal type 80 100 special move
- Chilling Water water type 50 100 special move
- Dragon Cheer dragon type --- --- status move
- Temper Flare fire type 75 100 physical move

Pokédex Entries

24 entries
Platinum

Once it begins to rampage, a GYARADOS will burn everything down, even in a harsh storm.

Heartgold

They say that during past strife, GYARADOS would appear and leave blazing ruins in its wake.

Red / Blue / Leafgreen / Y

Rarely seen in the wild. Huge and vicious, it is capable of destroying entire cities in a rage.

Yellow / Lets Go Pikachu / Lets Go Eevee

Brutally vicious and enormously destructive. Known for totally destroying cities in ancient times.

Gold

They say that during past wars, GYARADOS would appear and leave blazing ruins in its wake.

Silver

Once it appears, it goes on a rampage. It remains enraged until it demolishes everything around it.

Crystal

It appears whenever there is world conflict, burning down any place it travels through.

Ruby

When MAGIKARP evolves into GYARADOS, its brain cells undergo a structural transformation. It is said that this transformation is to blame for this POKéMON’s wildly violent nature.

Sapphire

Once GYARADOS goes on a rampage, its ferociously violent blood doesn’t calm until it has burned everything down. There are records of this POKéMON’s rampages lasting a whole month.

Emerald

It is an extremely vicious and violent POKéMON. When humans begin to fight, it will appear and burn everything to the ground with intensely hot flames.

Firered

It has an extremely aggressive nature. The HYPER BEAM it shoots from its mouth totally incinerates all targets.

Diamond

Once it appears, its rage never settles until it has razed the fields and mountains around it.

Pearl

In ancient literature, there is a record of a GYARADOS that razed a village when violence flared.

Soulsilver

Once it appears, it goes on a rampage. It remains enraged until it demolishes everything around it.

Black / White / Black 2 / White 2 / Shield

Once it begins to rampage, a Gyarados will burn everything down, even in a harsh storm.

X

In ancient literature, there is a record of a Gyarados that razed a village when violence flared.

Omega Ruby

When Magikarp evolves into Gyarados, its brain cells undergo a structural transformation. It is said that this transformation is to blame for this Pokémon’s wildly violent nature.

Alpha Sapphire

Once Gyarados goes on a rampage, its ferociously violent blood doesn’t calm until it has burned everything down. There are records of this Pokémon’s rampages lasting a whole month.

Sun

A tale is told of a town that angered Gyarados. Before the sun rose the next day, flames utterly consumed the town, leaving not a trace behind.

Moon

There are people who swear that any place Gyarados appears is fated for destruction.

Ultra Sun

It fires hyper beams in all directions, burning the surrounding area to ash. There are some regions where it’s called “the deity of destruction.”

Ultra Moon

The energy from evolution stimulated its brain cells strongly, causing it to become very ferocious.

Sword

It has an extremely aggressive nature. The Hyper Beam it shoots from its mouth totally incinerates all targets.

Legends Arceus

I suspect this Pokémon to be the true identity of a dragon written of in ancient texts, which claimed that it razed an entire village with white-hot beams from its maw.

Where To Find Gyarados

116 locations
Akala Outskirts · AlolaSOS Encounter, SOS From Bubbling Spot · version details vary

Akala Outskirts Area

Ultra Moon max 30%
SOS Encounter · Lv. 10–24 · 15%SOS From Bubbling Spot · Lv. 10–29 · 15%
Ultra Sun max 30%
SOS Encounter · Lv. 10–24 · 15%SOS From Bubbling Spot · Lv. 10–29 · 15%
Ancient Poni Path · AlolaSOS Encounter, SOS From Bubbling Spot · version details vary

Ancient Poni Path Area

Ultra Moon max 30%
SOS Encounter · Lv. 10–44 · 15%SOS From Bubbling Spot · Lv. 10–49 · 15%
Ultra Sun max 30%
SOS Encounter · Lv. 10–44 · 15%SOS From Bubbling Spot · Lv. 10–49 · 15%
Brooklet Hill · AlolaSOS Encounter, SOS From Bubbling Spot · version details vary

Brooklet Hill North

Moon max 30%
SOS Encounter · Lv. 10–15 · 15%SOS From Bubbling Spot · Lv. 10–15 · 15%
Sun max 30%
SOS Encounter · Lv. 10–15 · 15%SOS From Bubbling Spot · Lv. 10–15 · 15%
Ultra Moon max 30%
SOS Encounter · Lv. 10–16 · 15%SOS From Bubbling Spot · Lv. 10–21 · 15%
Ultra Sun max 30%
SOS Encounter · Lv. 10–16 · 15%SOS From Bubbling Spot · Lv. 10–21 · 15%

Brooklet Hill South

Moon max 30%
SOS Encounter · Lv. 10–15 · 15%SOS From Bubbling Spot · Lv. 10–15 · 15%
Sun max 30%
SOS Encounter · Lv. 10–15 · 15%SOS From Bubbling Spot · Lv. 10–15 · 15%
Ultra Moon max 30%
SOS Encounter · Lv. 10–16 · 15%SOS From Bubbling Spot · Lv. 10–21 · 15%
Ultra Sun max 30%
SOS Encounter · Lv. 10–16 · 15%SOS From Bubbling Spot · Lv. 10–21 · 15%

Brooklet Hill Totems Den

Moon max 30%
SOS Encounter · Lv. 10–15 · 15%SOS From Bubbling Spot · Lv. 10–15 · 15%
Sun max 30%
SOS Encounter · Lv. 10–15 · 15%SOS From Bubbling Spot · Lv. 10–15 · 15%
Ultra Moon max 30%
SOS Encounter · Lv. 10–16 · 15%SOS From Bubbling Spot · Lv. 10–21 · 15%
Ultra Sun max 30%
SOS Encounter · Lv. 10–16 · 15%SOS From Bubbling Spot · Lv. 10–21 · 15%
Hau'oli City · AlolaSOS Encounter, SOS From Bubbling Spot · version details vary

Hauoli City Beachfront

Ultra Moon max 30%
SOS Encounter · Lv. 10–17 · 15%SOS From Bubbling Spot · Lv. 10–22 · 15%
Ultra Sun max 30%
SOS Encounter · Lv. 10–17 · 15%SOS From Bubbling Spot · Lv. 10–22 · 15%
Kala’e Bay · AlolaSOS Encounter, SOS From Bubbling Spot · version details vary

Kalae Bay Area

Moon max 30%
SOS Encounter · Lv. 10–15 · 15%SOS From Bubbling Spot · Lv. 10–15 · 15%
Sun max 30%
SOS Encounter · Lv. 10–15 · 15%SOS From Bubbling Spot · Lv. 10–15 · 15%
Ultra Moon max 30%
SOS Encounter · Lv. 10–17 · 15%SOS From Bubbling Spot · Lv. 10–22 · 15%
Ultra Sun max 30%
SOS Encounter · Lv. 10–17 · 15%SOS From Bubbling Spot · Lv. 10–22 · 15%
Malie Garden · AlolaSOS Encounter, Bubbling Spots, SOS From Bubbling Spot, Super Rod · version details vary

Malie Garden Area

Moon max 15%
SOS Encounter · Lv. 10–27 · 15%
Sun max 15%
SOS Encounter · Lv. 10–27 · 15%
Ultra Moon max 70%
Bubbling Spots · Lv. 10–33 · 35%SOS Encounter · Lv. 10–28 · 15%SOS From Bubbling Spot · Lv. 10–33 · 15%Super Rod · Lv. 10–28 · 5%
Ultra Sun max 70%
Bubbling Spots · Lv. 10–33 · 35%SOS Encounter · Lv. 10–28 · 15%SOS From Bubbling Spot · Lv. 10–33 · 15%Super Rod · Lv. 10–28 · 5%
Melemele Sea · AlolaSOS Encounter, SOS From Bubbling Spot · version details vary

Melemele Sea Area

Moon max 30%
SOS Encounter · Lv. 10–18 · 15%SOS From Bubbling Spot · Lv. 10–18 · 15%
Sun max 30%
SOS Encounter · Lv. 10–18 · 15%SOS From Bubbling Spot · Lv. 10–18 · 15%
Ultra Moon max 30%
SOS Encounter · Lv. 10–17 · 15%SOS From Bubbling Spot · Lv. 10–22 · 15%
Ultra Sun max 30%
SOS Encounter · Lv. 10–17 · 15%SOS From Bubbling Spot · Lv. 10–22 · 15%
Paniola Town · AlolaSOS Encounter, SOS From Bubbling Spot · version details vary

Paniola Town Area

Moon max 30%
SOS Encounter · Lv. 10–18 · 15%SOS From Bubbling Spot · Lv. 10–18 · 15%
Sun max 30%
SOS Encounter · Lv. 10–18 · 15%SOS From Bubbling Spot · Lv. 10–18 · 15%
Ultra Moon max 30%
SOS Encounter · Lv. 10–17 · 15%SOS From Bubbling Spot · Lv. 10–22 · 15%
Ultra Sun max 30%
SOS Encounter · Lv. 10–17 · 15%SOS From Bubbling Spot · Lv. 10–22 · 15%
Poni Breaker Coast · AlolaSOS Encounter, SOS From Bubbling Spot · version details vary

Poni Breaker Coast Area

Moon max 30%
SOS Encounter · Lv. 10–43 · 15%SOS From Bubbling Spot · Lv. 10–43 · 15%
Sun max 30%
SOS Encounter · Lv. 10–43 · 15%SOS From Bubbling Spot · Lv. 10–43 · 15%
Ultra Moon max 30%
SOS Encounter · Lv. 10–44 · 15%SOS From Bubbling Spot · Lv. 10–49 · 15%
Ultra Sun max 30%
SOS Encounter · Lv. 10–44 · 15%SOS From Bubbling Spot · Lv. 10–49 · 15%
Poni Gauntlet · AlolaSOS Encounter, SOS From Bubbling Spot · version details vary

Poni Gauntlet Area

Moon max 30%
SOS Encounter · Lv. 10–59 · 15%SOS From Bubbling Spot · Lv. 10–59 · 15%
Sun max 30%
SOS Encounter · Lv. 10–59 · 15%SOS From Bubbling Spot · Lv. 10–59 · 15%
Ultra Moon max 30%
SOS Encounter · Lv. 10–61 · 15%SOS From Bubbling Spot · Lv. 10–66 · 15%
Ultra Sun max 30%
SOS Encounter · Lv. 10–61 · 15%SOS From Bubbling Spot · Lv. 10–66 · 15%
Poni Meadow · AlolaSOS Encounter, SOS From Bubbling Spot · version details vary

Poni Meadow Area

Moon max 30%
SOS Encounter · Lv. 10–57 · 15%SOS From Bubbling Spot · Lv. 10–57 · 15%
Sun max 30%
SOS Encounter · Lv. 10–57 · 15%SOS From Bubbling Spot · Lv. 10–57 · 15%
Ultra Moon max 30%
SOS Encounter · Lv. 10–57 · 15%SOS From Bubbling Spot · Lv. 10–62 · 15%
Ultra Sun max 30%
SOS Encounter · Lv. 10–57 · 15%SOS From Bubbling Spot · Lv. 10–62 · 15%
Poni Wilds · AlolaSOS Encounter, SOS From Bubbling Spot · version details vary

Poni Wilds Area

Moon max 30%
SOS Encounter · Lv. 10–43 · 15%SOS From Bubbling Spot · Lv. 10–43 · 15%
Sun max 30%
SOS Encounter · Lv. 10–43 · 15%SOS From Bubbling Spot · Lv. 10–43 · 15%
Route 13 · AlolaSOS Encounter · version details vary

Alola Route 13 Area

Moon max 15%
SOS Encounter · Lv. 10–30 · 15%
Sun max 15%
SOS Encounter · Lv. 10–30 · 15%
Ultra Moon max 15%
SOS Encounter · Lv. 10–33 · 15%
Ultra Sun max 15%
SOS Encounter · Lv. 10–33 · 15%
Route 14 · AlolaSOS Encounter, SOS From Bubbling Spot · version details vary

Alola Route 14 Area

Moon max 30%
SOS Encounter · Lv. 10–31 · 15%SOS From Bubbling Spot · Lv. 10–31 · 15%
Sun max 30%
SOS Encounter · Lv. 10–31 · 15%SOS From Bubbling Spot · Lv. 10–31 · 15%
Ultra Moon max 30%
SOS Encounter · Lv. 10–34 · 15%SOS From Bubbling Spot · Lv. 10–39 · 15%
Ultra Sun max 30%
SOS Encounter · Lv. 10–34 · 15%SOS From Bubbling Spot · Lv. 10–39 · 15%
Route 15 · AlolaSOS Encounter, SOS From Bubbling Spot · version details vary

Alola Route 15 Main

Moon max 30%
SOS Encounter · Lv. 10–33 · 15%SOS From Bubbling Spot · Lv. 10–33 · 15%
Sun max 30%
SOS Encounter · Lv. 10–33 · 15%SOS From Bubbling Spot · Lv. 10–33 · 15%
Ultra Moon max 30%
SOS Encounter · Lv. 10–35 · 15%SOS From Bubbling Spot · Lv. 10–40 · 15%
Ultra Sun max 30%
SOS Encounter · Lv. 10–35 · 15%SOS From Bubbling Spot · Lv. 10–40 · 15%
Route 7 · AlolaSOS Encounter, SOS From Bubbling Spot · version details vary

Alola Route 7 Area

Moon max 15%
SOS Encounter · Lv. 10–19 · 15%
Sun max 15%
SOS Encounter · Lv. 10–19 · 15%
Ultra Moon max 30%
SOS Encounter · Lv. 10–18 · 15%SOS From Bubbling Spot · Lv. 10–23 · 15%
Ultra Sun max 30%
SOS Encounter · Lv. 10–18 · 15%SOS From Bubbling Spot · Lv. 10–23 · 15%
Route 8 · AlolaSOS Encounter, SOS From Bubbling Spot · version details vary

Alola Route 8 Main

Moon max 30%
SOS Encounter · Lv. 10–20 · 15%SOS From Bubbling Spot · Lv. 10–25 · 15%
Sun max 30%
SOS Encounter · Lv. 10–20 · 15%SOS From Bubbling Spot · Lv. 10–25 · 15%
Ultra Moon max 30%
SOS Encounter · Lv. 10–20 · 15%SOS From Bubbling Spot · Lv. 10–25 · 15%
Ultra Sun max 30%
SOS Encounter · Lv. 10–20 · 15%SOS From Bubbling Spot · Lv. 10–25 · 15%
Route 9 · AlolaSOS Encounter · version details vary

Alola Route 9 Main

Moon max 15%
SOS Encounter · Lv. 10–23 · 15%
Sun max 15%
SOS Encounter · Lv. 10–23 · 15%
Ultra Moon max 15%
SOS Encounter · Lv. 10–23 · 15%
Ultra Sun max 15%
SOS Encounter · Lv. 10–23 · 15%
Seafolk Village · AlolaSOS Encounter, SOS From Bubbling Spot · version details vary

Seafolk Village Main

Moon max 30%
SOS Encounter · Lv. 10–43 · 15%SOS From Bubbling Spot · Lv. 10–43 · 15%
Sun max 30%
SOS Encounter · Lv. 10–43 · 15%SOS From Bubbling Spot · Lv. 10–43 · 15%
Ultra Moon max 30%
SOS Encounter · Lv. 10–44 · 15%SOS From Bubbling Spot · Lv. 10–49 · 15%
Ultra Sun max 30%
SOS Encounter · Lv. 10–44 · 15%SOS From Bubbling Spot · Lv. 10–49 · 15%
Seaward Cave · AlolaSOS Encounter, SOS From Bubbling Spot · version details vary

Seaward Cave Area

Moon max 30%
SOS Encounter · Lv. 10–15 · 15%SOS From Bubbling Spot · Lv. 10–15 · 15%
Sun max 30%
SOS Encounter · Lv. 10–15 · 15%SOS From Bubbling Spot · Lv. 10–15 · 15%
Ultra Moon max 30%
SOS Encounter · Lv. 10–17 · 15%SOS From Bubbling Spot · Lv. 10–22 · 15%
Ultra Sun max 30%
SOS Encounter · Lv. 10–17 · 15%SOS From Bubbling Spot · Lv. 10–22 · 15%
Secluded Shore · AlolaSOS Encounter · version details vary

Secluded Shore Area

Moon max 15%
SOS Encounter · Lv. 10–30 · 15%
Sun max 15%
SOS Encounter · Lv. 10–30 · 15%
Tapu Village · AlolaSOS Encounter, SOS From Bubbling Spot · version details vary

Tapu Village Area

Moon max 30%
SOS Encounter · Lv. 10–31 · 15%SOS From Bubbling Spot · Lv. 10–31 · 15%
Sun max 30%
SOS Encounter · Lv. 10–31 · 15%SOS From Bubbling Spot · Lv. 10–31 · 15%
Ultra Moon max 30%
SOS Encounter · Lv. 10–34 · 15%SOS From Bubbling Spot · Lv. 10–39 · 15%
Ultra Sun max 30%
SOS Encounter · Lv. 10–34 · 15%SOS From Bubbling Spot · Lv. 10–39 · 15%
Vast Poni Canyon · AlolaSOS Encounter, SOS From Bubbling Spot · version details vary

Vast Poni Canyon Northwest

Moon max 30%
SOS Encounter · Lv. 10–44 · 15%SOS From Bubbling Spot · Lv. 10–44 · 15%
Sun max 30%
SOS Encounter · Lv. 10–44 · 15%SOS From Bubbling Spot · Lv. 10–44 · 15%
Ultra Moon max 30%
SOS Encounter · Lv. 10–46 · 15%SOS From Bubbling Spot · Lv. 10–51 · 15%
Ultra Sun max 30%
SOS Encounter · Lv. 10–46 · 15%SOS From Bubbling Spot · Lv. 10–51 · 15%
Route 2 · GalarOverworld Water · version details vary

Route 2 (Lake)

Shield max 2%
Overworld Water · Lv. 38–40 · 2%
Sword max 2%
Overworld Water · Lv. 38–40 · 2%
Sootopolis City · HoennSuper Rod · version details vary

Sootopolis City

Emerald max 20%
Super Rod · Lv. 5–45 · 1%Super Rod · Lv. 35–40 · 15%Super Rod · Lv. 35–45 · 4%
Ruby max 20%
Super Rod · Lv. 5–45 · 1%Super Rod · Lv. 35–40 · 15%Super Rod · Lv. 35–45 · 4%
Sapphire max 20%
Super Rod · Lv. 5–45 · 1%Super Rod · Lv. 35–40 · 15%Super Rod · Lv. 35–45 · 4%
Johto Safari Zone · JohtoSuper Rod · version details vary

Safari Zone Marshland

HeartGold max 20%
Super Rod · Lv. 36 · 10%Super Rod · Lv. 37 · 10%
SoulSilver max 20%
Super Rod · Lv. 36 · 10%Super Rod · Lv. 37 · 10%
Lake of Rage · JohtoGood Rod, One-time, Super Rod, Surf · version details vary

Lake of Rage

Crystal max 150%
Good Rod · Lv. 20 · 10%One-time · Lv. 30 · 100%Super Rod · Lv. 40 · 30%Surf · Lv. 15–19 · 10%
Gold max 150%
Good Rod · Lv. 20 · 10%One-time · Lv. 30 · 100%Super Rod · Lv. 40 · 30%Surf · Lv. 15–19 · 10%
HeartGold max 150%
Good Rod · Lv. 20 · 10%One-time · Lv. 30 · 100%Super Rod · Lv. 40 · 30%Surf · Lv. 10–20 · 5%Surf · Lv. 10–20 · 4%Surf · Lv. 10–20 · 1%
Silver max 150%
Good Rod · Lv. 20 · 10%One-time · Lv. 30 · 100%Super Rod · Lv. 40 · 30%Surf · Lv. 15–19 · 10%
SoulSilver max 150%
Good Rod · Lv. 20 · 10%One-time · Lv. 30 · 100%Super Rod · Lv. 40 · 30%Surf · Lv. 10–20 · 5%Surf · Lv. 10–20 · 4%Surf · Lv. 10–20 · 1%
Mt. Silver · JohtoGood Rod, Super Rod · version details vary

Mount Silver (1F)

HeartGold max 90%
Good Rod · Lv. 20 · 10% · Time NightSuper Rod · Lv. 40 · 40%Super Rod · Lv. 40 · 30% · Time NightSuper Rod · Lv. 40 · 10%
SoulSilver max 90%
Good Rod · Lv. 20 · 10% · Time NightSuper Rod · Lv. 40 · 40%Super Rod · Lv. 40 · 30% · Time NightSuper Rod · Lv. 40 · 10%
Friend Safari · KalosWalking · version details vary

Friend Safari (Water)

X max 33%
Walking · Lv. 30 · 33% · Friend Safari Slot 2
Y max 33%
Walking · Lv. 30 · 33% · Friend Safari Slot 2
Parfum Palace · KalosSuper Rod · version details vary

Parfum Palace

X max 60%
Super Rod · Lv. 35 · 60%
Y max 60%
Super Rod · Lv. 35 · 60%
Route 22 · KalosSuper Rod · version details vary

Road 22

X max 60%
Super Rod · Lv. 35 · 60%
Y max 60%
Super Rod · Lv. 35 · 60%
Route 3 · KalosSuper Rod · version details vary

Road 3

X max 60%
Super Rod · Lv. 35 · 60%
Y max 60%
Super Rod · Lv. 35 · 60%
Berry Forest · KantoSuper Rod · version details vary

Berry Forest

FireRed max 15%
Super Rod · Lv. 15–25 · 15%
LeafGreen max 15%
Super Rod · Lv. 15–25 · 15%
Bond Bridge · KantoSuper Rod · version details vary

Bond Bridge

FireRed max 15%
Super Rod · Lv. 15–25 · 15%
LeafGreen max 15%
Super Rod · Lv. 15–25 · 15%
Cape Brink · KantoSuper Rod · version details vary

Cape Brink

FireRed max 15%
Super Rod · Lv. 15–25 · 15%
LeafGreen max 15%
Super Rod · Lv. 15–25 · 15%
Cerulean Cave · KantoSuper Rod · version details vary

Cerulean Cave (1F)

FireRed max 15%
Super Rod · Lv. 15–25 · 15%
HeartGold max 30%
Super Rod · Lv. 40 · 15%Super Rod · Lv. 40 · 10%Super Rod · Lv. 40 · 5%
LeafGreen max 15%
Super Rod · Lv. 15–25 · 15%
SoulSilver max 30%
Super Rod · Lv. 40 · 15%Super Rod · Lv. 40 · 10%Super Rod · Lv. 40 · 5%

Cerulean Cave (2F)

HeartGold max 30%
Super Rod · Lv. 40 · 15%Super Rod · Lv. 40 · 10%Super Rod · Lv. 40 · 5%
SoulSilver max 30%
Super Rod · Lv. 40 · 15%Super Rod · Lv. 40 · 10%Super Rod · Lv. 40 · 5%

Cerulean Cave (B1F)

FireRed max 16%
Super Rod · Lv. 15–25 · 15%Super Rod · Lv. 25–35 · 1%
HeartGold max 30%
Super Rod · Lv. 40 · 15%Super Rod · Lv. 40 · 10%Super Rod · Lv. 40 · 5%
LeafGreen max 16%
Super Rod · Lv. 15–25 · 15%Super Rod · Lv. 25–35 · 1%
SoulSilver max 30%
Super Rod · Lv. 40 · 15%Super Rod · Lv. 40 · 10%Super Rod · Lv. 40 · 5%
Cerulean City · KantoSuper Rod · version details vary

Cerulean City

FireRed max 15%
Super Rod · Lv. 15–25 · 15%
LeafGreen max 15%
Super Rod · Lv. 15–25 · 15%
Cinnabar Island · KantoSuper Rod · version details vary

Cinnabar Island

FireRed max 15%
Super Rod · Lv. 15–25 · 15%
LeafGreen max 15%
Super Rod · Lv. 15–25 · 15%
Five Island · KantoSuper Rod · version details vary

Five Island

FireRed max 15%
Super Rod · Lv. 15–25 · 15%
LeafGreen max 15%
Super Rod · Lv. 15–25 · 15%
Five Isle Meadow · KantoSuper Rod · version details vary

Five Isle Meadow

FireRed max 15%
Super Rod · Lv. 15–25 · 15%
LeafGreen max 15%
Super Rod · Lv. 15–25 · 15%
Four Island · KantoSuper Rod · version details vary

Four Island

FireRed max 15%
Super Rod · Lv. 15–25 · 15%
LeafGreen max 15%
Super Rod · Lv. 15–25 · 15%
Fuchsia City · KantoGood Rod, Super Rod · version details vary

Fuchsia City

Crystal max 40%
Good Rod · Lv. 20 · 10%Super Rod · Lv. 40 · 30%
FireRed max 15%
Super Rod · Lv. 15–25 · 15%
Gold max 40%
Good Rod · Lv. 20 · 10%Super Rod · Lv. 40 · 30%
HeartGold max 40%
Good Rod · Lv. 20 · 10%Super Rod · Lv. 40 · 30%
LeafGreen max 15%
Super Rod · Lv. 15–25 · 15%
Silver max 40%
Good Rod · Lv. 20 · 10%Super Rod · Lv. 40 · 30%
SoulSilver max 40%
Good Rod · Lv. 20 · 10%Super Rod · Lv. 40 · 30%
Yellow max 10%
Super Rod · Lv. 15 · 10%
Green Path · KantoSuper Rod · version details vary

Green Path

FireRed max 15%
Super Rod · Lv. 15–25 · 15%
LeafGreen max 15%
Super Rod · Lv. 15–25 · 15%
Icefall Cave · KantoSuper Rod · version details vary

Icefall Cave (entrance)

FireRed max 15%
Super Rod · Lv. 15–25 · 15%
LeafGreen max 15%
Super Rod · Lv. 15–25 · 15%

Icefall Cave (waterfall)

FireRed max 15%
Super Rod · Lv. 15–25 · 15%
LeafGreen max 15%
Super Rod · Lv. 15–25 · 15%
Kindle Road · KantoSuper Rod · version details vary

Kindle Road

FireRed max 15%
Super Rod · Lv. 15–25 · 15%
LeafGreen max 15%
Super Rod · Lv. 15–25 · 15%
Memorial Pillar · KantoSuper Rod · version details vary

Memorial Pillar

FireRed max 15%
Super Rod · Lv. 15–25 · 15%
LeafGreen max 15%
Super Rod · Lv. 15–25 · 15%
One Island · KantoSuper Rod · version details vary

One Island

FireRed max 15%
Super Rod · Lv. 15–25 · 15%
LeafGreen max 15%
Super Rod · Lv. 15–25 · 15%
Outcast Island · KantoSuper Rod · version details vary

Outcast Island

FireRed max 15%
Super Rod · Lv. 15–25 · 15%
LeafGreen max 15%
Super Rod · Lv. 15–25 · 15%
Pallet Town · KantoSuper Rod · version details vary

Pallet Town

FireRed max 15%
Super Rod · Lv. 15–25 · 15%
LeafGreen max 15%
Super Rod · Lv. 15–25 · 15%
Resort Gorgeous · KantoSuper Rod · version details vary

Resort Gorgeous

FireRed max 15%
Super Rod · Lv. 15–25 · 15%
LeafGreen max 15%
Super Rod · Lv. 15–25 · 15%
Route 10 · KantoSuper Rod · version details vary

Road 10

FireRed max 15%
Super Rod · Lv. 15–25 · 15%
LeafGreen max 15%
Super Rod · Lv. 15–25 · 15%
Route 11 · KantoSuper Rod · version details vary

Road 11

FireRed max 15%
Super Rod · Lv. 15–25 · 15%
LeafGreen max 15%
Super Rod · Lv. 15–25 · 15%
Route 12 · KantoSuper Rod · version details vary

Road 12

FireRed max 15%
Super Rod · Lv. 15–25 · 15%
LeafGreen max 15%
Super Rod · Lv. 15–25 · 15%
Route 13 · KantoSuper Rod · version details vary

Road 13

FireRed max 15%
Super Rod · Lv. 15–25 · 15%
LeafGreen max 15%
Super Rod · Lv. 15–25 · 15%
Route 22 · KantoSuper Rod · version details vary

Road 22

FireRed max 15%
Super Rod · Lv. 15–25 · 15%
LeafGreen max 15%
Super Rod · Lv. 15–25 · 15%
Route 23 · KantoSuper Rod · version details vary

Road 23

FireRed max 15%
Super Rod · Lv. 15–25 · 15%
LeafGreen max 15%
Super Rod · Lv. 15–25 · 15%
Route 24 · KantoSuper Rod · version details vary

Road 24

FireRed max 15%
Super Rod · Lv. 15–25 · 15%
LeafGreen max 15%
Super Rod · Lv. 15–25 · 15%
Route 25 · KantoSuper Rod · version details vary

Road 25

FireRed max 15%
Super Rod · Lv. 15–25 · 15%
LeafGreen max 15%
Super Rod · Lv. 15–25 · 15%
Route 4 · KantoSuper Rod · version details vary

Road 4

FireRed max 15%
Super Rod · Lv. 15–25 · 15%
LeafGreen max 15%
Super Rod · Lv. 15–25 · 15%
Route 6 · KantoSuper Rod · version details vary

Road 6

FireRed max 15%
Super Rod · Lv. 15–25 · 15%
LeafGreen max 15%
Super Rod · Lv. 15–25 · 15%
Ruin Valley · KantoSuper Rod · version details vary

Ruin Valley

FireRed max 15%
Super Rod · Lv. 15–25 · 15%
LeafGreen max 15%
Super Rod · Lv. 15–25 · 15%
S.S. Anne · KantoSuper Rod · version details vary

S.S. Anne

FireRed max 15%
Super Rod · Lv. 15–25 · 15%
LeafGreen max 15%
Super Rod · Lv. 15–25 · 15%
Sea Route 19 · KantoSuper Rod · version details vary

Road 19

FireRed max 15%
Super Rod · Lv. 15–25 · 15%
LeafGreen max 15%
Super Rod · Lv. 15–25 · 15%
Sea Route 20 · KantoSuper Rod, Overworld Water · version details vary

Road 20

FireRed max 15%
Super Rod · Lv. 15–25 · 15%
LeafGreen max 15%
Super Rod · Lv. 15–25 · 15%
Lets Go Eevee max 100%
Overworld Water · Lv. 37–42 · 100%
Lets Go Pikachu max 100%
Overworld Water · Lv. 37–42 · 100%
Sea Route 21 · KantoSuper Rod · version details vary

Road 21

FireRed max 15%
Super Rod · Lv. 15–25 · 15%
LeafGreen max 15%
Super Rod · Lv. 15–25 · 15%
Seafoam Islands · KantoSuper Rod · version details vary

Seafoam Islands (B3F)

FireRed max 16%
Super Rod · Lv. 15–25 · 15%Super Rod · Lv. 25–35 · 1%
LeafGreen max 16%
Super Rod · Lv. 15–25 · 15%Super Rod · Lv. 25–35 · 1%

Seafoam Islands (B4F)

FireRed max 16%
Super Rod · Lv. 15–25 · 15%Super Rod · Lv. 25–35 · 1%
HeartGold max 40%
Super Rod · Lv. 40 · 40%
LeafGreen max 16%
Super Rod · Lv. 15–25 · 15%Super Rod · Lv. 25–35 · 1%
SoulSilver max 40%
Super Rod · Lv. 40 · 40%
Tanoby Ruins · KantoSuper Rod · version details vary

Tanoby Ruins

FireRed max 15%
Super Rod · Lv. 15–25 · 15%
LeafGreen max 15%
Super Rod · Lv. 15–25 · 15%
Trainer Tower · KantoSuper Rod · version details vary

Trainer Tower

FireRed max 15%
Super Rod · Lv. 15–25 · 15%
LeafGreen max 15%
Super Rod · Lv. 15–25 · 15%
Treasure Beach · KantoSuper Rod · version details vary

Treasure Beach

FireRed max 15%
Super Rod · Lv. 15–25 · 15%
LeafGreen max 15%
Super Rod · Lv. 15–25 · 15%
Vermilion City · KantoSuper Rod · version details vary

Vermilion City

FireRed max 15%
Super Rod · Lv. 15–25 · 15%
LeafGreen max 15%
Super Rod · Lv. 15–25 · 15%
Viridian City · KantoSuper Rod · version details vary

Viridian City

FireRed max 15%
Super Rod · Lv. 15–25 · 15%
LeafGreen max 15%
Super Rod · Lv. 15–25 · 15%
Water Labyrinth · KantoSuper Rod · version details vary

Water Labyrinth

FireRed max 15%
Super Rod · Lv. 15–25 · 15%
LeafGreen max 15%
Super Rod · Lv. 15–25 · 15%
Water Path · KantoSuper Rod · version details vary

Water Path

FireRed max 15%
Super Rod · Lv. 15–25 · 15%
LeafGreen max 15%
Super Rod · Lv. 15–25 · 15%
Canalave City · SinnohSuper Rod · version details vary

Canalave City

Diamond max 40%
Super Rod · Lv. 30–40 · 40%
Pearl max 40%
Super Rod · Lv. 30–40 · 40%
Platinum max 40%
Super Rod · Lv. 30–55 · 40%
Celestic Town · SinnohSuper Rod · version details vary

Celestic Town

Diamond max 40%
Super Rod · Lv. 30–40 · 40%
Pearl max 40%
Super Rod · Lv. 30–40 · 40%
Platinum max 40%
Super Rod · Lv. 30–55 · 40%
Eterna City · SinnohSuper Rod · version details vary

Eterna City

Diamond max 55%
Super Rod · Lv. 30–40 · 40%Super Rod · Lv. 40–55 · 15%
Pearl max 55%
Super Rod · Lv. 30–40 · 40%Super Rod · Lv. 40–55 · 15%
Platinum max 55%
Super Rod · Lv. 30–40 · 40%Super Rod · Lv. 40–55 · 15%
Fuego Ironworks · SinnohSuper Rod · version details vary

Fuego Ironworks

Diamond max 40%
Super Rod · Lv. 30–40 · 40%
Pearl max 40%
Super Rod · Lv. 30–40 · 40%
Platinum max 40%
Super Rod · Lv. 30–55 · 40%
Great Marsh · SinnohGood Rod, Super Rod · version details vary

Great Marsh Area 1

Diamond max 20%
Good Rod · Lv. 15–30 · 4%Good Rod · Lv. 15–30 · 1%Super Rod · Lv. 40–55 · 15%
Pearl max 20%
Good Rod · Lv. 15–30 · 4%Good Rod · Lv. 15–30 · 1%Super Rod · Lv. 40–55 · 15%
Platinum max 40%
Super Rod · Lv. 30–55 · 40%

Great Marsh Area 2

Diamond max 20%
Good Rod · Lv. 15–30 · 4%Good Rod · Lv. 15–30 · 1%Super Rod · Lv. 40–55 · 15%
Pearl max 20%
Good Rod · Lv. 15–30 · 4%Good Rod · Lv. 15–30 · 1%Super Rod · Lv. 40–55 · 15%
Platinum max 40%
Super Rod · Lv. 30–55 · 40%

Great Marsh Area 3

Diamond max 20%
Good Rod · Lv. 15–30 · 4%Good Rod · Lv. 15–30 · 1%Super Rod · Lv. 40–55 · 15%
Pearl max 20%
Good Rod · Lv. 15–30 · 4%Good Rod · Lv. 15–30 · 1%Super Rod · Lv. 40–55 · 15%
Platinum max 40%
Super Rod · Lv. 30–55 · 40%

Great Marsh Area 4

Diamond max 20%
Good Rod · Lv. 15–30 · 4%Good Rod · Lv. 15–30 · 1%Super Rod · Lv. 40–55 · 15%
Pearl max 20%
Good Rod · Lv. 15–30 · 4%Good Rod · Lv. 15–30 · 1%Super Rod · Lv. 40–55 · 15%
Platinum max 40%
Super Rod · Lv. 30–55 · 40%

Great Marsh Area 5

Platinum max 40%
Super Rod · Lv. 30–55 · 40%

Great Marsh Area 6

Diamond max 20%
Good Rod · Lv. 15–30 · 4%Good Rod · Lv. 15–30 · 1%Super Rod · Lv. 40–55 · 15%
Pearl max 20%
Good Rod · Lv. 15–30 · 4%Good Rod · Lv. 15–30 · 1%Super Rod · Lv. 40–55 · 15%
Platinum max 40%
Super Rod · Lv. 30–55 · 40%
Iron Island · SinnohSuper Rod · version details vary

Iron Island area

Diamond max 40%
Super Rod · Lv. 30–40 · 40%
Pearl max 40%
Super Rod · Lv. 30–40 · 40%
Platinum max 40%
Super Rod · Lv. 30–55 · 40%
Lake Acuity · SinnohSuper Rod · version details vary

Lake Acuity

Diamond max 55%
Super Rod · Lv. 30–40 · 40%Super Rod · Lv. 40–55 · 15%
Pearl max 55%
Super Rod · Lv. 30–40 · 40%Super Rod · Lv. 40–55 · 15%
Platinum max 55%
Super Rod · Lv. 30–40 · 40%Super Rod · Lv. 40–55 · 15%
Lake Valor · SinnohSuper Rod · version details vary

Lake Valor

Diamond max 55%
Super Rod · Lv. 30–40 · 40%Super Rod · Lv. 40–55 · 15%
Pearl max 55%
Super Rod · Lv. 30–40 · 40%Super Rod · Lv. 40–55 · 15%
Platinum max 55%
Super Rod · Lv. 30–40 · 40%Super Rod · Lv. 40–55 · 15%
Lake Verity · SinnohSuper Rod · version details vary

Lake Verity (after Galactic intervention)

Diamond max 55%
Super Rod · Lv. 30–40 · 40%Super Rod · Lv. 40–55 · 15%
Pearl max 55%
Super Rod · Lv. 30–40 · 40%Super Rod · Lv. 40–55 · 15%
Platinum max 55%
Super Rod · Lv. 30–40 · 40%Super Rod · Lv. 40–55 · 15%

Lake Verity (before Galactic intervention)

Diamond max 55%
Super Rod · Lv. 30–40 · 40%Super Rod · Lv. 40–55 · 15%
Pearl max 55%
Super Rod · Lv. 30–40 · 40%Super Rod · Lv. 40–55 · 15%
Platinum max 55%
Super Rod · Lv. 30–40 · 40%Super Rod · Lv. 40–55 · 15%
Mt. Coronet · SinnohSuper Rod · version details vary

Mount Coronet (1F Road 207)

Diamond max 55%
Super Rod · Lv. 30–40 · 40%Super Rod · Lv. 40–55 · 15%
Pearl max 55%
Super Rod · Lv. 30–40 · 40%Super Rod · Lv. 40–55 · 15%
Platinum max 55%
Super Rod · Lv. 20–55 · 15%Super Rod · Lv. 30–55 · 40%

Mount Coronet (4F)

Diamond max 55%
Super Rod · Lv. 30–40 · 40%Super Rod · Lv. 40–55 · 15%
Pearl max 55%
Super Rod · Lv. 30–40 · 40%Super Rod · Lv. 40–55 · 15%
Platinum max 40%
Super Rod · Lv. 30–55 · 40%

Mount Coronet (B1F)

Diamond max 55%
Super Rod · Lv. 30–40 · 40%Super Rod · Lv. 40–55 · 15%
Pearl max 55%
Super Rod · Lv. 30–40 · 40%Super Rod · Lv. 40–55 · 15%
Platinum max 55%
Super Rod · Lv. 30–40 · 40%Super Rod · Lv. 40–55 · 15%
Oreburgh Gate · SinnohSuper Rod · version details vary

Oreburgh Gate (B1F)

Diamond max 55%
Super Rod · Lv. 30–40 · 40%Super Rod · Lv. 40–55 · 15%
Pearl max 55%
Super Rod · Lv. 30–40 · 40%Super Rod · Lv. 40–55 · 15%
Platinum max 55%
Super Rod · Lv. 30–55 · 40%Super Rod · Lv. 40–55 · 15%
Pastoria City · SinnohSuper Rod · version details vary

Pastoria City

Diamond max 55%
Super Rod · Lv. 30–40 · 40%Super Rod · Lv. 40–55 · 15%
Pearl max 55%
Super Rod · Lv. 30–40 · 40%Super Rod · Lv. 40–55 · 15%
Platinum max 55%
Super Rod · Lv. 30–40 · 40%Super Rod · Lv. 40–55 · 15%
Pokémon League · SinnohSuper Rod · version details vary

Sinnoh League

Diamond max 40%
Super Rod · Lv. 30–40 · 40%
Pearl max 40%
Super Rod · Lv. 30–40 · 40%
Platinum max 40%
Super Rod · Lv. 30–55 · 40%
Ravaged Path · SinnohSuper Rod · version details vary

Ravaged Path

Diamond max 55%
Super Rod · Lv. 30–40 · 40%Super Rod · Lv. 40–55 · 15%
Pearl max 55%
Super Rod · Lv. 30–40 · 40%Super Rod · Lv. 40–55 · 15%
Platinum max 55%
Super Rod · Lv. 30–55 · 40%Super Rod · Lv. 40–55 · 15%
Resort Area · SinnohSuper Rod · version details vary

Resort Area

Diamond max 55%
Super Rod · Lv. 30–40 · 40%Super Rod · Lv. 40–55 · 15%
Pearl max 55%
Super Rod · Lv. 30–40 · 40%Super Rod · Lv. 40–55 · 15%
Route 203 · SinnohSuper Rod · version details vary

Road 203

Diamond max 55%
Super Rod · Lv. 30–40 · 40%Super Rod · Lv. 40–55 · 15%
Pearl max 55%
Super Rod · Lv. 30–40 · 40%Super Rod · Lv. 40–55 · 15%
Platinum max 55%
Super Rod · Lv. 30–40 · 40%Super Rod · Lv. 40–55 · 15%
Route 204 · SinnohSuper Rod · version details vary

Road 204 (north, towards Floaroma Town)

Diamond max 55%
Super Rod · Lv. 30–40 · 40%Super Rod · Lv. 40–55 · 15%
Pearl max 55%
Super Rod · Lv. 30–40 · 40%Super Rod · Lv. 40–55 · 15%
Platinum max 55%
Super Rod · Lv. 30–40 · 40%Super Rod · Lv. 40–55 · 15%

Road 204 (south, towards Jubilife City)

Diamond max 55%
Super Rod · Lv. 30–40 · 40%Super Rod · Lv. 40–55 · 15%
Pearl max 55%
Super Rod · Lv. 30–40 · 40%Super Rod · Lv. 40–55 · 15%
Platinum max 55%
Super Rod · Lv. 30–40 · 40%Super Rod · Lv. 40–55 · 15%
Route 205 · SinnohSuper Rod · version details vary

Road 205 (east, towards Eterna City)

Diamond max 55%
Super Rod · Lv. 30–40 · 40%Super Rod · Lv. 40–55 · 15%
Pearl max 55%
Super Rod · Lv. 30–40 · 40%Super Rod · Lv. 40–55 · 15%
Platinum max 55%
Super Rod · Lv. 30–40 · 40%Super Rod · Lv. 40–55 · 15%

Road 205 (south, towards Floaroma Town)

Diamond max 40%
Super Rod · Lv. 30–40 · 40%
Pearl max 40%
Super Rod · Lv. 30–40 · 40%
Platinum max 40%
Super Rod · Lv. 30–55 · 40%
Route 208 · SinnohSuper Rod · version details vary

Road 208

Diamond max 55%
Super Rod · Lv. 30–40 · 40%Super Rod · Lv. 40–55 · 15%
Pearl max 55%
Super Rod · Lv. 30–40 · 40%Super Rod · Lv. 40–55 · 15%
Platinum max 55%
Super Rod · Lv. 30–40 · 40%Super Rod · Lv. 40–55 · 15%
Route 209 · SinnohSuper Rod · version details vary

Road 209

Diamond max 55%
Super Rod · Lv. 30–40 · 40%Super Rod · Lv. 40–55 · 15%
Pearl max 55%
Super Rod · Lv. 30–40 · 40%Super Rod · Lv. 40–55 · 15%
Platinum max 55%
Super Rod · Lv. 30–40 · 40%Super Rod · Lv. 40–55 · 15%
Route 210 · SinnohSuper Rod · version details vary

Road 210 (west, towards Celestic Town)

Diamond max 55%
Super Rod · Lv. 30–40 · 40%Super Rod · Lv. 40–55 · 15%
Pearl max 55%
Super Rod · Lv. 30–40 · 40%Super Rod · Lv. 40–55 · 15%
Platinum max 55%
Super Rod · Lv. 30–40 · 40%Super Rod · Lv. 40–55 · 15%
Route 212 · SinnohSuper Rod · version details vary

Road 212 (east, towards Pastoria City)

Diamond max 55%
Super Rod · Lv. 30–40 · 40%Super Rod · Lv. 40–55 · 15%
Pearl max 55%
Super Rod · Lv. 30–40 · 40%Super Rod · Lv. 40–55 · 15%
Platinum max 55%
Super Rod · Lv. 30–40 · 40%Super Rod · Lv. 40–55 · 15%

Road 212 (north, towards Hearthome City)

Diamond max 55%
Super Rod · Lv. 30–40 · 40%Super Rod · Lv. 40–55 · 15%
Pearl max 55%
Super Rod · Lv. 30–40 · 40%Super Rod · Lv. 40–55 · 15%
Platinum max 55%
Super Rod · Lv. 30–40 · 40%Super Rod · Lv. 40–55 · 15%
Route 213 · SinnohSuper Rod · version details vary

Road 213

Diamond max 40%
Super Rod · Lv. 30–40 · 40%
Pearl max 40%
Super Rod · Lv. 30–40 · 40%
Platinum max 55%
Super Rod · Lv. 30–40 · 40%Super Rod · Lv. 40–55 · 15%
Route 214 · SinnohSuper Rod · version details vary

Road 214

Diamond max 55%
Super Rod · Lv. 30–40 · 40%Super Rod · Lv. 40–55 · 15%
Pearl max 55%
Super Rod · Lv. 30–40 · 40%Super Rod · Lv. 40–55 · 15%
Platinum max 55%
Super Rod · Lv. 30–40 · 40%Super Rod · Lv. 40–55 · 15%
Route 218 · SinnohSuper Rod · version details vary

Road 218

Diamond max 55%
Super Rod · Lv. 30–40 · 40%Super Rod · Lv. 40–55 · 15%
Pearl max 55%
Super Rod · Lv. 30–40 · 40%Super Rod · Lv. 40–55 · 15%
Platinum max 55%
Super Rod · Lv. 30–40 · 40%Super Rod · Lv. 40–55 · 15%
Route 219 · SinnohSuper Rod · version details vary

Road 219

Diamond max 40%
Super Rod · Lv. 30–40 · 40%
Pearl max 40%
Super Rod · Lv. 30–40 · 40%
Platinum max 55%
Super Rod · Lv. 30–40 · 40%Super Rod · Lv. 40–55 · 15%
Route 221 · SinnohSuper Rod · version details vary

Road 221

Diamond max 40%
Super Rod · Lv. 30–40 · 40%
Pearl max 40%
Super Rod · Lv. 30–40 · 40%
Platinum max 55%
Super Rod · Lv. 30–40 · 40%Super Rod · Lv. 40–55 · 15%
Route 222 · SinnohSuper Rod · version details vary

Road 222

Diamond max 40%
Super Rod · Lv. 30–40 · 40%
Pearl max 40%
Super Rod · Lv. 30–40 · 40%
Platinum max 55%
Super Rod · Lv. 30–40 · 40%Super Rod · Lv. 40–55 · 15%
Route 224 · SinnohSuper Rod · version details vary

Road 224

Diamond max 40%
Super Rod · Lv. 30–40 · 40%
Pearl max 40%
Super Rod · Lv. 30–40 · 40%
Platinum max 40%
Super Rod · Lv. 30–55 · 40%
Route 225 · SinnohSuper Rod · version details vary

Road 225

Diamond max 55%
Super Rod · Lv. 30–40 · 40%Super Rod · Lv. 40–55 · 15%
Pearl max 55%
Super Rod · Lv. 30–40 · 40%Super Rod · Lv. 40–55 · 15%
Platinum max 55%
Super Rod · Lv. 30–40 · 40%Super Rod · Lv. 40–55 · 15%
Route 227 · SinnohSuper Rod · version details vary

Road 227

Diamond max 55%
Super Rod · Lv. 30–40 · 40%Super Rod · Lv. 40–55 · 15%
Pearl max 55%
Super Rod · Lv. 30–40 · 40%Super Rod · Lv. 40–55 · 15%
Platinum max 55%
Super Rod · Lv. 30–40 · 40%Super Rod · Lv. 40–55 · 15%
Route 228 · SinnohSuper Rod · version details vary

Road 228

Diamond max 55%
Super Rod · Lv. 30–40 · 40%Super Rod · Lv. 40–55 · 15%
Pearl max 55%
Super Rod · Lv. 30–40 · 40%Super Rod · Lv. 40–55 · 15%
Platinum max 55%
Super Rod · Lv. 30–40 · 40%Super Rod · Lv. 40–55 · 15%
Route 229 · SinnohSuper Rod · version details vary

Road 229

Diamond max 100%
Super Rod · Lv. 20–50 · 4%Super Rod · Lv. 20–50 · 1%Super Rod · Lv. 30–40 · 40%Super Rod · Lv. 40–55 · 15%
Pearl max 100%
Super Rod · Lv. 20–50 · 4%Super Rod · Lv. 20–50 · 1%Super Rod · Lv. 30–40 · 40%Super Rod · Lv. 40–55 · 15%
Platinum max 55%
Super Rod · Lv. 30–40 · 40%Super Rod · Lv. 40–55 · 15%
Sea Route 220 · SinnohSuper Rod · version details vary

Road 220

Diamond max 40%
Super Rod · Lv. 30–40 · 40%
Pearl max 40%
Super Rod · Lv. 30–40 · 40%
Platinum max 40%
Super Rod · Lv. 30–55 · 40%
Sea Route 223 · SinnohSuper Rod · version details vary

Road 223

Diamond max 40%
Super Rod · Lv. 30–40 · 40%
Pearl max 40%
Super Rod · Lv. 30–40 · 40%
Platinum max 40%
Super Rod · Lv. 30–55 · 40%
Sea Route 226 · SinnohSuper Rod · version details vary

Road 226

Diamond max 40%
Super Rod · Lv. 30–40 · 40%
Pearl max 40%
Super Rod · Lv. 30–40 · 40%
Platinum max 40%
Super Rod · Lv. 30–55 · 40%
Sea Route 230 · SinnohSuper Rod · version details vary

Road 230

Diamond max 40%
Super Rod · Lv. 30–40 · 40%
Pearl max 40%
Super Rod · Lv. 30–40 · 40%
Platinum max 40%
Super Rod · Lv. 30–55 · 40%
Sendoff Spring · SinnohSuper Rod · version details vary

Sendoff Spring

Diamond max 55%
Super Rod · Lv. 30–40 · 40%Super Rod · Lv. 40–55 · 15%
Pearl max 55%
Super Rod · Lv. 30–40 · 40%Super Rod · Lv. 40–55 · 15%
Platinum max 55%
Super Rod · Lv. 30–40 · 40%Super Rod · Lv. 40–55 · 15%
Sunyshore City · SinnohSuper Rod · version details vary

Sunyshore City

Diamond max 40%
Super Rod · Lv. 30–40 · 40%
Pearl max 40%
Super Rod · Lv. 30–40 · 40%
Platinum max 40%
Super Rod · Lv. 30–55 · 40%
Twinleaf Town · SinnohSuper Rod · version details vary

Twinleaf Town

Diamond max 55%
Super Rod · Lv. 30–40 · 40%Super Rod · Lv. 40–55 · 15%
Pearl max 55%
Super Rod · Lv. 30–40 · 40%Super Rod · Lv. 40–55 · 15%
Platinum max 55%
Super Rod · Lv. 30–40 · 40%Super Rod · Lv. 40–55 · 15%
Valley Windworks · SinnohSuper Rod · version details vary

Valley Windworks

Diamond max 40%
Super Rod · Lv. 30–40 · 40%
Pearl max 40%
Super Rod · Lv. 30–40 · 40%
Platinum max 40%
Super Rod · Lv. 30–55 · 40%
Victory Road · SinnohSuper Rod · version details vary

Victory Road (B1F)

Diamond max 100%
Super Rod · Lv. 20–50 · 4%Super Rod · Lv. 20–50 · 1%Super Rod · Lv. 30–40 · 40%Super Rod · Lv. 40–55 · 15%
Pearl max 100%
Super Rod · Lv. 20–50 · 4%Super Rod · Lv. 20–50 · 1%Super Rod · Lv. 30–40 · 40%Super Rod · Lv. 40–55 · 15%
Platinum max 100%
Super Rod · Lv. 30–40 · 40%Super Rod · Lv. 40–55 · 15%Super Rod · Lv. 40–55 · 4%Super Rod · Lv. 40–55 · 1%

Victory Road (inside B1F)

Diamond max 100%
Super Rod · Lv. 20–50 · 4%Super Rod · Lv. 20–50 · 1%Super Rod · Lv. 30–40 · 40%Super Rod · Lv. 40–55 · 15%
Pearl max 100%
Super Rod · Lv. 20–50 · 4%Super Rod · Lv. 20–50 · 1%Super Rod · Lv. 30–40 · 40%Super Rod · Lv. 40–55 · 15%
Platinum max 100%
Super Rod · Lv. 30–40 · 40%Super Rod · Lv. 40–55 · 15%Super Rod · Lv. 40–55 · 4%Super Rod · Lv. 40–55 · 1%
Nature Sanctuary · UnovaSuper Rod Spots · version details vary

Nature Sanctuary

Black 2 max 20%
Super Rod Spots · Lv. 1–100 · 1%Super Rod Spots · Lv. 50–70 · 15%Super Rod Spots · Lv. 50–70 · 4%
White 2 max 20%
Super Rod Spots · Lv. 1–100 · 1%Super Rod Spots · Lv. 50–70 · 15%Super Rod Spots · Lv. 50–70 · 4%

Additional Images

PokeAPI sprites

Open this section to load extra PokeAPI sprite images.

Gyarados Biology and Behavior

Gyarados undergoes a dramatic neurological and behavioral change on evolution, with Pokedex accounts linking alterations in its brain to extreme aggression. Its fangs can crush stone and its scales are exceptionally hard, while enraged individuals may continue destructive rampages for extended periods. Gyarados lives in both fresh and salt water and retains enough jumping ability to launch its enormous body out of the water. Its reputation for destruction is so deeply rooted that some regions refer to Gyarados as the "deity of destruction," and ancient records repeatedly associate its appearances with wars and outbreaks of human conflict. Pokedex accounts also describe its Hyper Beam as powerful enough to incinerate targets, helping explain why a rampaging Gyarados is treated as a disaster rather than simply an aggressive animal.

Gyarados Biological Data

National Pokédex
#130
Species
Atrocious Pokémon
Height
21' 4" (6.5 m)
Weight
518.1 lbs (235.0 kg)
Habitat
Waters Edge
Color
Blue
Body Style
Squiggle
Gender
50% female / 50% male

Misc

Catch Rate: 45

Base Experience: 189 Exp

Hatch Counter: 5

Gyarados Size Comparison: BETA

Gyarados is listed at 21' 4" (6.5 m) and shown in an in-chart visual comparison.
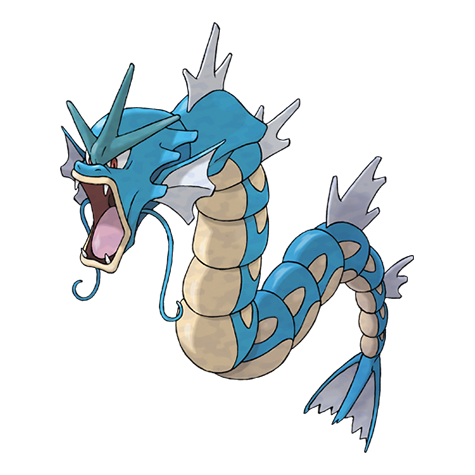
22 ft20 ft18 ft16 ft14 ft12 ft10 ft8 ft6 ft4 ft2 ft0 ft
gyarados
Professor Oak
How is visual size determined?

Pokédex height is treated as the official listed measurement, but the chart uses pose-aware visual scaling so each sprite looks reasonable in a direct comparison.

For long or coiled Pokémon, the listed height may represent total body length rather than upright height. For Pokémon with floppy ears, leaves, feathers, antennae, wings, or other flexible features, the chart usually measures to the top of the solid, substantial part of the head or body instead of the tallest decorative feature.

The goal is not to replace the official height, but to make the artwork compare naturally at the size it appears to occupy.