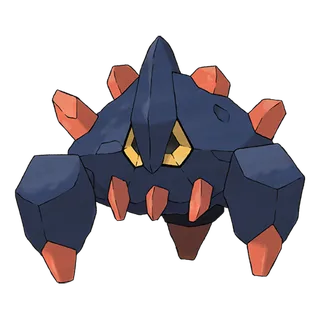
Boldore is a Rock-type Pokémon introduced in Generation V and a middle stage of its evolution line, with a base stat total of 390.
Boldore

Abilities
Negates 1-hit KO attacks.
Physical attacks lower Defense and raise Speed.
Boosts certain moves’ power in a sandstorm.
Hidden AbilityBase Stats
Boldore's Weaknesses and Resistances







Evolution Chain
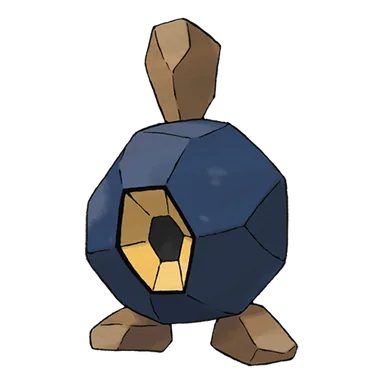
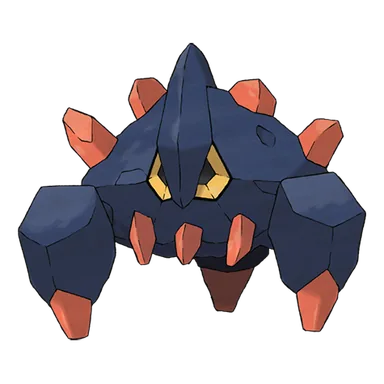
Roggenrola evolves into Boldore at level 25, and Boldore evolves into Gigalith by trading.
 Roggenrola
 Boldore
 Gigalith
Boldore Playthrough, Competitive, and Nuzlocke Usage
Using Boldore in a Playthrough
Roggenrola evolves into Boldore at level 25 and then into Gigalith through trading, making access to the final stage dependent on another player or an equivalent trade feature in most games. Gigalith is extremely slow at base 25 Speed but has enormous base 135 Attack and 130 Defense, while its Special Defense increased from 70 to 80 beginning in Generation VII. Rock Slide or Stone Edge provides strong STAB, with Rock Blast, Earthquake, Heavy Slam, Body Press in later games, Stealth Rock, and Explosion or utility options giving it both offensive and support roles. Sturdy guarantees survival from full HP against a single otherwise fatal hit in modern mechanics, Sand Force boosts Rock-, Ground-, and Steel-type attacks in sand, and from Generation VII onward Gigalith gained Sand Stream as a standard ability, automatically summoning sand and increasing its own Special Defense by 50 percent because it is a Rock-type. Brave is excellent under Trick Room and Adamant suits ordinary physical offense, while the trade requirement means Boldore itself may need to serve as the final form in runs where trading is unavailable.
Boldore in Competitive Pokémon
Gigalith began BW competitive play as a slow lower-tier Rock attacker whose defining tools were base 135 Attack, base 130 Defense, Sturdy, and excellent performance under Trick Room. Smogon placed it in BW NU and highlighted Sturdy as effectively providing a built-in Focus Sash, while Rock Slide or Rock Blast, Earthquake, Choice Band, and even Explosion made it capable of dealing enormous physical damage despite rock-bottom base 25 Speed. Generation VII dramatically improved Gigalith by increasing Special Defense from 70 to 80 and giving it Sand Stream; sand automatically boosts a Rock-type's Special Defense by 50 percent, turning Gigalith into an unusually durable weather setter rather than merely a slow attacker. In SM it reached RU and also became an important VGC 2017 weather Pokemon, supporting partners such as Sand Rush Stoutland while functioning exceptionally well under Trick Room. Later formats continued to use it as a bulky sand setter, Stealth Rock user, and physical tank, making Gigalith one of the clearer examples of a Pokemon whose competitive relevance improved substantially because of later-generation mechanical changes rather than a new evolution or form.
Boldore in Nuzlockes
The Roggenrola line is very safe against many physical attacks because Boldore and Gigalith have enormous Defense and modern Sturdy can guarantee survival from full HP against a single otherwise lethal hit. That guarantee disappears once chip damage, status, weather, or hazards break full health, so keeping Sturdy intact can be more important than maximizing damage in a dangerous fight. Water, Grass, Fighting, Ground, and Steel attacks are all super effective, and Gigalith's extremely low Speed means one of those attacks will almost always land before it responds. Sand Stream from Generation VII onward improves special durability substantially but can also chip teammates that are not immune to sand, while Stone Edge and Rock Slide introduce accuracy concerns compared with weaker but safer alternatives. The biggest practical issue is the trade evolution: where trading is unavailable, Boldore may be the endpoint, so a Nuzlocke should not assume access to Gigalith unless its evolution method is actually possible under the run's rules.
Learnsets
15 moves · Sword Shield
Level Up — Sword Shield



Pokédex Entries
9 entries
When it overflows with power, the orange crystal on its body glows. It looks for underground water in caves.
Because its energy was too great to be contained, the energy leaked and formed orange crystals.
When it is healthy, its core sticks out. Always facing the same way, it swiftly moves front to back and left to right.
Its orange crystal is a mass of energy. Just one crystal fragment would provide enough fuel for a hundred dump trucks.
It explores caves in search of underground water. It’s not comfortable around water, so this Pokémon takes great care in lapping it up.
The energy overflowing from its body has turned into orange crystals that are hard enough to smash diamonds.
Its orange crystals are lumps of powerful energy. They’re valuable, so Boldore is sometimes targeted for them.
If you see its orange crystals start to glow, be wary. It’s about to fire off bursts of energy.
It relies on sound in order to monitor what’s in its vicinity. When angered, it will attack without ever changing the direction it’s facing.
Where To Find Boldore
21 locations
Vast Poni Canyon · AlolaWalking · version details vary
Vast Poni Canyon Inside
Vast Poni Canyon Northwest
Vast Poni Canyon Outside
Mirage Cave · HoennRock Smash · version details vary
Mirage Cave (North of Route 124)
Mirage Cave (South East of Route 129)
Mirage Cave (West of Rustboro)
Friend Safari · KalosWalking · version details vary
Friend Safari (Rock)
Challenger's Cave · UnovaWalking · version details vary
Challengers Cave (1F)
Challengers Cave (B1F)
Challengers Cave (B2F)
Chargestone Cave · UnovaWalking · version details vary
Chargestone Cave (1F)
Chargestone Cave (B1F)
Chargestone Cave (B2F)
Clay Tunnel · UnovaWalking · version details vary
Clay Tunnel
Giant Chasm · UnovaWalking · version details vary
Giant Chasm
Giant Chasm (forest cave)
Glacier Room · UnovaWalking · version details vary
Glacier Room
Guidance Chamber · UnovaWalking · version details vary
Guidance Chamber
Iron Room · UnovaWalking · version details vary
Iron Room
Mistralton Cave · UnovaWalking · version details vary
Mistralton Cave
Relic Passage · UnovaWalking · version details vary
Relic Tunnel (PWT entrance)
Relic Tunnel (Relic Castle entrance)
Reversal Mountain · UnovaWalking · version details vary
Reversal Mountain (unknown area 49)
Reversal Mountain (unknown area 50)
Reversal Mountain (unknown area 51)
Reversal Mountain (unknown area 52)
Reversal Mountain (unknown area 53)
Reversal Mountain (unknown area 54)
Reversal Mountain (unknown area 55)
Reversal Mountain (unknown area 56)
Reversal Mountain (unknown area 57)
Reversal Mountain (unknown area 58)
Reversal Mountain (unknown area 59)
Reversal Mountain (unknown area 60)
Rocky Mountain Room · UnovaWalking · version details vary
Rocky Mountain Room
Seaside Cave · UnovaWalking · version details vary
Seaside Cave (1F)
Seaside Cave (B1F)
Trial Chamber · UnovaWalking · version details vary
Trial Chamber
Twist Mountain · UnovaWalking · version details vary
Twist Mountain
Underground Ruins · UnovaWalking · version details vary
Underground Ruins
Victory Road · UnovaWalking · version details vary
Victory Road (4f Middle Room)
Victory Road (7F)
Victory Road (unknown area 53)
Victory Road (unknown area 54)
Victory Road (unknown area 55)
Victory Road (unknown area 57)
Victory Road (unknown area 58)
Victory Road (unknown area 59)
Victory Road (unknown area 60)
Victory Road (unknown area 61)
Victory Road (unknown area 62)
Victory Road (unknown area 63)
Victory Road (unknown area 64)
Victory Road (unknown area 65)
Victory Road (unknown area 66)
Victory Road · UnovaWalking · version details vary
Victory Road 2 (unknown area 74)
Victory Road 2 (unknown area 75)
Wellspring Cave · UnovaWalking · version details vary
Wellspring Cave
Held Items
2 items
- Black: 50% chance
- White: 50% chance
- Black 2: 50% chance
- White 2: 50% chance
- X: 50% chance
- Y: 50% chance
- Omega Ruby: 50% chance
- Alpha Sapphire: 50% chance
- Sun: 50% chance
- Moon: 50% chance
- Ultra Sun: 50% chance
- Ultra Moon: 50% chance
- Black: 5% chance
- White: 5% chance
- Black 2: 5% chance
- White 2: 5% chance
- X: 5% chance
- Y: 5% chance
- Omega Ruby: 5% chance
- Alpha Sapphire: 5% chance
- Sun: 5% chance
- Moon: 5% chance
- Ultra Sun: 5% chance
- Ultra Moon: 5% chance
Additional Images
PokeAPI sprites
Open this section to load extra PokeAPI sprite images.
Boldore Biology and Behavior
Boldore's reddish-orange crystals are hardened forms of energy that continuously leaks from the core inside its body, and the crystals glow intensely when the Pokemon is preparing to release that power. The material is extraordinarily hard and valuable, with even a fragment described as capable of supplying immense amounts of energy, so Boldore is sometimes targeted for its crystals. It searches cave systems for underground water but dislikes becoming wet and drinks cautiously. Boldore relies heavily on sound to understand its surroundings and has unusual movement habits, tending to keep its body facing the same direction even while attacking.
Boldore Biological Data
- National Pokédex
- #525
- Species
- Ore Pokémon
- Height
- 2' 11" (0.9 m)
- Weight
- 224.9 lbs (102.0 kg)
- Habitat
- Currently Unknown
- Color
- Blue
- Body Style
- Tentacles
- Gender
- 50% female / 50% male
Misc
Catch Rate: 120
Base Experience: 137 Exp
Hatch Counter: 15
Boldore Size Comparison: BETA
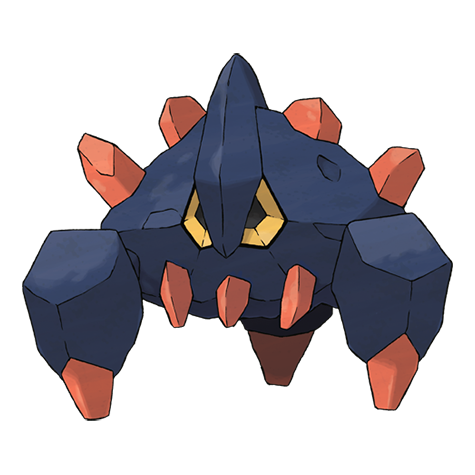
Boldore is listed at 2' 11" (0.9 m) and shown in an in-chart visual comparison.

How is visual size determined?
Pokédex height is treated as the official listed measurement, but the chart uses pose-aware visual scaling so each sprite looks reasonable in a direct comparison.
For long or coiled Pokémon, the listed height may represent total body length rather than upright height. For Pokémon with floppy ears, leaves, feathers, antennae, wings, or other flexible features, the chart usually measures to the top of the solid, substantial part of the head or body instead of the tallest decorative feature.
The goal is not to replace the official height, but to make the artwork compare naturally at the size it appears to occupy.