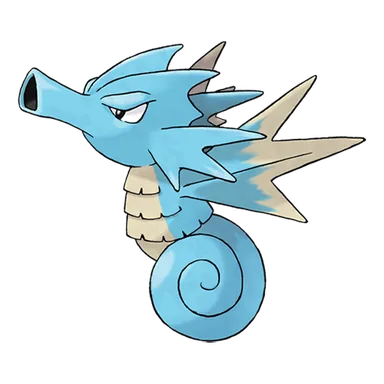
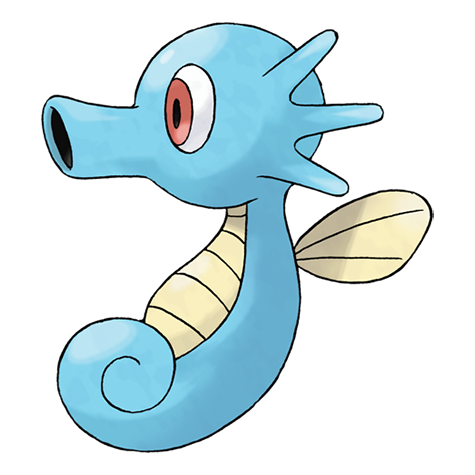
Horsea is a Water-type Pokémon introduced in Generation I and the first stage of its evolution line, with a base stat total of 295.
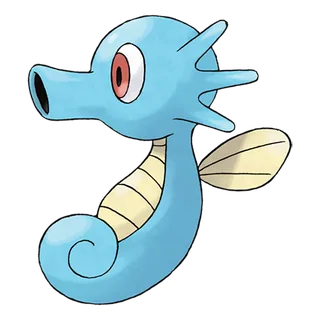
Horsea

Horsea

Abilities

Swift Swim

Raises SPEED in rain.

Sniper

Powers up moves if they become critical hits.

Damp

Prevents self-destruction.

Hidden Ability

Base Stats

Total: 295
EV Yield: 1 Sp. Atk
HP: 30
Attack: 40
Defense: 70
Sp. Atk: 70
Sp. Def: 25
Speed: 60

Horsea's Weaknesses and Resistances

Evolution Chain

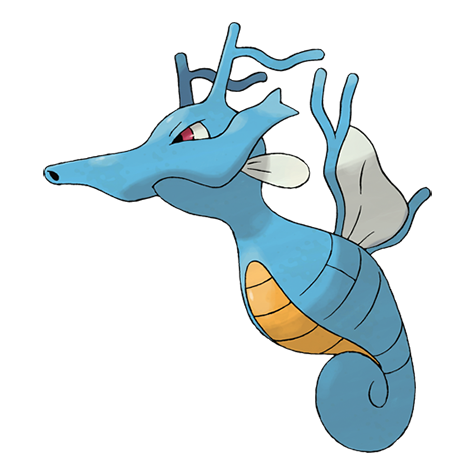
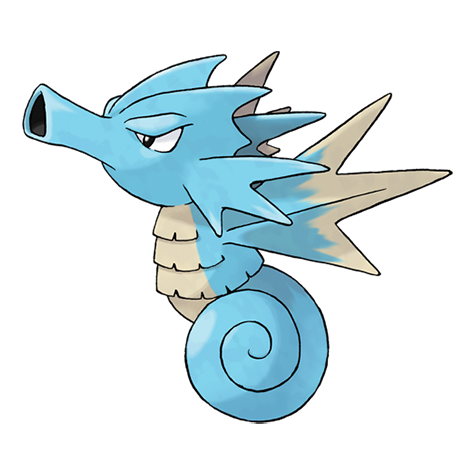
Horsea evolves into Seadra at level 32, and Seadra evolves into Kingdra by trading while holding a Dragon Scale.
Horsea Playthrough, Competitive, and Nuzlocke Usage
Using Horsea in a Playthrough

The Horsea line begins as a relatively fragile Water-type but develops into increasingly capable special attackers. Seadra evolves at level 32 and provides good Special Attack, physical Defense, and usable Speed, making Surf and Ice-type coverage sufficient for a dependable conventional Water role even when trading is unavailable. Kingdra requires Seadra to be traded while holding a Dragon Scale in most games, but rewards that requirement with balanced bulk, good mixed offenses, Water/Dragon typing, and only a small number of weaknesses. Swift Swim can make Kingdra exceptionally fast in rain, while Sniper supports critical-hit strategies where the necessary moves and items are available. In FireRed and LeafGreen specifically, Kingdra cannot be obtained before the National Pokedex and Seadra therefore represents the line's practical main-story endpoint.

Horsea in Competitive Pokémon

Kingdra's most enduring competitive role is as a rain sweeper. Swift Swim doubles its Speed in rain, and its Water STAB is simultaneously strengthened by the weather, allowing Kingdra to become extremely difficult for ordinary offensive teams to outrun while attacking from either its physical or special side. Its Water/Dragon typing and balanced defensive stats provide more setup and switching opportunities than many frail weather sweepers. Sniper offers an alternative strategy centered on critical hits rather than rain, but Swift Swim has historically been its most important high-level identity. Seadra lacks Kingdra's typing and overall bulk but has occasionally occupied lower-tier roles of its own; the major competitive payoff of the family is nevertheless the fully evolved Kingdra.

Horsea in Nuzlockes

The Horsea line is functional even when Kingdra cannot be obtained, but trade access changes its ceiling substantially. FireRed and LeafGreen community analysis treats Seadra as a serviceable mid-tier Water-type because it has enough Special Attack and Speed to use Surf and Ice Beam effectively, while poor HP and Special Defense prevent it from being especially safe. Kingdra solves several of those problems through better overall bulk and Water/Dragon typing and can become extremely powerful if rain support is available. Its trade-with-item evolution is the main practical limitation in many Nuzlockes. Without Kingdra, Seadra remains useful but faces intense competition from the many strong Water-types available in most regions.

Learnsets

46 moves · Scarlet Violet

Level Up

1 Leer normal type --- 100 status move
1 Water Gun water type 40 100 special move
5 Smokescreen normal type --- 100 status move
10 Twister dragon type 40 100 special move
15 Focus Energy normal type --- --- status move
20 Dragon Breath dragon type 60 100 special move
25 Bubble Beam water type 65 100 special move
30 Agility psychic type --- --- status move
35 Water Pulse water type 60 100 special move
40 Dragon Pulse dragon type 85 100 special move
45 Hydro Pump water type 110 80 special move
50 Dragon Dance dragon type --- --- status move
55 Rain Dance water type --- --- status move

Machine

- Hydro Pump water type 110 80 special move
- Surf water type 90 100 special move
- Ice Beam ice type 90 100 special move
- Blizzard ice type 110 70 special move
- Agility psychic type --- --- status move
- Waterfall water type 80 100 physical move
- Swift normal type 60 --- special move
- Rest psychic type --- --- status move
- Substitute normal type --- --- status move
- Protect normal type --- --- status move
- Icy Wind ice type 55 95 special move
- Outrage dragon type 120 100 physical move
- Endure normal type --- --- status move
- Sleep Talk normal type --- --- status move
- Rain Dance water type --- --- status move
- Whirlpool water type 35 85 special move
- Facade normal type 70 100 physical move
- Weather Ball normal type 50 100 special move
- Muddy Water water type 90 85 special move
- Dragon Dance dragon type --- --- status move
- Water Pulse water type 60 100 special move
- Dragon Pulse dragon type 85 100 special move
- Flash Cannon steel type 80 100 special move
- Liquidation water type 85 100 physical move
- Scale Shot dragon type 25 90 physical move
- Flip Turn water type 60 100 physical move
- Tera Blast normal type 80 100 special move
- Chilling Water water type 50 100 special move

Egg

- Disable normal type --- 100 status move
- Aurora Beam ice type 65 100 special move
- Splash normal type --- --- status move
- Flail normal type --- 100 physical move
- Clear Smog poison type 50 --- special move

Pokédex Entries

15 entries
Red / Blue / Leafgreen / X

Known to shoot down flying bugs with precision blasts of ink from the surface of the water.

Yellow / Lets Go Pikachu / Lets Go Eevee

If it senses any danger, it will vigorously spray water or a special type of ink from its mouth.

Gold

If attacked by a larger enemy, it quickly swims to safety by adeptly controlling its dorsal fin.

Silver / Soulsilver

Its big, developed fins move rapidly, allowing it to swim backward while still facing forward.

Crystal

When they're in a safe location, they can be seen playfully tangling their tails together.

Ruby

HORSEA eats small insects and moss off of rocks. If the ocean current turns fast, this POKéMON anchors itself by wrapping its tail around rocks or coral to prevent being washed away.

Sapphire

If HORSEA senses danger, it will reflexively spray a dense black ink from its mouth and try to escape. This POKéMON swims by cleverly flapping the fins on its back.

Emerald

By cleverly flicking the fins on its back side to side, it moves in any direction while facing forward. It spits ink to escape if it senses danger.

Firered

It maintains balance using its tail, which is wound up like a coil. It may spray ink from its mouth.

Diamond / Pearl / Platinum / Black / White / Black 2 / White 2 / Y

It makes its nest in the shade of corals. If it senses danger, it spits murky ink and flees.

Heartgold

If attacked by a larger enemy, it quickly swims to safety by adeptly controlling its well-developed dorsal fin.

Omega Ruby

Horsea eats small insects and moss off of rocks. If the ocean current turns fast, this Pokémon anchors itself by wrapping its tail around rocks or coral to prevent being washed away.

Alpha Sapphire

If Horsea senses danger, it will reflexively spray a dense black ink from its mouth and try to escape. This Pokémon swims by cleverly flapping the fin on its back.

Sword

Horsea makes its home in oceans with gentle currents. If this Pokémon is under attack, it spits out pitch-black ink and escapes.

Shield

They swim with dance-like motions and cause whirlpools to form. Horsea compete to see which of them can generate the biggest whirlpool.

Where To Find Horsea

43 locations
Kala’e Bay · AlolaIsland Scan · version details vary

Kalae Bay Area

Moon max 100%
Island Scan · Lv. 18 · 100%
Sun max 100%
Island Scan · Lv. 18 · 100%
Ultra Moon max 100%
Island Scan · Lv. 18 · 100%
Ultra Sun max 100%
Island Scan · Lv. 18 · 100%
Pacifidlog Town · HoennNpc Trade · version details vary

Pacifidlog Town

Emerald max 100%
Npc Trade · Lv. 5–100 · 100% · Trade Bagon
Route 132 · HoennSuper Rod · version details vary

Road 132

Emerald max 15%
Super Rod · Lv. 25–30 · 15%
Ruby max 15%
Super Rod · Lv. 25–30 · 15%
Sapphire max 15%
Super Rod · Lv. 25–30 · 15%
Route 133 · HoennSuper Rod · version details vary

Road 133

Emerald max 15%
Super Rod · Lv. 25–30 · 15%
Ruby max 15%
Super Rod · Lv. 25–30 · 15%
Sapphire max 15%
Super Rod · Lv. 25–30 · 15%
Route 134 · HoennSuper Rod · version details vary

Road 134

Emerald max 15%
Super Rod · Lv. 25–30 · 15%
Ruby max 15%
Super Rod · Lv. 25–30 · 15%
Sapphire max 15%
Super Rod · Lv. 25–30 · 15%
Whirl Islands · JohtoGood Rod, Super Rod, Surf · version details vary

Whirl Islands (1F)

Crystal max 70%
Good Rod · Lv. 20 · 10%Super Rod · Lv. 40 · 30%Surf · Lv. 15–19 · 30%
Gold max 70%
Good Rod · Lv. 20 · 10%Super Rod · Lv. 40 · 30%Surf · Lv. 15–19 · 30%
HeartGold max 70%
Good Rod · Lv. 20 · 10%Super Rod · Lv. 40 · 30%Surf · Lv. 10–20 · 30%
Silver max 70%
Good Rod · Lv. 20 · 10%Super Rod · Lv. 40 · 30%Surf · Lv. 15–19 · 30%
SoulSilver max 70%
Good Rod · Lv. 20 · 10%Super Rod · Lv. 40 · 30%Surf · Lv. 10–20 · 30%

Whirl Islands (B2F)

Crystal max 130%
Good Rod · Lv. 20 · 10%Super Rod · Lv. 40 · 30%Surf · Lv. 15–19 · 60%Surf · Lv. 20–24 · 30%
Gold max 130%
Good Rod · Lv. 20 · 10%Super Rod · Lv. 40 · 30%Surf · Lv. 15–19 · 60%Surf · Lv. 20–24 · 30%
HeartGold max 100%
Good Rod · Lv. 20 · 10%Super Rod · Lv. 40 · 30%Surf · Lv. 15–25 · 60%
Silver max 130%
Good Rod · Lv. 20 · 10%Super Rod · Lv. 40 · 30%Surf · Lv. 15–19 · 60%Surf · Lv. 20–24 · 30%
SoulSilver max 100%
Good Rod · Lv. 20 · 10%Super Rod · Lv. 40 · 30%Surf · Lv. 15–25 · 60%

Whirl Islands (B3F)

Crystal max 100%
Good Rod · Lv. 20 · 10%Super Rod · Lv. 40 · 30%Surf · Lv. 20–24 · 60%
Gold max 130%
Good Rod · Lv. 20 · 10%Super Rod · Lv. 40 · 30%Surf · Lv. 15–19 · 60%Surf · Lv. 20–24 · 30%
Silver max 130%
Good Rod · Lv. 20 · 10%Super Rod · Lv. 40 · 30%Surf · Lv. 15–19 · 60%Surf · Lv. 20–24 · 30%
Ambrette Town · KalosGood Rod · version details vary

Ambrette Town

X max 35%
Good Rod · Lv. 25 · 35%
Y max 35%
Good Rod · Lv. 25 · 35%
Cyllage City · KalosGood Rod · version details vary

Cyllage City

X max 35%
Good Rod · Lv. 25 · 35%
Y max 35%
Good Rod · Lv. 25 · 35%
Bond Bridge · KantoGood Rod, Super Rod · version details vary

Bond Bridge

FireRed max 160%
Good Rod · Lv. 5–15 · 60%Good Rod · Lv. 5–15 · 20%Super Rod · Lv. 15–25 · 40%
Celadon City · KantoGift · version details vary

Celadon City Prize Corner

Blue Japan max 100%
Gift · Lv. 18 · 100% · Coins 1000
Cerulean City · KantoGood Rod, Super Rod · version details vary

Cerulean City

FireRed max 144%
Good Rod · Lv. 5–15 · 60%Super Rod · Lv. 15–25 · 40%Super Rod · Lv. 25–35 · 4%
LeafGreen max 20%
Good Rod · Lv. 5–15 · 20%
Cinnabar Island · KantoSuper Rod, Good Rod · version details vary

Cinnabar Island

Blue max 25%
Super Rod · Lv. 15 · 17%Super Rod · Lv. 15 · 8%
FireRed max 100%
Good Rod · Lv. 5–15 · 60%Super Rod · Lv. 15–25 · 40%
Green Japan max 25%
Super Rod · Lv. 15 · 17%Super Rod · Lv. 15 · 8%
LeafGreen max 20%
Good Rod · Lv. 5–15 · 20%
Red max 25%
Super Rod · Lv. 15 · 17%Super Rod · Lv. 15 · 8%
Red Japan max 25%
Super Rod · Lv. 15 · 17%Super Rod · Lv. 15 · 8%
Five Island · KantoGood Rod, Super Rod · version details vary

Five Island

FireRed max 120%
Good Rod · Lv. 5–15 · 60%Good Rod · Lv. 5–15 · 20%Super Rod · Lv. 15–25 · 40%
Five Isle Meadow · KantoGood Rod, Super Rod · version details vary

Five Isle Meadow

FireRed max 120%
Good Rod · Lv. 5–15 · 60%Good Rod · Lv. 5–15 · 20%Super Rod · Lv. 15–25 · 40%
Green Path · KantoGood Rod, Super Rod · version details vary

Green Path

FireRed max 120%
Good Rod · Lv. 5–15 · 60%Good Rod · Lv. 5–15 · 20%Super Rod · Lv. 15–25 · 40%
Icefall Cave · KantoGood Rod, Super Rod · version details vary

Icefall Cave (waterfall)

FireRed max 120%
Good Rod · Lv. 5–15 · 60%Good Rod · Lv. 5–15 · 20%Super Rod · Lv. 15–25 · 40%
Kindle Road · KantoGood Rod, Super Rod · version details vary

Kindle Road

FireRed max 160%
Good Rod · Lv. 5–15 · 60%Good Rod · Lv. 5–15 · 20%Super Rod · Lv. 15–25 · 40%
Memorial Pillar · KantoGood Rod, Super Rod · version details vary

Memorial Pillar

FireRed max 120%
Good Rod · Lv. 5–15 · 60%Good Rod · Lv. 5–15 · 20%Super Rod · Lv. 15–25 · 40%
One Island · KantoGood Rod, Super Rod · version details vary

One Island

FireRed max 120%
Good Rod · Lv. 5–15 · 60%Good Rod · Lv. 5–15 · 20%Super Rod · Lv. 15–25 · 40%
Outcast Island · KantoGood Rod, Super Rod · version details vary

Outcast Island

FireRed max 120%
Good Rod · Lv. 5–15 · 60%Good Rod · Lv. 5–15 · 20%Super Rod · Lv. 15–25 · 40%
Pallet Town · KantoGood Rod, Super Rod · version details vary

Pallet Town

FireRed max 100%
Good Rod · Lv. 5–15 · 60%Super Rod · Lv. 15–25 · 40%
LeafGreen max 20%
Good Rod · Lv. 5–15 · 20%
Resort Gorgeous · KantoGood Rod, Super Rod · version details vary

Resort Gorgeous

FireRed max 120%
Good Rod · Lv. 5–15 · 60%Good Rod · Lv. 5–15 · 20%Super Rod · Lv. 15–25 · 40%
Route 10 · KantoGood Rod, Super Rod · version details vary

Road 10

FireRed max 144%
Good Rod · Lv. 5–15 · 60%Super Rod · Lv. 15–25 · 40%Super Rod · Lv. 25–35 · 4%
LeafGreen max 20%
Good Rod · Lv. 5–15 · 20%
Yellow max 20%
Super Rod · Lv. 10 · 20%
Route 11 · KantoGood Rod, Super Rod, Overworld Water · version details vary

Road 11

FireRed max 144%
Good Rod · Lv. 5–15 · 60%Super Rod · Lv. 15–25 · 40%Super Rod · Lv. 25–35 · 4%
LeafGreen max 20%
Good Rod · Lv. 5–15 · 20%
Lets Go Eevee max 100%
Overworld Water · Lv. 13–18 · 100%
Lets Go Pikachu max 100%
Overworld Water · Lv. 13–18 · 100%
Yellow max 10%
Super Rod · Lv. 5 · 10%
Route 12 · KantoGood Rod, Super Rod, Overworld Water · version details vary

Road 12

FireRed max 144%
Good Rod · Lv. 5–15 · 60%Super Rod · Lv. 15–25 · 40%Super Rod · Lv. 25–35 · 4%
LeafGreen max 20%
Good Rod · Lv. 5–15 · 20%
Lets Go Eevee max 100%
Overworld Water · Lv. 31–36 · 100%
Lets Go Pikachu max 100%
Overworld Water · Lv. 31–36 · 100%
Yellow max 70%
Super Rod · Lv. 20 · 40%Super Rod · Lv. 25 · 30%
Route 13 · KantoGood Rod, Super Rod, Overworld Water · version details vary

Road 13

FireRed max 144%
Good Rod · Lv. 5–15 · 60%Super Rod · Lv. 15–25 · 40%Super Rod · Lv. 25–35 · 4%
LeafGreen max 20%
Good Rod · Lv. 5–15 · 20%
Lets Go Eevee max 100%
Overworld Water · Lv. 33–38 · 100%
Lets Go Pikachu max 100%
Overworld Water · Lv. 33–38 · 100%
Yellow max 70%
Super Rod · Lv. 15 · 40%Super Rod · Lv. 20 · 30%
Route 24 · KantoGood Rod, Super Rod · version details vary

Road 24

FireRed max 144%
Good Rod · Lv. 5–15 · 60%Super Rod · Lv. 15–25 · 40%Super Rod · Lv. 25–35 · 4%
LeafGreen max 20%
Good Rod · Lv. 5–15 · 20%
Route 4 · KantoGood Rod, Super Rod · version details vary

Road 4

FireRed max 144%
Good Rod · Lv. 5–15 · 60%Super Rod · Lv. 15–25 · 40%Super Rod · Lv. 25–35 · 4%
LeafGreen max 20%
Good Rod · Lv. 5–15 · 20%
S.S. Anne · KantoGood Rod, Super Rod · version details vary

S.S. Anne

FireRed max 104%
Good Rod · Lv. 5–15 · 60%Super Rod · Lv. 15–25 · 40%Super Rod · Lv. 25–35 · 4%
LeafGreen max 20%
Good Rod · Lv. 5–15 · 20%
Sea Route 19 · KantoSuper Rod, Good Rod · version details vary

Road 19

Blue max 25%
Super Rod · Lv. 15 · 17%Super Rod · Lv. 15 · 8%
FireRed max 140%
Good Rod · Lv. 5–15 · 60%Super Rod · Lv. 15–25 · 40%
Green Japan max 25%
Super Rod · Lv. 15 · 17%Super Rod · Lv. 15 · 8%
LeafGreen max 20%
Good Rod · Lv. 5–15 · 20%
Red max 25%
Super Rod · Lv. 15 · 17%Super Rod · Lv. 15 · 8%
Red Japan max 25%
Super Rod · Lv. 15 · 17%Super Rod · Lv. 15 · 8%
Sea Route 20 · KantoSuper Rod, Good Rod · version details vary

Road 20

Blue max 25%
Super Rod · Lv. 15 · 17%Super Rod · Lv. 15 · 8%
FireRed max 140%
Good Rod · Lv. 5–15 · 60%Super Rod · Lv. 15–25 · 40%
Green Japan max 25%
Super Rod · Lv. 15 · 17%Super Rod · Lv. 15 · 8%
LeafGreen max 20%
Good Rod · Lv. 5–15 · 20%
Red max 25%
Super Rod · Lv. 15 · 17%Super Rod · Lv. 15 · 8%
Red Japan max 25%
Super Rod · Lv. 15 · 17%Super Rod · Lv. 15 · 8%
Sea Route 21 · KantoSuper Rod, Good Rod · version details vary

Road 21

Blue max 25%
Super Rod · Lv. 15 · 17%Super Rod · Lv. 15 · 8%
FireRed max 140%
Good Rod · Lv. 5–15 · 60%Super Rod · Lv. 15–25 · 40%
Green Japan max 25%
Super Rod · Lv. 15 · 17%Super Rod · Lv. 15 · 8%
LeafGreen max 20%
Good Rod · Lv. 5–15 · 20%
Red max 25%
Super Rod · Lv. 15 · 17%Super Rod · Lv. 15 · 8%
Red Japan max 25%
Super Rod · Lv. 15 · 17%Super Rod · Lv. 15 · 8%
Seafoam Islands · KantoWalking, Super Rod, Good Rod, Surf · version details vary

Seafoam Islands (1F)

Red max 20%
Walking · Lv. 28 · 10%Walking · Lv. 30 · 10%
Red Japan max 20%
Walking · Lv. 28 · 10%Walking · Lv. 30 · 10%

Seafoam Islands (B1F)

Red max 30%
Walking · Lv. 30 · 20%Walking · Lv. 32 · 10%
Red Japan max 30%
Walking · Lv. 30 · 20%Walking · Lv. 32 · 10%

Seafoam Islands (B2F)

Red max 15%
Walking · Lv. 28 · 10%Walking · Lv. 30 · 5%
Red Japan max 15%
Walking · Lv. 28 · 10%Walking · Lv. 30 · 5%

Seafoam Islands (B3F)

Blue max 25%
Super Rod · Lv. 15 · 17%Super Rod · Lv. 15 · 8%
FireRed max 170%
Good Rod · Lv. 5–15 · 60%Super Rod · Lv. 15–25 · 40%Super Rod · Lv. 20–30 · 40%Surf · Lv. 25–30 · 30%
Green Japan max 25%
Super Rod · Lv. 15 · 17%Super Rod · Lv. 15 · 8%
LeafGreen max 20%
Good Rod · Lv. 5–15 · 20%
Red max 40%
Super Rod · Lv. 15 · 17%Super Rod · Lv. 15 · 8%Walking · Lv. 29 · 10%Walking · Lv. 31 · 5%
Red Japan max 40%
Super Rod · Lv. 15 · 17%Super Rod · Lv. 15 · 8%Walking · Lv. 29 · 10%Walking · Lv. 31 · 5%

Seafoam Islands (B4F)

Blue max 25%
Super Rod · Lv. 15 · 17%Super Rod · Lv. 15 · 8%
FireRed max 170%
Good Rod · Lv. 5–15 · 60%Super Rod · Lv. 15–25 · 40%Super Rod · Lv. 20–30 · 40%Surf · Lv. 25–30 · 30%
Green Japan max 25%
Super Rod · Lv. 15 · 17%Super Rod · Lv. 15 · 8%
HeartGold max 70%
Good Rod · Lv. 20 · 10%Super Rod · Lv. 40 · 30%Surf · Lv. 30–40 · 30%
LeafGreen max 20%
Good Rod · Lv. 5–15 · 20%
Red max 60%
Super Rod · Lv. 15 · 17%Super Rod · Lv. 15 · 8%Walking · Lv. 31 · 20%Walking · Lv. 33 · 15%
Red Japan max 60%
Super Rod · Lv. 15 · 17%Super Rod · Lv. 15 · 8%Walking · Lv. 31 · 20%Walking · Lv. 33 · 15%
SoulSilver max 70%
Good Rod · Lv. 20 · 10%Super Rod · Lv. 40 · 30%Surf · Lv. 30–40 · 30%
Tanoby Ruins · KantoGood Rod, Super Rod · version details vary

Tanoby Ruins

FireRed max 120%
Good Rod · Lv. 5–15 · 60%Good Rod · Lv. 5–15 · 20%Super Rod · Lv. 15–25 · 40%
Trainer Tower · KantoGood Rod, Super Rod · version details vary

Trainer Tower

FireRed max 120%
Good Rod · Lv. 5–15 · 60%Good Rod · Lv. 5–15 · 20%Super Rod · Lv. 15–25 · 40%
Treasure Beach · KantoGood Rod, Super Rod · version details vary

Treasure Beach

FireRed max 160%
Good Rod · Lv. 5–15 · 60%Good Rod · Lv. 5–15 · 20%Super Rod · Lv. 15–25 · 40%
Vermilion City · KantoGood Rod, Super Rod · version details vary

Vermilion City

FireRed max 104%
Good Rod · Lv. 5–15 · 60%Super Rod · Lv. 15–25 · 40%Super Rod · Lv. 25–35 · 4%
LeafGreen max 24%
Good Rod · Lv. 5–15 · 20%Super Rod · Lv. 25–35 · 4%
Yellow max 10%
Super Rod · Lv. 5 · 10%
Water Labyrinth · KantoGood Rod, Super Rod · version details vary

Water Labyrinth

FireRed max 120%
Good Rod · Lv. 5–15 · 60%Good Rod · Lv. 5–15 · 20%Super Rod · Lv. 15–25 · 40%
Water Path · KantoGood Rod, Super Rod · version details vary

Water Path

FireRed max 120%
Good Rod · Lv. 5–15 · 60%Good Rod · Lv. 5–15 · 20%Super Rod · Lv. 15–25 · 40%
Sea Route 226 · SinnohGood Rod · version details vary

Road 226

Diamond max 45%
Good Rod · Lv. 10–25 · 4%Good Rod · Lv. 10–25 · 1%Good Rod · Lv. 15–20 · 40%
Pearl max 45%
Good Rod · Lv. 10–25 · 4%Good Rod · Lv. 10–25 · 1%Good Rod · Lv. 15–20 · 40%
Platinum max 45%
Good Rod · Lv. 10–25 · 4%Good Rod · Lv. 10–25 · 1%Good Rod · Lv. 15–20 · 40%
P2 Laboratory · UnovaSuper Rod · version details vary

P2 Laboratory

Black max 55%
Super Rod · Lv. 35–55 · 40%Super Rod · Lv. 35–55 · 15%
Black 2 max 55%
Super Rod · Lv. 35–55 · 40%Super Rod · Lv. 35–55 · 15%
White max 55%
Super Rod · Lv. 35–55 · 40%Super Rod · Lv. 35–55 · 15%
White 2 max 55%
Super Rod · Lv. 35–55 · 40%Super Rod · Lv. 35–55 · 15%
Route 17 · UnovaSuper Rod, Super Rod Spots · version details vary

Road 17

Black max 55%
Super Rod · Lv. 35–55 · 40%Super Rod · Lv. 35–55 · 15%
Black 2 max 80%
Super Rod · Lv. 50–60 · 40%Super Rod Spots · Lv. 50–60 · 40%
White max 55%
Super Rod · Lv. 35–55 · 40%Super Rod · Lv. 35–55 · 15%
White 2 max 80%
Super Rod · Lv. 50–60 · 40%Super Rod Spots · Lv. 50–60 · 40%
Route 18 · UnovaSuper Rod, Super Rod Spots · version details vary

Road 18

Black max 55%
Super Rod · Lv. 35–55 · 40%Super Rod · Lv. 35–55 · 15%
Black 2 max 80%
Super Rod · Lv. 50–60 · 40%Super Rod Spots · Lv. 50–60 · 40%
White max 55%
Super Rod · Lv. 35–55 · 40%Super Rod · Lv. 35–55 · 15%
White 2 max 80%
Super Rod · Lv. 50–60 · 40%Super Rod Spots · Lv. 50–60 · 40%

Held Items

1 items
Dragon Scale
  • Ruby: 5% chance
  • Sapphire: 5% chance
  • Emerald: 5% chance
  • Diamond: 5% chance
  • Pearl: 5% chance
  • Platinum: 5% chance
  • Heartgold: 5% chance
  • Soulsilver: 5% chance
  • Black: 5% chance
  • White: 5% chance
  • Black 2: 5% chance
  • White 2: 5% chance
  • X: 5% chance
  • Y: 5% chance
  • Omega Ruby: 5% chance
  • Alpha Sapphire: 5% chance
  • Sun: 5% chance
  • Moon: 5% chance
  • Ultra Sun: 5% chance
  • Ultra Moon: 5% chance

Additional Images

PokeAPI sprites

Open this section to load extra PokeAPI sprite images.

Horsea Biology and Behavior

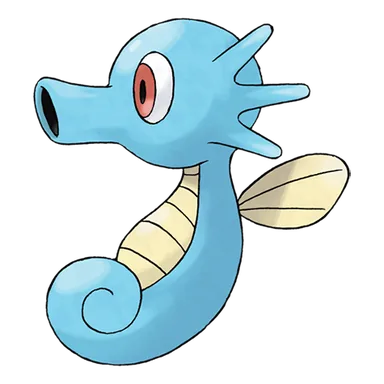
Horsea is highly maneuverable in water, using its dorsal fin to swim in any direction while still facing forward and wrapping its coiled tail around rocks or coral as an anchor in strong currents. It feeds on small insects and moss and can accurately shoot insects flying above the water with jets from its tubular mouth. When threatened, it sprays water or dense black ink and escapes. Horsea living in safe conditions play by intertwining their tails, and groups also compete by swimming in dance-like patterns that create whirlpools. The male Horsea, rather than the female, is documented caring for the young.

Horsea Biological Data

National Pokédex
#116
Species
Dragon Pokémon
Height
1' 4" (0.4 m)
Weight
17.6 lbs (8.0 kg)
Habitat
Sea
Color
Blue
Body Style
Blob
Gender
50% female / 50% male

Misc

Catch Rate: 225

Base Experience: 59 Exp

Hatch Counter: 20

Horsea Size Comparison: BETA

Horsea is listed at 1' 4" (0.4 m) and shown in an in-chart visual comparison.
7 ft6 ft5 ft4 ft3 ft2 ft1 ft0 ft
horsea
Professor Oak
How is visual size determined?

Pokédex height is treated as the official listed measurement, but the chart uses pose-aware visual scaling so each sprite looks reasonable in a direct comparison.

For long or coiled Pokémon, the listed height may represent total body length rather than upright height. For Pokémon with floppy ears, leaves, feathers, antennae, wings, or other flexible features, the chart usually measures to the top of the solid, substantial part of the head or body instead of the tallest decorative feature.

The goal is not to replace the official height, but to make the artwork compare naturally at the size it appears to occupy.