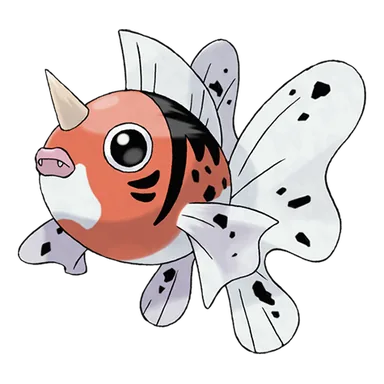
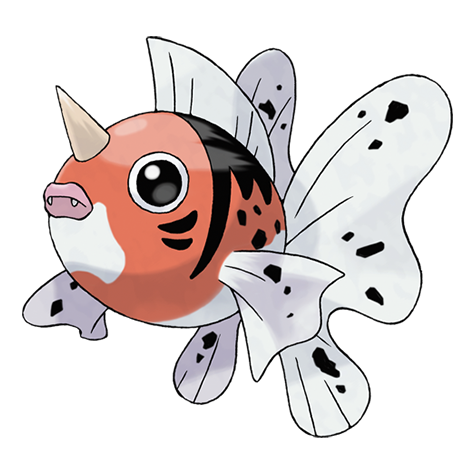
Seaking is a Water-type Pokémon introduced in Generation I and a final stage of its evolution line, with a base stat total of 450.
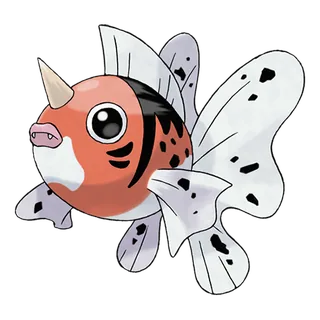
Seaking

Seaking

Abilities

Swift Swim

Raises SPEED in rain.

Water Veil

Prevents burns.

Lightning Rod

Draws electrical moves.

Hidden Ability

Base Stats

Total: 450
EV Yield: 2 Attack
HP: 80
Attack: 92
Defense: 65
Sp. Atk: 65
Sp. Def: 80
Speed: 68

Seaking's Weaknesses and Resistances

Evolution Chain

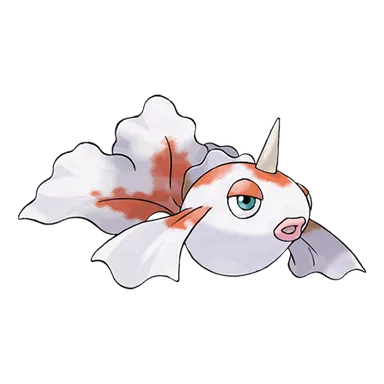
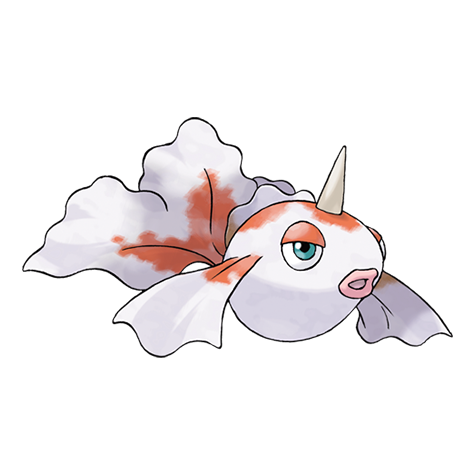
Goldeen evolves into Seaking at level 33.
Seaking Playthrough, Competitive, and Nuzlocke Usage

Using Seaking in a Playthrough

The Goldeen line is a physically oriented pure Water line whose effectiveness improved substantially after the Generation IV physical/special split. Seaking has respectable Attack and HP, and later generations allow Waterfall and other physical attacks to exploit that Attack directly; coverage such as Megahorn can also distinguish it from more conventional Water-types. Before the physical/special split, however, Water STAB uses Seaking's much weaker Special Attack, creating a major mismatch between its typing and best offensive stat. Its level-33 evolution is also relatively late for a final form with only moderate overall statistics. Lightning Rod can provide an extremely valuable Electric immunity in generations where that ability is legitimately available, but Seaking otherwise faces intense competition from stronger, faster, bulkier, or more versatile Water-types.

Seaking in Competitive Pokémon

Seaking has historically been a niche lower-tier Water-type rather than a major competitive threat. Its most distinctive later-generation attribute is Lightning Rod, which gives a Water-type an immunity to Electric attacks and raises Special Attack when such an attack is absorbed, allowing Seaking to switch into one of Water's normal weaknesses. Physical Water STAB and coverage give it enough offense to punish selected opponents, but its middling Speed, defenses, and overall power limit how much advantage it can gain from favorable positioning. The existence of numerous stronger bulky and offensive Water-types has kept Seaking's competitive role narrow despite the unusual defensive utility of Lightning Rod.

Seaking in Nuzlockes

The Goldeen line is strongly generation-dependent in Nuzlockes. FireRed and LeafGreen community analysis rates Seaking poorly because it evolves at level 33, has a limited movepool, and cannot use its stronger Attack stat for Water STAB under Generation III's type-based physical/special mechanics. It remains a Water-type with useful resistances and enough Attack to use neutral physical moves, but there are numerous stronger Water encounters available. Later generations improve Seaking considerably by making Waterfall physical, and Lightning Rod can create completely safe switches into Electric attacks when that ability is available. Even with those improvements, it is generally a competent replacement Water-type rather than a uniquely valuable encounter.

Learnsets

12 moves · Brilliant Diamond Shining Pearl

Level Up — Brilliant Diamond Shining Pearl

1 Tail Whip normal type --- 100 status move
1 Supersonic normal type --- 55 status move
1 Peck flying type 35 100 physical move
1 Water Pulse water type 60 100 special move
15 Horn Attack normal type 65 100 physical move
20 Agility psychic type --- --- status move
25 Aqua Ring water type --- --- status move
30 Flail normal type --- 100 physical move
37 Waterfall water type 80 100 physical move
44 Soak water type --- 100 status move
51 Megahorn bug type 120 85 physical move
58 Horn Drill normal type --- 30 physical move

Pokédex Entries

21 entries
Leafgreen / X

In the autumn spawning season, they can be seen swimming powerfully up rivers and creeks.

Red / Blue

In the autumn spawning season, they can be seen swimming powerfully up rivers and creeks.

Yellow

It is the male's job to make a nest by carving out boulders in a stream using the horn on its head.

Gold

During spawning season, SEAKING gather from all over, coloring the rivers a brilliant red.

Silver / Soulsilver / Shield

Using its horn, it bores holes in riverbed boulders, making nests to prevent its eggs from washing away.

Crystal

When autumn comes, the males patrol the area around their nests in order to protect their offspring.

Ruby

In the autumn, SEAKING males can be seen performing courtship dances in riverbeds to woo females. During this season, this POKéMON’s body coloration is at its most beautiful.

Sapphire

SEAKING is very protective of its eggs. The male and female will take turns patrolling around their nest and eggs. The guarding of eggs by these POKéMON goes on for over a month.

Emerald

It punches holes in boulders on streambeds. This is a clever innovation that prevents its eggs from being attacked or washed away by the current.

Firered

The horn on its head is sharp like a drill. It bores a hole in a boulder to make its nest.

Diamond / Y

It makes its nest by hollowing out boulders in streams with its horn. It defends its eggs with its life.

Pearl

To protect its family, it will fight with its drill-sharp horn. It lives in hollowed rocks in streams.

Platinum / Black / White / Black 2 / White 2 / Sword

In autumn, its body becomes more fatty in preparing to propose to a mate. It takes on beautiful colors.

Heartgold

During spawning season, SEAKING gather from all over, causing rivers to appear a brilliant red.

Omega Ruby

In the autumn, Seaking males can be seen performing courtship dances in riverbeds to woo females. During this season, this Pokémon’s body coloration is at its most beautiful.

Alpha Sapphire

Seaking is very protective of its eggs. The male and female will take turns patrolling around their nest and eggs. The guarding of eggs by these Pokémon goes on for over a month.

Sun

When the weather grows cold, its whole body flushes a deep red. This sight serves as a poetic reminder that autumn has arrived.

Moon

Trainers who are crazy for Seaking are divided into horn enthusiasts and fin enthusiasts. The two groups do not get along well.

Ultra Sun

Its horn spins like a drill to steadily hollow out rocks—even harder ones. The coloration of the male is more vivid.

Ultra Moon

To attract females, males dance on the river’s floor. The females gather around the male that dances most gracefully.

Lets Go Pikachu / Lets Go Eevee

It is the male’s job to make a nest by carving out boulders in a stream using the horn on its head.

Where To Find Seaking

48 locations
Brooklet Hill · AlolaSOS Encounter, SOS From Bubbling Spot · version details vary

Brooklet Hill North

Moon max 30%
SOS Encounter · Lv. 10–15 · 15%SOS From Bubbling Spot · Lv. 10–15 · 15%
Sun max 30%
SOS Encounter · Lv. 10–15 · 15%SOS From Bubbling Spot · Lv. 10–15 · 15%
Ultra Moon max 30%
SOS Encounter · Lv. 10–16 · 15%SOS From Bubbling Spot · Lv. 10–21 · 15%
Ultra Sun max 30%
SOS Encounter · Lv. 10–16 · 15%SOS From Bubbling Spot · Lv. 10–21 · 15%

Brooklet Hill South

Moon max 30%
SOS Encounter · Lv. 10–15 · 15%SOS From Bubbling Spot · Lv. 10–15 · 15%
Sun max 30%
SOS Encounter · Lv. 10–15 · 15%SOS From Bubbling Spot · Lv. 10–15 · 15%
Ultra Moon max 30%
SOS Encounter · Lv. 10–16 · 15%SOS From Bubbling Spot · Lv. 10–21 · 15%
Ultra Sun max 30%
SOS Encounter · Lv. 10–16 · 15%SOS From Bubbling Spot · Lv. 10–21 · 15%
Malie Garden · AlolaSOS Encounter, SOS From Bubbling Spot · version details vary

Malie Garden Area

Moon max 15%
SOS Encounter · Lv. 10–27 · 15%
Sun max 15%
SOS Encounter · Lv. 10–27 · 15%
Ultra Moon max 30%
SOS Encounter · Lv. 10–28 · 15%SOS From Bubbling Spot · Lv. 10–33 · 15%
Ultra Sun max 30%
SOS Encounter · Lv. 10–28 · 15%SOS From Bubbling Spot · Lv. 10–33 · 15%
Safari Zone · HoennSuper Rod · version details vary

Safari Zone (NW/mach bike area)

Emerald max 20%
Super Rod · Lv. 25–30 · 1%Super Rod · Lv. 30–35 · 15%Super Rod · Lv. 35–40 · 4%
Ruby max 20%
Super Rod · Lv. 25–30 · 1%Super Rod · Lv. 30–35 · 15%Super Rod · Lv. 35–40 · 4%
Sapphire max 20%
Super Rod · Lv. 25–30 · 1%Super Rod · Lv. 30–35 · 15%Super Rod · Lv. 35–40 · 4%

Safari Zone (SW)

Emerald max 20%
Super Rod · Lv. 25–30 · 1%Super Rod · Lv. 30–35 · 15%Super Rod · Lv. 35–40 · 4%
Ruby max 20%
Super Rod · Lv. 25–30 · 1%Super Rod · Lv. 30–35 · 15%Super Rod · Lv. 35–40 · 4%
Sapphire max 20%
Super Rod · Lv. 25–30 · 1%Super Rod · Lv. 30–35 · 15%Super Rod · Lv. 35–40 · 4%
Dark Cave · JohtoSuper Rod · version details vary

Dark Cave (Blackthorn City entrance)

Crystal max 10%
Super Rod · Lv. 40 · 10%
Gold max 10%
Super Rod · Lv. 40 · 10%
HeartGold max 10%
Super Rod · Lv. 40 · 10%
Silver max 10%
Super Rod · Lv. 40 · 10%
SoulSilver max 10%
Super Rod · Lv. 40 · 10%

Dark Cave (Violet City entrance)

Crystal max 10%
Super Rod · Lv. 40 · 10%
Gold max 10%
Super Rod · Lv. 40 · 10%
HeartGold max 10%
Super Rod · Lv. 40 · 10%
Silver max 10%
Super Rod · Lv. 40 · 10%
SoulSilver max 10%
Super Rod · Lv. 40 · 10%
Johto Safari Zone · JohtoSuper Rod, Good Rod · version details vary

Safari Zone Rocky Beach

HeartGold max 40%
Super Rod · Lv. 35 · 10%Super Rod · Lv. 36 · 10%Super Rod · Lv. 37 · 10%Super Rod · Lv. 38 · 10%
SoulSilver max 40%
Super Rod · Lv. 35 · 10%Super Rod · Lv. 36 · 10%Super Rod · Lv. 37 · 10%Super Rod · Lv. 38 · 10%

Safari Zone Swamp

HeartGold max 60%
Good Rod · Lv. 24 · 10%Good Rod · Lv. 25 · 10%Super Rod · Lv. 35 · 10%Super Rod · Lv. 36 · 10%Super Rod · Lv. 37 · 10%
SoulSilver max 60%
Good Rod · Lv. 24 · 10%Good Rod · Lv. 25 · 10%Super Rod · Lv. 35 · 10%Super Rod · Lv. 36 · 10%Super Rod · Lv. 37 · 10%
Mt. Mortar · JohtoSuper Rod, Surf · version details vary

Mount Mortar (1F)

Crystal max 20%
Super Rod · Lv. 40 · 10%Surf · Lv. 20–24 · 10%
Gold max 30%
Super Rod · Lv. 40 · 10%Surf · Lv. 20 · 10% · Swarm YesSurf · Lv. 20–24 · 10% · Swarm No
HeartGold max 20%
Super Rod · Lv. 40 · 10%Surf · Lv. 15–25 · 5%Surf · Lv. 15–25 · 4%Surf · Lv. 15–25 · 1%
Silver max 30%
Super Rod · Lv. 40 · 10%Surf · Lv. 20 · 10% · Swarm YesSurf · Lv. 20–24 · 10% · Swarm No
SoulSilver max 20%
Super Rod · Lv. 40 · 10%Surf · Lv. 15–25 · 5%Surf · Lv. 15–25 · 4%Surf · Lv. 15–25 · 1%

Mount Mortar (B1F)

Crystal max 20%
Super Rod · Lv. 40 · 10%Surf · Lv. 20–24 · 10%
Gold max 20%
Super Rod · Lv. 40 · 10%Surf · Lv. 20–24 · 10%
HeartGold max 20%
Super Rod · Lv. 40 · 10%Surf · Lv. 15–25 · 5%Surf · Lv. 15–25 · 4%Surf · Lv. 15–25 · 1%
Silver max 20%
Super Rod · Lv. 40 · 10%Surf · Lv. 20–24 · 10%
SoulSilver max 20%
Super Rod · Lv. 40 · 10%Surf · Lv. 15–25 · 5%Surf · Lv. 15–25 · 4%Surf · Lv. 15–25 · 1%

Mount Mortar (Upper Cave)

Crystal max 20%
Super Rod · Lv. 40 · 10%Surf · Lv. 25–29 · 10%
Gold max 20%
Super Rod · Lv. 40 · 10%Surf · Lv. 25–29 · 10%
HeartGold max 20%
Super Rod · Lv. 40 · 10%Surf · Lv. 20–30 · 5%Surf · Lv. 20–30 · 4%Surf · Lv. 20–30 · 1%
Silver max 20%
Super Rod · Lv. 40 · 10%Surf · Lv. 25–29 · 10%
SoulSilver max 20%
Super Rod · Lv. 40 · 10%Surf · Lv. 20–30 · 5%Surf · Lv. 20–30 · 4%Surf · Lv. 20–30 · 1%
Mt. Silver · JohtoSuper Rod, Surf, Good Rod · version details vary

Mount Silver (1F top)

HeartGold max 100%
Super Rod · Lv. 40 · 10%Surf · Lv. 30–40 · 60%Surf · Lv. 35–45 · 30%
SoulSilver max 100%
Super Rod · Lv. 40 · 10%Surf · Lv. 30–40 · 60%Surf · Lv. 35–45 · 30%

Mount Silver (1F)

HeartGold max 191%
Good Rod · Lv. 20 · 15%Good Rod · Lv. 20 · 5%Super Rod · Lv. 40 · 30% · Time DaySuper Rod · Lv. 40 · 30% · Time MorningSuper Rod · Lv. 40 · 15%Super Rod · Lv. 40 · 5%Surf · Lv. 30–40 · 60%Surf · Lv. 35–45 · 30%Surf · Lv. 50 · 1%
SoulSilver max 191%
Good Rod · Lv. 20 · 15%Good Rod · Lv. 20 · 5%Super Rod · Lv. 40 · 30% · Time DaySuper Rod · Lv. 40 · 30% · Time MorningSuper Rod · Lv. 40 · 15%Super Rod · Lv. 40 · 5%Surf · Lv. 30–40 · 60%Surf · Lv. 35–45 · 30%Surf · Lv. 50 · 1%

Mount Silver (2F)

Crystal max 70%
Super Rod · Lv. 40 · 10%Surf · Lv. 35–39 · 60%
Gold max 100%
Super Rod · Lv. 40 · 10%Surf · Lv. 35–39 · 60%Surf · Lv. 40–44 · 30%
HeartGold max 100%
Super Rod · Lv. 40 · 10%Surf · Lv. 30–40 · 60%Surf · Lv. 35–45 · 30%
Silver max 100%
Super Rod · Lv. 40 · 10%Surf · Lv. 35–39 · 60%Surf · Lv. 40–44 · 30%
SoulSilver max 100%
Super Rod · Lv. 40 · 10%Surf · Lv. 30–40 · 60%Surf · Lv. 35–45 · 30%

Mount Silver (4F)

HeartGold max 100%
Super Rod · Lv. 40 · 10%Surf · Lv. 30–40 · 60%Surf · Lv. 35–45 · 30%
SoulSilver max 100%
Super Rod · Lv. 40 · 10%Surf · Lv. 30–40 · 60%Surf · Lv. 35–45 · 30%

Mount Silver (top)

HeartGold max 100%
Super Rod · Lv. 40 · 10%Surf · Lv. 30–40 · 60%Surf · Lv. 35–45 · 30%
SoulSilver max 100%
Super Rod · Lv. 40 · 10%Surf · Lv. 30–40 · 60%Surf · Lv. 35–45 · 30%
Route 42 · JohtoSuper Rod, Surf · version details vary

Road 42

Crystal max 20%
Super Rod · Lv. 40 · 10%Surf · Lv. 20–24 · 10%
Gold max 20%
Super Rod · Lv. 40 · 10%Surf · Lv. 20–24 · 10%
HeartGold max 20%
Super Rod · Lv. 40 · 10%Surf · Lv. 15–25 · 5%Surf · Lv. 15–25 · 4%Surf · Lv. 15–25 · 1%
Silver max 20%
Super Rod · Lv. 40 · 10%Surf · Lv. 20–24 · 10%
SoulSilver max 20%
Super Rod · Lv. 40 · 10%Surf · Lv. 15–25 · 5%Surf · Lv. 15–25 · 4%Surf · Lv. 15–25 · 1%
Slowpoke Well · JohtoSuper Rod · version details vary

Slowpoke Well (1F)

Crystal max 10%
Super Rod · Lv. 40 · 10%
Gold max 10%
Super Rod · Lv. 40 · 10%
HeartGold max 10%
Super Rod · Lv. 40 · 10%
Silver max 10%
Super Rod · Lv. 40 · 10%
SoulSilver max 10%
Super Rod · Lv. 40 · 10%

Slowpoke Well (B1F)

Crystal max 10%
Super Rod · Lv. 40 · 10%
Gold max 10%
Super Rod · Lv. 40 · 10%
HeartGold max 10%
Super Rod · Lv. 40 · 10%
Silver max 10%
Super Rod · Lv. 40 · 10%
SoulSilver max 10%
Super Rod · Lv. 40 · 10%
Tohjo Falls · JohtoSuper Rod, Surf · version details vary

Tohjo Falls

Crystal max 20%
Super Rod · Lv. 40 · 10%Surf · Lv. 20–24 · 10%
Gold max 20%
Super Rod · Lv. 40 · 10%Surf · Lv. 20–24 · 10%
HeartGold max 20%
Super Rod · Lv. 40 · 10%Surf · Lv. 20 · 5%Surf · Lv. 20 · 4%Surf · Lv. 20 · 1%
Silver max 20%
Super Rod · Lv. 40 · 10%Surf · Lv. 20–24 · 10%
SoulSilver max 20%
Super Rod · Lv. 40 · 10%Surf · Lv. 20 · 5%Surf · Lv. 20 · 4%Surf · Lv. 20 · 1%
Union Cave · JohtoSuper Rod · version details vary

Union Cave (1F)

Crystal max 10%
Super Rod · Lv. 40 · 10%
Gold max 10%
Super Rod · Lv. 40 · 10%
HeartGold max 10%
Super Rod · Lv. 40 · 10%
Silver max 10%
Super Rod · Lv. 40 · 10%
SoulSilver max 10%
Super Rod · Lv. 40 · 10%

Union Cave (B1F)

Crystal max 10%
Super Rod · Lv. 40 · 10%
Gold max 10%
Super Rod · Lv. 40 · 10%
HeartGold max 10%
Super Rod · Lv. 40 · 10%
Silver max 10%
Super Rod · Lv. 40 · 10%
SoulSilver max 10%
Super Rod · Lv. 40 · 10%
Parfum Palace · KalosSuper Rod · version details vary

Parfum Palace

X max 35%
Super Rod · Lv. 35 · 35%
Y max 35%
Super Rod · Lv. 35 · 35%
Route 22 · KalosSuper Rod · version details vary

Road 22

X max 35%
Super Rod · Lv. 35 · 35%
Y max 35%
Super Rod · Lv. 35 · 35%
Route 3 · KalosSuper Rod · version details vary

Road 3

X max 35%
Super Rod · Lv. 35 · 35%
Y max 35%
Super Rod · Lv. 35 · 35%
Berry Forest · KantoSuper Rod · version details vary

Berry Forest

FireRed max 40%
Super Rod · Lv. 20–30 · 40%
LeafGreen max 40%
Super Rod · Lv. 20–30 · 40%
Cerulean Cave · KantoSuper Rod · version details vary

Cerulean Cave (1F)

Blue max 25%
Super Rod · Lv. 23 · 17%Super Rod · Lv. 23 · 8%
Green Japan max 25%
Super Rod · Lv. 23 · 17%Super Rod · Lv. 23 · 8%
Red max 25%
Super Rod · Lv. 23 · 17%Super Rod · Lv. 23 · 8%
Red Japan max 25%
Super Rod · Lv. 23 · 17%Super Rod · Lv. 23 · 8%
Yellow max 60%
Super Rod · Lv. 35 · 30%Super Rod · Lv. 45 · 20%Super Rod · Lv. 55 · 10%

Cerulean Cave (B1F)

Blue max 25%
Super Rod · Lv. 23 · 17%Super Rod · Lv. 23 · 8%
Green Japan max 25%
Super Rod · Lv. 23 · 17%Super Rod · Lv. 23 · 8%
Red max 25%
Super Rod · Lv. 23 · 17%Super Rod · Lv. 23 · 8%
Red Japan max 25%
Super Rod · Lv. 23 · 17%Super Rod · Lv. 23 · 8%
Yellow max 60%
Super Rod · Lv. 40 · 30%Super Rod · Lv. 50 · 20%Super Rod · Lv. 60 · 10%
Cerulean City · KantoSuper Rod, Surf · version details vary

Cerulean City

Crystal max 20%
Super Rod · Lv. 40 · 10%Surf · Lv. 10–14 · 10%
Gold max 20%
Super Rod · Lv. 40 · 10%Surf · Lv. 10–14 · 10%
HeartGold max 20%
Super Rod · Lv. 40 · 10%Surf · Lv. 10 · 5%Surf · Lv. 10 · 4%Surf · Lv. 10 · 1%
Silver max 20%
Super Rod · Lv. 40 · 10%Surf · Lv. 10–14 · 10%
SoulSilver max 20%
Super Rod · Lv. 40 · 10%Surf · Lv. 10 · 5%Surf · Lv. 10 · 4%Surf · Lv. 10 · 1%
Yellow max 30%
Super Rod · Lv. 30 · 20%Super Rod · Lv. 40 · 10%
Fuchsia City · KantoSuper Rod · version details vary

Fuchsia City

Blue max 25%
Super Rod · Lv. 23 · 25%
FireRed max 40%
Super Rod · Lv. 20–30 · 40%
Green Japan max 25%
Super Rod · Lv. 23 · 25%
LeafGreen max 40%
Super Rod · Lv. 20–30 · 40%
Red max 25%
Super Rod · Lv. 23 · 25%
Red Japan max 25%
Super Rod · Lv. 23 · 25%
Route 10 · KantoSuper Rod, Surf · version details vary

Road 10

Crystal max 20%
Super Rod · Lv. 40 · 10%Surf · Lv. 15–19 · 10%
Gold max 20%
Super Rod · Lv. 40 · 10%Surf · Lv. 15–19 · 10%
HeartGold max 20%
Super Rod · Lv. 40 · 10%Surf · Lv. 15 · 5%Surf · Lv. 15 · 4%Surf · Lv. 15 · 1%
Silver max 20%
Super Rod · Lv. 40 · 10%Surf · Lv. 15–19 · 10%
SoulSilver max 20%
Super Rod · Lv. 40 · 10%Surf · Lv. 15 · 5%Surf · Lv. 15 · 4%Surf · Lv. 15 · 1%
Route 23 · KantoSuper Rod · version details vary

Road 23

Blue max 25%
Super Rod · Lv. 23 · 17%Super Rod · Lv. 23 · 8%
Green Japan max 25%
Super Rod · Lv. 23 · 17%Super Rod · Lv. 23 · 8%
Red max 25%
Super Rod · Lv. 23 · 17%Super Rod · Lv. 23 · 8%
Red Japan max 25%
Super Rod · Lv. 23 · 17%Super Rod · Lv. 23 · 8%
Route 24 · KantoSuper Rod, Surf · version details vary

Road 24

Crystal max 20%
Super Rod · Lv. 40 · 10%Surf · Lv. 10–14 · 10%
Gold max 20%
Super Rod · Lv. 40 · 10%Surf · Lv. 10–14 · 10%
HeartGold max 20%
Super Rod · Lv. 40 · 10%Surf · Lv. 10 · 5%Surf · Lv. 10 · 4%Surf · Lv. 10 · 1%
Silver max 20%
Super Rod · Lv. 40 · 10%Surf · Lv. 10–14 · 10%
SoulSilver max 20%
Super Rod · Lv. 40 · 10%Surf · Lv. 10 · 5%Surf · Lv. 10 · 4%Surf · Lv. 10 · 1%
Yellow max 10%
Super Rod · Lv. 30 · 10%
Route 25 · KantoSuper Rod, Surf · version details vary

Road 25

Crystal max 20%
Super Rod · Lv. 40 · 10%Surf · Lv. 10–14 · 10%
Gold max 20%
Super Rod · Lv. 40 · 10%Surf · Lv. 10–14 · 10%
HeartGold max 20%
Super Rod · Lv. 40 · 10%Surf · Lv. 10 · 5%Surf · Lv. 10 · 4%Surf · Lv. 10 · 1%
Silver max 20%
Super Rod · Lv. 40 · 10%Surf · Lv. 10–14 · 10%
SoulSilver max 20%
Super Rod · Lv. 40 · 10%Surf · Lv. 10 · 5%Surf · Lv. 10 · 4%Surf · Lv. 10 · 1%
Route 4 · KantoSurf, Super Rod · version details vary

Road 4

Crystal max 10%
Surf · Lv. 10–14 · 10%
Gold max 10%
Surf · Lv. 10–14 · 10%
HeartGold max 20%
Super Rod · Lv. 40 · 10%Surf · Lv. 10 · 5%Surf · Lv. 10 · 4%Surf · Lv. 10 · 1%
Silver max 10%
Surf · Lv. 10–14 · 10%
SoulSilver max 20%
Super Rod · Lv. 40 · 10%Surf · Lv. 10 · 5%Surf · Lv. 10 · 4%Surf · Lv. 10 · 1%
Route 6 · KantoOverworld Water · version details vary

Road 6

Lets Go Eevee max 100%
Overworld Water · Lv. 11–16 · 100%
Lets Go Pikachu max 100%
Overworld Water · Lv. 11–16 · 100%
Route 9 · KantoSuper Rod, Surf · version details vary

Road 9

Crystal max 20%
Super Rod · Lv. 40 · 10%Surf · Lv. 15–19 · 10%
Gold max 20%
Super Rod · Lv. 40 · 10%Surf · Lv. 15–19 · 10%
HeartGold max 20%
Super Rod · Lv. 40 · 10%Surf · Lv. 15 · 5%Surf · Lv. 15 · 4%Surf · Lv. 15 · 1%
Silver max 20%
Super Rod · Lv. 40 · 10%Surf · Lv. 15–19 · 10%
SoulSilver max 20%
Super Rod · Lv. 40 · 10%Surf · Lv. 15 · 5%Surf · Lv. 15 · 4%Surf · Lv. 15 · 1%
Safari Zone · KantoSuper Rod · version details vary

Safari Zone (Area 1, east)

FireRed max 40%
Super Rod · Lv. 20–30 · 40%
LeafGreen max 40%
Super Rod · Lv. 20–30 · 40%

Safari Zone (Area 2, north)

FireRed max 40%
Super Rod · Lv. 20–30 · 40%
LeafGreen max 40%
Super Rod · Lv. 20–30 · 40%

Safari Zone (Area 3, west)

FireRed max 40%
Super Rod · Lv. 20–30 · 40%
LeafGreen max 40%
Super Rod · Lv. 20–30 · 40%

Safari Zone (middle)

FireRed max 40%
Super Rod · Lv. 20–30 · 40%
LeafGreen max 40%
Super Rod · Lv. 20–30 · 40%
Celestic Town · SinnohSuper Rod · version details vary

Celestic Town

Platinum max 5%
Super Rod · Lv. 40–55 · 4%Super Rod · Lv. 40–55 · 1%
Lake Acuity · SinnohSuper Rod, Good Rod · version details vary

Lake Acuity

Diamond max 45%
Super Rod · Lv. 20–50 · 4%Super Rod · Lv. 20–50 · 1%Super Rod · Lv. 30–40 · 40%
Pearl max 45%
Super Rod · Lv. 20–50 · 4%Super Rod · Lv. 20–50 · 1%Super Rod · Lv. 30–40 · 40%
Platinum max 50%
Good Rod · Lv. 25–35 · 4%Good Rod · Lv. 25–35 · 1%Super Rod · Lv. 30–40 · 40%Super Rod · Lv. 40–55 · 4%Super Rod · Lv. 40–55 · 1%
Lake Valor · SinnohSuper Rod, Good Rod · version details vary

Lake Valor

Diamond max 45%
Super Rod · Lv. 20–50 · 4%Super Rod · Lv. 20–50 · 1%Super Rod · Lv. 30–40 · 40%
Pearl max 45%
Super Rod · Lv. 20–50 · 4%Super Rod · Lv. 20–50 · 1%Super Rod · Lv. 30–40 · 40%
Platinum max 50%
Good Rod · Lv. 25–35 · 4%Good Rod · Lv. 25–35 · 1%Super Rod · Lv. 30–40 · 40%Super Rod · Lv. 40–55 · 4%Super Rod · Lv. 40–55 · 1%
Lake Verity · SinnohSuper Rod, Good Rod · version details vary

Lake Verity (after Galactic intervention)

Diamond max 45%
Super Rod · Lv. 20–50 · 4%Super Rod · Lv. 20–50 · 1%Super Rod · Lv. 30–40 · 40%
Pearl max 45%
Super Rod · Lv. 20–50 · 4%Super Rod · Lv. 20–50 · 1%Super Rod · Lv. 30–40 · 40%
Platinum max 50%
Good Rod · Lv. 25–35 · 4%Good Rod · Lv. 25–35 · 1%Super Rod · Lv. 30–40 · 40%Super Rod · Lv. 40–55 · 4%Super Rod · Lv. 40–55 · 1%

Lake Verity (before Galactic intervention)

Diamond max 45%
Super Rod · Lv. 20–50 · 4%Super Rod · Lv. 20–50 · 1%Super Rod · Lv. 30–40 · 40%
Pearl max 45%
Super Rod · Lv. 20–50 · 4%Super Rod · Lv. 20–50 · 1%Super Rod · Lv. 30–40 · 40%
Platinum max 50%
Good Rod · Lv. 25–35 · 4%Good Rod · Lv. 25–35 · 1%Super Rod · Lv. 30–40 · 40%Super Rod · Lv. 40–55 · 4%Super Rod · Lv. 40–55 · 1%
Resort Area · SinnohSuper Rod · version details vary

Resort Area

Diamond max 45%
Super Rod · Lv. 20–50 · 4%Super Rod · Lv. 20–50 · 1%Super Rod · Lv. 30–40 · 40%
Pearl max 45%
Super Rod · Lv. 20–50 · 4%Super Rod · Lv. 20–50 · 1%Super Rod · Lv. 30–40 · 40%
Route 203 · SinnohSuper Rod · version details vary

Road 203

Diamond max 45%
Super Rod · Lv. 20–50 · 4%Super Rod · Lv. 20–50 · 1%Super Rod · Lv. 30–40 · 40%
Pearl max 45%
Super Rod · Lv. 20–50 · 4%Super Rod · Lv. 20–50 · 1%Super Rod · Lv. 30–40 · 40%
Platinum max 45%
Super Rod · Lv. 30–40 · 40%Super Rod · Lv. 40–55 · 4%Super Rod · Lv. 40–55 · 1%
Route 204 · SinnohSuper Rod · version details vary

Road 204 (north, towards Floaroma Town)

Diamond max 45%
Super Rod · Lv. 20–50 · 4%Super Rod · Lv. 20–50 · 1%Super Rod · Lv. 30–40 · 40%
Pearl max 45%
Super Rod · Lv. 20–50 · 4%Super Rod · Lv. 20–50 · 1%Super Rod · Lv. 30–40 · 40%
Platinum max 45%
Super Rod · Lv. 30–40 · 40%Super Rod · Lv. 40–55 · 4%Super Rod · Lv. 40–55 · 1%

Road 204 (south, towards Jubilife City)

Diamond max 45%
Super Rod · Lv. 20–50 · 4%Super Rod · Lv. 20–50 · 1%Super Rod · Lv. 30–40 · 40%
Pearl max 45%
Super Rod · Lv. 20–50 · 4%Super Rod · Lv. 20–50 · 1%Super Rod · Lv. 30–40 · 40%
Platinum max 45%
Super Rod · Lv. 30–40 · 40%Super Rod · Lv. 40–55 · 4%Super Rod · Lv. 40–55 · 1%
Route 208 · SinnohSuper Rod · version details vary

Road 208

Platinum max 45%
Super Rod · Lv. 30–40 · 40%Super Rod · Lv. 40–55 · 4%Super Rod · Lv. 40–55 · 1%
Route 209 · SinnohSuper Rod · version details vary

Road 209

Diamond max 45%
Super Rod · Lv. 20–50 · 4%Super Rod · Lv. 20–50 · 1%Super Rod · Lv. 30–40 · 40%
Pearl max 45%
Super Rod · Lv. 20–50 · 4%Super Rod · Lv. 20–50 · 1%Super Rod · Lv. 30–40 · 40%
Platinum max 45%
Super Rod · Lv. 30–40 · 40%Super Rod · Lv. 40–55 · 4%Super Rod · Lv. 40–55 · 1%
Route 212 · SinnohSuper Rod · version details vary

Road 212 (north, towards Hearthome City)

Diamond max 45%
Super Rod · Lv. 20–50 · 4%Super Rod · Lv. 20–50 · 1%Super Rod · Lv. 30–40 · 40%
Pearl max 45%
Super Rod · Lv. 20–50 · 4%Super Rod · Lv. 20–50 · 1%Super Rod · Lv. 30–40 · 40%
Platinum max 45%
Super Rod · Lv. 30–40 · 40%Super Rod · Lv. 40–55 · 4%Super Rod · Lv. 40–55 · 1%
Route 214 · SinnohSuper Rod · version details vary

Road 214

Diamond max 45%
Super Rod · Lv. 20–50 · 4%Super Rod · Lv. 20–50 · 1%Super Rod · Lv. 30–40 · 40%
Pearl max 45%
Super Rod · Lv. 20–50 · 4%Super Rod · Lv. 20–50 · 1%Super Rod · Lv. 30–40 · 40%
Platinum max 45%
Super Rod · Lv. 30–40 · 40%Super Rod · Lv. 40–55 · 4%Super Rod · Lv. 40–55 · 1%
Route 229 · SinnohSuper Rod · version details vary

Road 229

Platinum max 45%
Super Rod · Lv. 30–40 · 40%Super Rod · Lv. 40–55 · 4%Super Rod · Lv. 40–55 · 1%
Sendoff Spring · SinnohSuper Rod · version details vary

Sendoff Spring

Diamond max 45%
Super Rod · Lv. 20–50 · 4%Super Rod · Lv. 20–50 · 1%Super Rod · Lv. 30–40 · 40%
Pearl max 45%
Super Rod · Lv. 20–50 · 4%Super Rod · Lv. 20–50 · 1%Super Rod · Lv. 30–40 · 40%
Platinum max 45%
Super Rod · Lv. 30–40 · 40%Super Rod · Lv. 40–55 · 4%Super Rod · Lv. 40–55 · 1%
Twinleaf Town · SinnohSuper Rod · version details vary

Twinleaf Town

Diamond max 45%
Super Rod · Lv. 20–50 · 4%Super Rod · Lv. 20–50 · 1%Super Rod · Lv. 30–40 · 40%
Pearl max 45%
Super Rod · Lv. 20–50 · 4%Super Rod · Lv. 20–50 · 1%Super Rod · Lv. 30–40 · 40%
Platinum max 45%
Super Rod · Lv. 30–40 · 40%Super Rod · Lv. 40–55 · 4%Super Rod · Lv. 40–55 · 1%
Abundant Shrine · UnovaSuper Rod Spots · version details vary

Abundant Shrine

Black max 20%
Super Rod Spots · Lv. 35–70 · 15%Super Rod Spots · Lv. 45–70 · 4%Super Rod Spots · Lv. 45–70 · 1%
Black 2 max 20%
Super Rod Spots · Lv. 50–70 · 15%Super Rod Spots · Lv. 50–70 · 4%Super Rod Spots · Lv. 50–70 · 1%
White max 20%
Super Rod Spots · Lv. 35–70 · 15%Super Rod Spots · Lv. 45–70 · 4%Super Rod Spots · Lv. 45–70 · 1%
White 2 max 20%
Super Rod Spots · Lv. 50–70 · 15%Super Rod Spots · Lv. 50–70 · 4%Super Rod Spots · Lv. 50–70 · 1%
Aspertia City · UnovaSuper Rod Spots · version details vary

Aspertia City

Black 2 max 20%
Super Rod Spots · Lv. 50–70 · 15%Super Rod Spots · Lv. 50–70 · 4%Super Rod Spots · Lv. 50–70 · 1%
White 2 max 20%
Super Rod Spots · Lv. 50–70 · 15%Super Rod Spots · Lv. 50–70 · 4%Super Rod Spots · Lv. 50–70 · 1%
Pinwheel Forest · UnovaSuper Rod Spots · version details vary

Pinwheel Forest (inside)

Black max 20%
Super Rod Spots · Lv. 35–70 · 15%Super Rod Spots · Lv. 45–70 · 4%Super Rod Spots · Lv. 45–70 · 1%
Black 2 max 20%
Super Rod Spots · Lv. 35–70 · 15%Super Rod Spots · Lv. 45–70 · 4%Super Rod Spots · Lv. 45–70 · 1%
White max 20%
Super Rod Spots · Lv. 35–70 · 15%Super Rod Spots · Lv. 45–70 · 4%Super Rod Spots · Lv. 45–70 · 1%
White 2 max 20%
Super Rod Spots · Lv. 35–70 · 15%Super Rod Spots · Lv. 45–70 · 4%Super Rod Spots · Lv. 45–70 · 1%
Route 11 · UnovaSuper Rod Spots · version details vary

Road 11

Black max 20%
Super Rod Spots · Lv. 35–70 · 15%Super Rod Spots · Lv. 45–70 · 4%Super Rod Spots · Lv. 45–70 · 1%
Black 2 max 20%
Super Rod Spots · Lv. 50–70 · 15%Super Rod Spots · Lv. 50–70 · 4%Super Rod Spots · Lv. 50–70 · 1%
White max 20%
Super Rod Spots · Lv. 35–70 · 15%Super Rod Spots · Lv. 45–70 · 4%Super Rod Spots · Lv. 45–70 · 1%
White 2 max 20%
Super Rod Spots · Lv. 50–70 · 15%Super Rod Spots · Lv. 50–70 · 4%Super Rod Spots · Lv. 50–70 · 1%
Route 14 · UnovaSuper Rod Spots · version details vary

Road 14

Black max 20%
Super Rod Spots · Lv. 35–70 · 15%Super Rod Spots · Lv. 45–70 · 4%Super Rod Spots · Lv. 45–70 · 1%
Black 2 max 20%
Super Rod Spots · Lv. 50–70 · 15%Super Rod Spots · Lv. 50–70 · 4%Super Rod Spots · Lv. 50–70 · 1%
White max 20%
Super Rod Spots · Lv. 35–70 · 15%Super Rod Spots · Lv. 45–70 · 4%Super Rod Spots · Lv. 45–70 · 1%
White 2 max 20%
Super Rod Spots · Lv. 50–70 · 15%Super Rod Spots · Lv. 50–70 · 4%Super Rod Spots · Lv. 50–70 · 1%
Route 22 · UnovaSuper Rod Spots · version details vary

Road 22

Black 2 max 20%
Super Rod Spots · Lv. 50–70 · 15%Super Rod Spots · Lv. 50–70 · 4%Super Rod Spots · Lv. 50–70 · 1%
White 2 max 20%
Super Rod Spots · Lv. 50–70 · 15%Super Rod Spots · Lv. 50–70 · 4%Super Rod Spots · Lv. 50–70 · 1%
Route 3 · UnovaSuper Rod Spots · version details vary

Road 3

Black max 20%
Super Rod Spots · Lv. 35–70 · 15%Super Rod Spots · Lv. 45–70 · 4%Super Rod Spots · Lv. 45–70 · 1%
Black 2 max 20%
Super Rod Spots · Lv. 50–70 · 15%Super Rod Spots · Lv. 50–70 · 4%Super Rod Spots · Lv. 50–70 · 1%
White max 20%
Super Rod Spots · Lv. 35–70 · 15%Super Rod Spots · Lv. 45–70 · 4%Super Rod Spots · Lv. 45–70 · 1%
White 2 max 20%
Super Rod Spots · Lv. 50–70 · 15%Super Rod Spots · Lv. 50–70 · 4%Super Rod Spots · Lv. 50–70 · 1%
Striaton City · UnovaSuper Rod Spots · version details vary

Striaton City

Black max 20%
Super Rod Spots · Lv. 35–70 · 15%Super Rod Spots · Lv. 45–70 · 4%Super Rod Spots · Lv. 45–70 · 1%
Black 2 max 20%
Super Rod Spots · Lv. 50–70 · 15%Super Rod Spots · Lv. 50–70 · 4%Super Rod Spots · Lv. 50–70 · 1%
White max 20%
Super Rod Spots · Lv. 35–70 · 15%Super Rod Spots · Lv. 45–70 · 4%Super Rod Spots · Lv. 45–70 · 1%
White 2 max 20%
Super Rod Spots · Lv. 50–70 · 15%Super Rod Spots · Lv. 50–70 · 4%Super Rod Spots · Lv. 50–70 · 1%

Held Items

1 items
Mystic Water
  • Omega Ruby: 5% chance
  • Alpha Sapphire: 5% chance
  • Sun: 5% chance
  • Moon: 5% chance
  • Ultra Sun: 5% chance
  • Ultra Moon: 5% chance

Additional Images

PokeAPI sprites

Open this section to load extra PokeAPI sprite images.

Seaking Biology and Behavior

Seaking is a strong river swimmer capable of moving against powerful currents and climbing waterfalls. During the autumn spawning season, males perform elaborate courtship dances, with females selecting mates based on the gracefulness of the display. Seaking uses its drill-like horn to bore nesting holes into riverbed boulders so eggs will not be swept away by the current. After mating, both parents take turns patrolling the nest for roughly a month and are described as defending their eggs with their lives.

Seaking Biological Data

National Pokédex
#119
Species
Goldfish Pokémon
Height
4' 3" (1.3 m)
Weight
86.0 lbs (39.0 kg)
Habitat
Waters Edge
Color
Red
Body Style
Fish
Gender
50% female / 50% male

Misc

Catch Rate: 60

Base Experience: 158 Exp

Hatch Counter: 20

Seaking Size Comparison: BETA

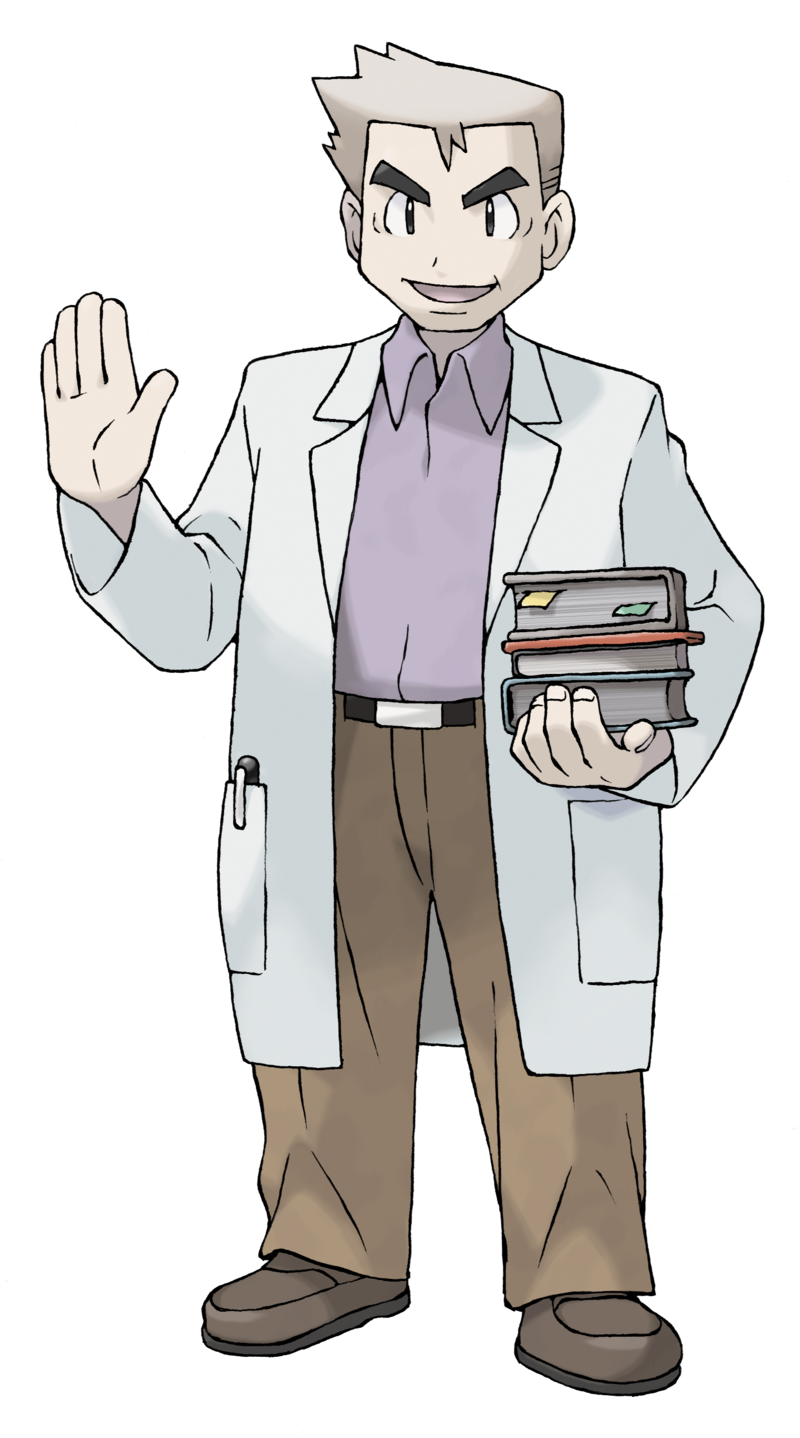
Seaking is listed at 4' 3" (1.3 m) and shown in an in-chart visual comparison.
7 ft6 ft5 ft4 ft3 ft2 ft1 ft0 ft
seaking
Professor Oak
How is visual size determined?

Pokédex height is treated as the official listed measurement, but the chart uses pose-aware visual scaling so each sprite looks reasonable in a direct comparison.

For long or coiled Pokémon, the listed height may represent total body length rather than upright height. For Pokémon with floppy ears, leaves, feathers, antennae, wings, or other flexible features, the chart usually measures to the top of the solid, substantial part of the head or body instead of the tallest decorative feature.

The goal is not to replace the official height, but to make the artwork compare naturally at the size it appears to occupy.