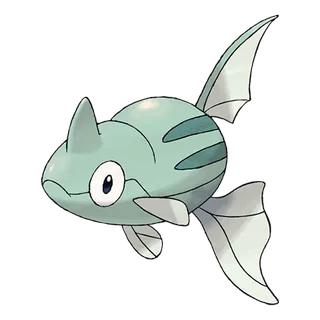
Remoraid is a Water-type Pokémon introduced in Generation II and the first stage of its evolution line, with a base stat total of 300.
Remoraid

Abilities
Base Stats
Remoraid's Weaknesses and Resistances



Evolution Chain
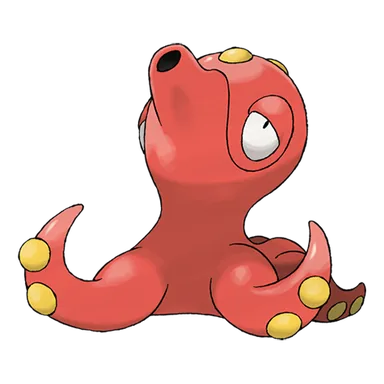
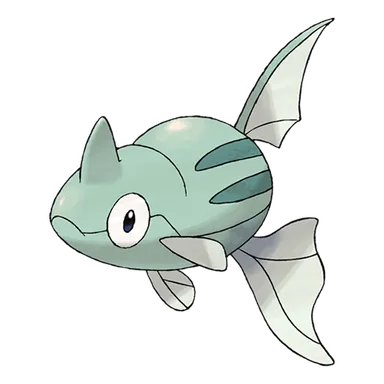
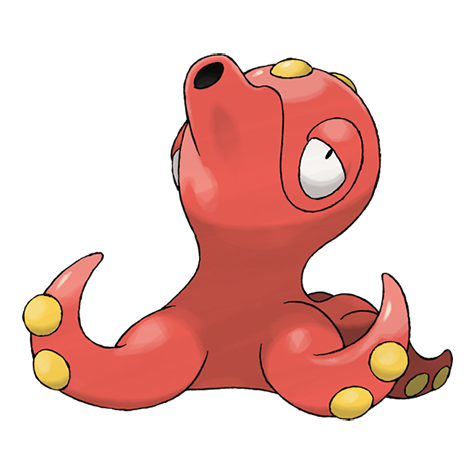
Remoraid evolves into Octillery at level 25.
 Remoraid
 Octillery
Remoraid Playthrough, Competitive, and Nuzlocke Usage
Using Remoraid in a Playthrough
The Remoraid line is unusual because its unevolved and evolved forms look almost unrelated, but both are built around ranged attacks and broad offensive coverage. Remoraid evolves into Octillery at level 25, after which both Attack and Special Attack reach base 105, allowing physical, special, or mixed sets depending on the generation and available moves. Octillery is particularly notable for special coverage far beyond that of most Water-types, with combinations such as Surf or Hydro Pump, Ice Beam, Fire Blast, Energy Ball, Psychic, and other options letting it target many common Water answers. Its major limitation is base 45 Speed and merely average 75/75/75 bulk, so Octillery often has to take a hit before using that excellent coverage and can be overwhelmed by stronger or faster attackers. Suction Cups prevents forced switching, Sniper can strengthen critical hits, and Moody can produce extreme stat swings in games where it is available, but ordinary playthroughs usually benefit more from Octillery's straightforward offensive movepool than from building around unreliable random boosts.
Remoraid in Competitive Pokémon
Octillery has rarely escaped low competitive tiers despite possessing excellent mixed offenses and one of the broadest special coverage movepools among Water-types. Base 105 Attack and Special Attack let it threaten would-be counters with moves such as Hydro Pump, Fire Blast, Ice Beam, Energy Ball, and Gunk Shot, while Sniper can support critical-hit-focused sets and Suction Cups prevents opposing phazing moves from forcing it out. The problem is base 45 Speed combined with only average bulk, which means faster attackers often remove Octillery before it can exploit its coverage and bulkier Water-types can usually perform defensive or offensive roles more efficiently. Its Hidden Ability Moody has historically been banned or heavily restricted in many standard singles environments because the automatic random stat changes can create uncompetitive snowballing, so competitive Octillery is generally evaluated without relying on it. The result is a Pokemon with genuinely threatening move selection but insufficient Speed and durability to convert that versatility into consistent high-level success.
Remoraid in Nuzlockes
Remoraid can become useful quickly in a Nuzlocke because it evolves into Octillery at level 25 and does not require a stone, trade, or friendship condition. Octillery's pure Water typing leaves only Grass and Electric weaknesses, while equal base 105 offenses and enormous coverage let it adapt its moveset to whatever gaps the rest of the team has. Its main weakness is tempo: base 45 Speed means it will often take a hit before acting, and base 75 defenses are not high enough to make repeated strong neutral attacks comfortable in a permadeath run. Because Octillery can attack from either side, it can exploit opponents with lopsided defenses more easily than many Water-types, but the player should still avoid asking it to absorb unknown Electric or Grass coverage. It is a flexible and often underrated team member when encountered, but it is safer as a deliberate coverage attacker than as a universal defensive Water-type.
Learnsets
7 moves · Legends Arceus
Level Up — Legends Arceus



Pokédex Entries
18 entries
It has superb accuracy. The water it shoots out can strike even moving prey from more than 300 feet.
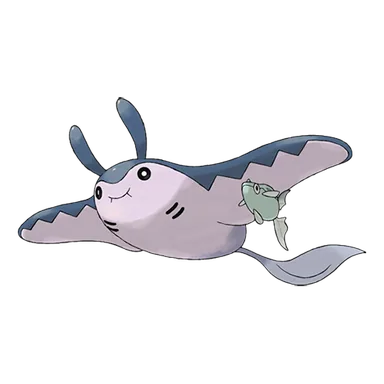
Using its dorsal fin as a suction pad, it clings to a MANTINE's underside to scavenge for leftovers.
To escape from an attacker, it may shoot water out of its mouth, then use that force to swim backward.
REMORAID sucks in water, then expels it at high velocity using its abdominal muscles to shoot down flying prey. When evolution draws near, this POKéMON travels downstream from rivers.
A REMORAID uses its abdominal muscles to forcefully expel swallowed water, then shoot down flying prey. When evolution approaches, it travels down rivers.
Using its dorsal fin as a suction pad, it clings to a MANTINE’s underside to scavenge for leftovers.
It has superb accuracy. The water it shoots out can strike even moving prey from more than 100 yards.
It squirts water forcefully from its mouth to shoot down flying prey.
It clings to MANTINE to feed on the big Pokémon’s scraps. This is an adaptation to avoid foes.
It forcefully squirts water. The water jet never misses prey even if the REMORAID is deep in the sea.
It has superb accuracy. The water it shoots out can strike moving prey from more than 300 feet away.
It forcefully squirts water. The water jet never misses prey even if the Remoraid is deep in the sea.
The water they shoot from their mouths can hit moving prey from more than 300 feet away.
Using its dorsal fin as a suction pad, it clings to a Mantine’s underside to scavenge for leftovers.
Remoraid sucks in water, then expels it at high velocity using its abdominal muscles to shoot down flying prey. When evolution draws near, this Pokémon travels downstream from rivers.
This Pokémon clings to Mantine and shares in its prosperity. When its Mantine is attacked, Remoraid will fight alongside it!
Also known as the “sniper of the seas,” its water gun can hit prey without fail from over 300 feet away.
Spits water from its mouth with incredible accuracy. It captures Burmy by shooting them down off the branches from which they dangle.
Where To Find Remoraid
32 locations
Hau'oli City · AlolaBubbling Spots, SOS Encounter, Super Rod · version details vary
Hauoli City Beachfront
Kala’e Bay · AlolaBubbling Spots, SOS Encounter, Super Rod · version details vary
Kalae Bay Area
Melemele Sea · AlolaBubbling Spots, SOS Encounter, Super Rod · version details vary
Melemele Sea Area
Route 8 · AlolaBubbling Spots, Super Rod · version details vary
Alola Route 8 Main
Safari Zone · HoennGood Rod, Super Rod · version details vary
Safari Zone (expansion south)
Route 44 · JohtoGood Rod, Old Rod, Super Rod · version details vary
Road 44
Azure Bay · KalosGood Rod · version details vary
Azure Bay
Route 12 · KalosGood Rod · version details vary
Road 12
Shalour City · KalosGood Rod · version details vary
Shalour City
Five Isle Meadow · KantoSuper Rod · version details vary
Five Isle Meadow
Green Path · KantoSuper Rod · version details vary
Green Path
Memorial Pillar · KantoSuper Rod · version details vary
Memorial Pillar
Outcast Island · KantoSuper Rod · version details vary
Outcast Island
Resort Gorgeous · KantoSuper Rod · version details vary
Resort Gorgeous
Tanoby Ruins · KantoSuper Rod · version details vary
Tanoby Ruins
Trainer Tower · KantoSuper Rod · version details vary
Trainer Tower
Water Labyrinth · KantoSuper Rod · version details vary
Water Labyrinth
Water Path · KantoSuper Rod · version details vary
Water Path
Pyrite Bldg · OrreSnag · version details vary
Pyrite Bldg 4F
Pyrite Cave · OrreSnag Rematch · version details vary
Pyrite Cave (Miror's Hideout)
Pastoria City · SinnohGood Rod · version details vary
Pastoria City
Pokémon League · SinnohGood Rod · version details vary
Sinnoh League
Route 212 · SinnohGood Rod · version details vary
Road 212 (east, towards Pastoria City)
Route 213 · SinnohGood Rod · version details vary
Road 213
Route 222 · SinnohGood Rod · version details vary
Road 222
Route 224 · SinnohGood Rod · version details vary
Road 224
Sea Route 223 · SinnohGood Rod · version details vary
Road 223
Sea Route 230 · SinnohGood Rod · version details vary
Road 230
Sunyshore City · SinnohGood Rod · version details vary
Sunyshore City
Route 21 · UnovaSuper Rod, Super Rod Spots, Surf · version details vary
Road 21
Undella Bay · UnovaSuper Rod, Super Rod Spots, Surf · version details vary
Undella Bay
Undella Town · UnovaSuper Rod · version details vary
Undella Town
Additional Images
PokeAPI sprites
Open this section to load extra PokeAPI sprite images.
Remoraid Biology and Behavior
Remoraid is an exceptionally accurate aquatic hunter capable of firing concentrated jets of water from its mouth at moving targets more than 300 feet, or roughly 100 meters, away. It generates the pressure with powerful abdominal muscles and uses the technique to knock flying prey such as Burmy out of the air, earning the species the nickname 'sniper of the seas.' The same water jets can be fired in reverse to propel Remoraid backward when it needs to escape danger. Its dorsal fin functions like a suction pad, allowing Remoraid to attach beneath Mantine, eat scraps left behind by its host, travel with it, and even help defend it against attackers. Remoraid also gather in schools of their own kind and may move downstream from rivers toward the sea as evolution approaches.
Remoraid Biological Data
- National Pokédex
- #223
- Species
- Jet Pokémon
- Height
- 2' 0" (0.6 m)
- Weight
- 26.5 lbs (12.0 kg)
- Habitat
- Sea
- Color
- Gray
- Body Style
- Fish
- Gender
- 50% female / 50% male
Misc
Catch Rate: 190
Base Experience: 60 Exp
Hatch Counter: 20
Remoraid Size Comparison: BETA
Remoraid is listed at 2' 0" (0.6 m); this chart uses a pose-adjusted visual scale.
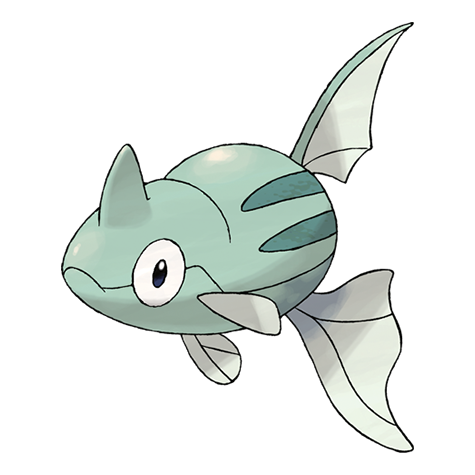

How is visual size determined?
Pokédex height is treated as the official listed measurement, but the chart uses pose-aware visual scaling so each sprite looks reasonable in a direct comparison.
For long or coiled Pokémon, the listed height may represent total body length rather than upright height. For Pokémon with floppy ears, leaves, feathers, antennae, wings, or other flexible features, the chart usually measures to the top of the solid, substantial part of the head or body instead of the tallest decorative feature.
The goal is not to replace the official height, but to make the artwork compare naturally at the size it appears to occupy.
Remoraid currently uses a pose-adjusted visual scale.