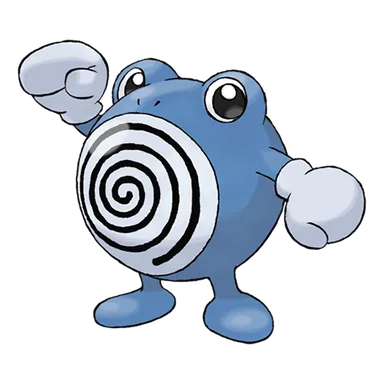
Poliwhirl is a Water-type Pokémon introduced in Generation I and a middle stage of its evolution line, with a base stat total of 385.
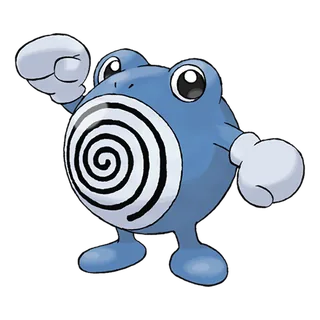
Poliwhirl

Poliwhirl

Abilities

Water Absorb

Changes water into HP.

Damp

Prevents self-destruction.

Swift Swim

Raises SPEED in rain.

Hidden Ability

Base Stats

Total: 385
EV Yield: 2 Speed
HP: 65
Attack: 65
Defense: 65
Sp. Atk: 50
Sp. Def: 50
Speed: 90

Poliwhirl's Weaknesses and Resistances

Evolution Chain

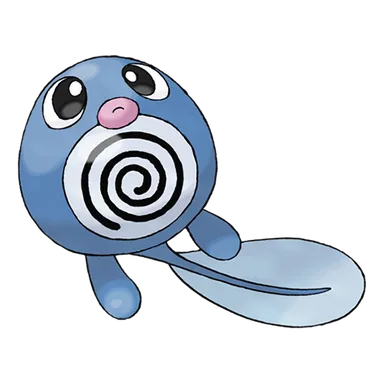
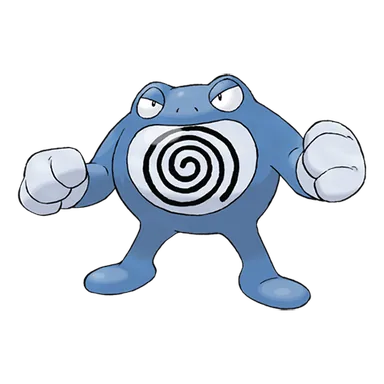
Poliwag evolves into Poliwhirl at level 25, and Poliwhirl can then evolve into Poliwrath with a Water Stone or Politoed by trading while holding a Kings Rock.

Poliwhirl Playthrough, Competitive, and Nuzlocke Usage

Using Poliwhirl in a Playthrough

The Poliwag line offers two distinct final evolutions after Poliwhirl. Poliwrath becomes Water/Fighting and combines balanced mixed bulk with physical strength, Water STAB, Fighting coverage, and useful abilities such as Water Absorb; it is dependable but often competes with both stronger Water-types and stronger Fighting-types. Politoed remains pure Water and tends to emphasize special offense, support, and weather more than direct physical combat, with Drizzle becoming especially valuable in games where the ability is obtainable. Poliwrath requires a Water Stone while Politoed traditionally requires a King's Rock trade evolution, so accessibility can strongly influence which branch is practical during a playthrough.

Poliwhirl in Competitive Pokémon

Poliwrath has filled several competitive roles, including bulky Water/Fighting tank, Water Absorb switch-in, phazer with Circle Throw, and niche rain sweeper through Swift Swim. Belly Drum sets have also attempted to turn its balanced statistics into late-game offense. Politoed's competitive importance changed dramatically when it gained Drizzle, because automatic rain made it one of the defining weather enablers of Generation V and continued to support rain teams in later formats. Outside weather-centric environments, Politoed's fairly ordinary raw statistics make it much less distinctive. The evolutionary choice therefore creates two fundamentally different competitive Pokemon: Poliwrath supplies typing, bulk, and direct battle utility, while Politoed's greatest historical contribution is enabling an entire weather-based team structure.

Poliwhirl in Nuzlockes

The Poliwag line provides a relatively safe Water-type foundation because Poliwrath and Politoed both have workable bulk and Water typing offers relatively few weaknesses. Poliwrath can gain especially safe switching opportunities through Water Absorb and has enough physical durability to handle many neutral attacks, but FireRed and LeafGreen community evaluations note that it competes with numerous excellent Water-types and does not dominate the Fighting role either. Politoed can be valuable where available, particularly with Drizzle, but its trade evolution requirement can make it inaccessible under some Nuzlocke rules or game setups. The line is consequently reliable but highly dependent on which evolution method, ability, and competing Water encounters are available in a particular game.

Learnsets

61 moves · Scarlet Violet

Level Up

1 Pound normal type 40 100 physical move
1 Water Gun water type 40 100 special move
1 Hypnosis psychic type --- 60 status move
1 Mud Shot ground type 55 95 special move
18 Bubble Beam water type 65 100 special move
24 Rain Dance water type --- --- status move
32 Body Slam normal type 85 100 physical move
40 Earth Power ground type 90 100 special move
48 Hydro Pump water type 110 80 special move
56 Belly Drum normal type --- --- status move
66 Double-Edge normal type 120 100 physical move

Machine

- Ice Punch ice type 75 100 physical move
- Body Slam normal type 85 100 physical move
- Take Down normal type 90 85 physical move
- Double-Edge normal type 120 100 physical move
- Hydro Pump water type 110 80 special move
- Surf water type 90 100 special move
- Ice Beam ice type 90 100 special move
- Blizzard ice type 110 70 special move
- Low Kick fighting type --- 100 physical move
- Earthquake ground type 100 100 physical move
- Dig ground type 80 100 physical move
- Psychic psychic type 90 100 special move
- Haze ice type --- --- status move
- Metronome normal type --- --- status move
- Waterfall water type 80 100 physical move
- Swift normal type 60 --- special move
- Amnesia psychic type --- --- status move
- Rest psychic type --- --- status move
- Substitute normal type --- --- status move
- Thief dark type 60 100 physical move
- Protect normal type --- --- status move
- Mud-Slap ground type 20 100 special move
- Icy Wind ice type 55 95 special move
- Endure normal type --- --- status move
- Sleep Talk normal type --- --- status move
- Encore normal type --- 100 status move
- Rain Dance water type --- --- status move
- Psych Up normal type --- --- status move
- Whirlpool water type 35 85 special move
- Facade normal type 70 100 physical move
- Focus Punch fighting type 150 100 physical move
- Helping Hand normal type --- --- status move
- Brick Break fighting type 75 100 physical move
- Endeavor normal type --- 100 physical move
- Weather Ball normal type 50 100 special move
- Muddy Water water type 90 85 special move
- Mud Shot ground type 55 95 special move
- Water Pulse water type 60 100 special move
- Fling dark type --- 100 physical move
- Earth Power ground type 90 100 special move
- Low Sweep fighting type 65 100 physical move
- Bulldoze ground type 60 100 physical move
- Liquidation water type 85 100 physical move
- Tera Blast normal type 80 100 special move
- Chilling Water water type 50 100 special move

Egg

- Mist ice type --- --- status move
- Splash normal type --- --- status move
- Endeavor normal type --- 100 physical move
- Muddy Water water type 90 85 special move
- Water Pulse water type 60 100 special move

Pokédex Entries

18 entries
Red / Blue

Capable of living in or out of water. When out of water, it sweats to keep its body slimy.

Yellow / Lets Go Pikachu / Lets Go Eevee

Under attack, it uses its belly spiral to put the foe to sleep. It then makes its escape.

Gold

The swirl on its belly subtly undulates. Staring at it may gradually cause drowsiness.

Silver / Soulsilver

The skin on most of its body is moist. However, the skin on its belly spiral feels smooth.

Crystal

Though it is skilled at walking, it prefers to live underwater where there is less danger.

Ruby / Sapphire

The surface of POLIWHIRL’s body is always wet and slick with an oily fluid. Because of this greasy covering, it can easily slip and slide out of the clutches of any enemy in battle.

Emerald

Its body surface is always wet and slick with an oily fluid. Because of this greasy covering, it can easily slip and slide out of the clutches of any enemy in battle.

Firered / Y

Its two legs are well developed. Even though it can live on the ground, it prefers living in water.

Leafgreen / X

It can live in or out of water. When out of water, it constantly sweats to keep its body slimy.

Diamond / Pearl / Platinum / Black / White / Black 2 / White 2

The spiral pattern on its belly subtly undulates. Staring at it gradually causes drowsiness.

Heartgold

The swirl on its belly subtly undulates. Staring at it may gradually cause drowsiness.

Omega Ruby / Alpha Sapphire

The surface of Poliwhirl’s body is always wet and slick with a slimy fluid. Because of this slippery covering, it can easily slip and slide out of the clutches of any enemy in battle.

Sun

Although it can live on land, it prefers to stay in the water, where it has fewer natural enemies.

Moon

It marches over the land in search of bug Pokémon to eat. Then it takes them underwater so it can dine on them where it’s safe.

Ultra Sun

Although it has become capable of living on land, it spends its time in the water, where its prey, fish Pokémon, are plentiful.

Ultra Moon

Its health suffers when its skin dries out, so be sure to moisturize it diligently.

Sword

Staring at the swirl on its belly causes drowsiness. This trait of Poliwhirl’s has been used in place of lullabies to get children to go to sleep.

Shield

This Pokémon’s sweat is a slimy mucus. When captured, Poliwhirl can slither from its enemies’ grasp and escape.

Where To Find Poliwhirl

50 locations
Konikoni City · AlolaNpc Trade · version details vary

Konikoni City Area

Moon max 100%
Npc Trade · Lv. 22 · 100%
Sun max 100%
Npc Trade · Lv. 22 · 100%
Malie Garden · AlolaSOS Encounter, Walking · version details vary

Malie Garden Area

Moon max 10%
SOS Encounter · Lv. 24–27 · 10%
Sun max 10%
SOS Encounter · Lv. 24–27 · 10%
Ultra Moon max 30%
SOS Encounter · Lv. 25–28 · 10%Walking · Lv. 25–28 · 20%
Ultra Sun max 30%
SOS Encounter · Lv. 25–28 · 10%Walking · Lv. 25–28 · 20%
Ecruteak City · JohtoSurf · version details vary

Ecruteak City

Crystal max 10%
Surf · Lv. 20–24 · 10%
Gold max 10%
Surf · Lv. 20–24 · 10%
HeartGold max 10%
Surf · Lv. 15–25 · 5%Surf · Lv. 15–25 · 4%Surf · Lv. 15–25 · 1%
Silver max 10%
Surf · Lv. 20–24 · 10%
SoulSilver max 10%
Surf · Lv. 15–25 · 5%Surf · Lv. 15–25 · 4%Surf · Lv. 15–25 · 1%
Johto Safari Zone · JohtoGood Rod, Super Rod, Surf · version details vary

Safari Zone Marshland

HeartGold max 140%
Good Rod · Lv. 24 · 10%Good Rod · Lv. 25 · 10%Super Rod · Lv. 7 · 10%Super Rod · Lv. 8 · 10%Super Rod · Lv. 35 · 10%Super Rod · Lv. 36 · 10%Super Rod · Lv. 37 · 10%
SoulSilver max 140%
Good Rod · Lv. 24 · 10%Good Rod · Lv. 25 · 10%Super Rod · Lv. 7 · 10%Super Rod · Lv. 8 · 10%Super Rod · Lv. 35 · 10%Super Rod · Lv. 36 · 10%Super Rod · Lv. 37 · 10%

Safari Zone Meadow

HeartGold max 80%
Good Rod · Lv. 24 · 10%Good Rod · Lv. 25 · 10%Super Rod · Lv. 35 · 10%Super Rod · Lv. 36 · 10%Super Rod · Lv. 37 · 10%Super Rod · Lv. 38 · 10%
SoulSilver max 80%
Good Rod · Lv. 24 · 10%Good Rod · Lv. 25 · 10%Super Rod · Lv. 35 · 10%Super Rod · Lv. 36 · 10%Super Rod · Lv. 37 · 10%Super Rod · Lv. 38 · 10%

Safari Zone Rocky Beach

HeartGold max 20%
Surf · Lv. 16 · 10%Surf · Lv. 17 · 10%
SoulSilver max 20%
Surf · Lv. 16 · 10%Surf · Lv. 17 · 10%

Safari Zone Wetland

HeartGold max 80%
Good Rod · Lv. 23 · 10%Good Rod · Lv. 24 · 10%Good Rod · Lv. 25 · 10%Super Rod · Lv. 35 · 10%Super Rod · Lv. 36 · 10%Super Rod · Lv. 37 · 10%
SoulSilver max 80%
Good Rod · Lv. 23 · 10%Good Rod · Lv. 24 · 10%Good Rod · Lv. 25 · 10%Super Rod · Lv. 35 · 10%Super Rod · Lv. 36 · 10%Super Rod · Lv. 37 · 10%
Mt. Silver · JohtoSurf, Walking · version details vary

Mount Silver (outside)

Crystal max 130%
Surf · Lv. 35–39 · 60%Surf · Lv. 40–44 · 30%Walking · Lv. 42 · 30% · Time NightWalking · Lv. 44 · 10% · Time Night
Gold max 90%
Surf · Lv. 35–39 · 60%Surf · Lv. 40–44 · 30%
HeartGold max 91%
Surf · Lv. 30–40 · 60%Surf · Lv. 35–45 · 30%Surf · Lv. 48 · 1%
Silver max 90%
Surf · Lv. 35–39 · 60%Surf · Lv. 40–44 · 30%
SoulSilver max 91%
Surf · Lv. 30–40 · 60%Surf · Lv. 35–45 · 30%Surf · Lv. 48 · 1%
Route 30 · JohtoSurf · version details vary

Road 30

Crystal max 10%
Surf · Lv. 20–24 · 10%
Gold max 10%
Surf · Lv. 20–24 · 10%
HeartGold max 10%
Surf · Lv. 15–25 · 5%Surf · Lv. 15–25 · 4%Surf · Lv. 32 · 1%
Silver max 10%
Surf · Lv. 20–24 · 10%
SoulSilver max 10%
Surf · Lv. 15–25 · 5%Surf · Lv. 15–25 · 4%Surf · Lv. 32 · 1%
Route 31 · JohtoSurf · version details vary

Road 31

Crystal max 10%
Surf · Lv. 20–24 · 10%
Gold max 10%
Surf · Lv. 20–24 · 10%
HeartGold max 10%
Surf · Lv. 15–25 · 5%Surf · Lv. 15–25 · 4%Surf · Lv. 32 · 1%
Silver max 10%
Surf · Lv. 20–24 · 10%
SoulSilver max 10%
Surf · Lv. 15–25 · 5%Surf · Lv. 15–25 · 4%Surf · Lv. 32 · 1%
Route 44 · JohtoSurf, Walking · version details vary

Road 44

Crystal max 20%
Surf · Lv. 25–29 · 10%Walking · Lv. 24 · 5% · Time NightWalking · Lv. 26 · 4% · Time NightWalking · Lv. 26 · 1% · Time Night
Gold max 10%
Surf · Lv. 25–29 · 10%
HeartGold max 10%
Surf · Lv. 20–30 · 5%Surf · Lv. 20–30 · 4%Surf · Lv. 20–30 · 1%
Silver max 10%
Surf · Lv. 25–29 · 10%
SoulSilver max 10%
Surf · Lv. 20–30 · 5%Surf · Lv. 20–30 · 4%Surf · Lv. 20–30 · 1%
Violet City · JohtoSurf · version details vary

Violet City

Crystal max 10%
Surf · Lv. 20–24 · 10%
Gold max 10%
Surf · Lv. 20–24 · 10%
HeartGold max 10%
Surf · Lv. 15–25 · 5%Surf · Lv. 15–25 · 4%Surf · Lv. 15–25 · 1%
Silver max 10%
Surf · Lv. 20–24 · 10%
SoulSilver max 10%
Surf · Lv. 15–25 · 5%Surf · Lv. 15–25 · 4%Surf · Lv. 15–25 · 1%
Couriway Town · KalosGood Rod, Super Rod · version details vary

Couriway Town

X max 100%
Good Rod · Lv. 35 · 35%Super Rod · Lv. 45 · 60%Super Rod · Lv. 45 · 5%
Y max 100%
Good Rod · Lv. 35 · 35%Super Rod · Lv. 45 · 60%Super Rod · Lv. 45 · 5%
Friend Safari · KalosWalking · version details vary

Friend Safari (Water)

X max 33%
Walking · Lv. 30 · 33% · Friend Safari Slot 3
Y max 33%
Walking · Lv. 30 · 33% · Friend Safari Slot 3
Frost Cavern · KalosGood Rod, Super Rod, Surf · version details vary

Frost Cavern (unknown area 313)

X max 166%
Good Rod · Lv. 30 · 35%Super Rod · Lv. 40 · 60%Super Rod · Lv. 40 · 5%Surf · Lv. 38 · 50%Surf · Lv. 39 · 15%Surf · Lv. 40 · 1%
Y max 166%
Good Rod · Lv. 30 · 35%Super Rod · Lv. 40 · 60%Super Rod · Lv. 40 · 5%Surf · Lv. 38 · 50%Surf · Lv. 39 · 15%Surf · Lv. 40 · 1%

Frost Cavern (unknown area 315)

X max 166%
Good Rod · Lv. 30 · 35%Super Rod · Lv. 40 · 60%Super Rod · Lv. 40 · 5%Surf · Lv. 38 · 50%Surf · Lv. 39 · 15%Surf · Lv. 40 · 1%
Y max 166%
Good Rod · Lv. 30 · 35%Super Rod · Lv. 40 · 60%Super Rod · Lv. 40 · 5%Surf · Lv. 38 · 50%Surf · Lv. 39 · 15%Surf · Lv. 40 · 1%
Laverre City · KalosGood Rod, Super Rod · version details vary

Laverre City

X max 100%
Good Rod · Lv. 25 · 35%Super Rod · Lv. 35 · 60%Super Rod · Lv. 35 · 5%
Y max 100%
Good Rod · Lv. 25 · 35%Super Rod · Lv. 35 · 60%Super Rod · Lv. 35 · 5%
Pokémon Village · KalosGood Rod, Super Rod, Surf · version details vary

Pokemon Village

X max 134%
Good Rod · Lv. 40 · 35%Super Rod · Lv. 50 · 60%Super Rod · Lv. 50 · 5%Surf · Lv. 48 · 30%Surf · Lv. 50 · 4%
Y max 134%
Good Rod · Lv. 40 · 35%Super Rod · Lv. 50 · 60%Super Rod · Lv. 50 · 5%Surf · Lv. 48 · 30%Surf · Lv. 50 · 4%
Route 14 · KalosGood Rod, Super Rod · version details vary

Road 14

X max 100%
Good Rod · Lv. 35 · 35%Super Rod · Lv. 35 · 60%Super Rod · Lv. 35 · 5%
Y max 100%
Good Rod · Lv. 35 · 35%Super Rod · Lv. 35 · 60%Super Rod · Lv. 35 · 5%
Route 15 · KalosGood Rod, Super Rod · version details vary

Road 15

X max 100%
Good Rod · Lv. 25 · 35%Super Rod · Lv. 35 · 60%Super Rod · Lv. 35 · 5%
Y max 100%
Good Rod · Lv. 25 · 35%Super Rod · Lv. 35 · 60%Super Rod · Lv. 35 · 5%
Route 16 · KalosGood Rod, Super Rod · version details vary

Road 16

X max 100%
Good Rod · Lv. 25 · 35%Super Rod · Lv. 35 · 60%Super Rod · Lv. 35 · 5%
Y max 100%
Good Rod · Lv. 25 · 35%Super Rod · Lv. 35 · 60%Super Rod · Lv. 35 · 5%
Route 19 · KalosGood Rod, Super Rod · version details vary

Road 19

X max 95%
Good Rod · Lv. 35 · 35%Super Rod · Lv. 45 · 60%
Y max 95%
Good Rod · Lv. 35 · 35%Super Rod · Lv. 45 · 60%
Route 21 · KalosGood Rod, Super Rod · version details vary

Road 21

X max 95%
Good Rod · Lv. 40 · 35%Super Rod · Lv. 50 · 60%
Y max 95%
Good Rod · Lv. 40 · 35%Super Rod · Lv. 50 · 60%
Victory Road · KalosGood Rod, Super Rod, Surf · version details vary

Victory Road (unknown area 322)

X max 166%
Good Rod · Lv. 45 · 35%Super Rod · Lv. 55 · 60%Super Rod · Lv. 55 · 5%Surf · Lv. 57 · 50%Surf · Lv. 58 · 15%Surf · Lv. 59 · 1%
Y max 166%
Good Rod · Lv. 45 · 35%Super Rod · Lv. 55 · 60%Super Rod · Lv. 55 · 5%Surf · Lv. 57 · 50%Surf · Lv. 58 · 15%Surf · Lv. 59 · 1%

Victory Road (unknown area 327)

X max 100%
Good Rod · Lv. 45 · 35%Super Rod · Lv. 55 · 60%Super Rod · Lv. 55 · 5%
Y max 100%
Good Rod · Lv. 45 · 35%Super Rod · Lv. 55 · 60%Super Rod · Lv. 55 · 5%

Victory Road (unknown area 328)

X max 161%
Good Rod · Lv. 45 · 35%Super Rod · Lv. 55 · 60%Surf · Lv. 57 · 50%Surf · Lv. 58 · 15%Surf · Lv. 59 · 1%
Y max 161%
Good Rod · Lv. 45 · 35%Super Rod · Lv. 55 · 60%Surf · Lv. 57 · 50%Surf · Lv. 58 · 15%Surf · Lv. 59 · 1%
Cape Brink · KantoSuper Rod · version details vary

Cape Brink

FireRed max 40%
Super Rod · Lv. 20–30 · 40%
LeafGreen max 40%
Super Rod · Lv. 20–30 · 40%
Celadon City · KantoSuper Rod · version details vary

Celadon City

Blue max 50%
Super Rod · Lv. 23 · 25%Super Rod · Lv. 23 · 17%Super Rod · Lv. 23 · 8%
Green Japan max 50%
Super Rod · Lv. 23 · 25%Super Rod · Lv. 23 · 17%Super Rod · Lv. 23 · 8%
Red max 50%
Super Rod · Lv. 23 · 25%Super Rod · Lv. 23 · 17%Super Rod · Lv. 23 · 8%
Red Japan max 50%
Super Rod · Lv. 23 · 25%Super Rod · Lv. 23 · 17%Super Rod · Lv. 23 · 8%
Cerulean Cave · KantoSuper Rod, Overworld Water · version details vary

Cerulean Cave (1F)

FireRed max 40%
Super Rod · Lv. 20–30 · 40%
HeartGold max 60%
Super Rod · Lv. 40 · 30% · Time DaySuper Rod · Lv. 40 · 30% · Time Morning
LeafGreen max 40%
Super Rod · Lv. 20–30 · 40%
Lets Go Eevee max 100%
Overworld Water · Lv. 51–56 · 100%
Lets Go Pikachu max 100%
Overworld Water · Lv. 51–56 · 100%
SoulSilver max 60%
Super Rod · Lv. 40 · 30% · Time DaySuper Rod · Lv. 40 · 30% · Time Morning

Cerulean Cave (2F)

HeartGold max 60%
Super Rod · Lv. 40 · 30% · Time DaySuper Rod · Lv. 40 · 30% · Time Morning
SoulSilver max 60%
Super Rod · Lv. 40 · 30% · Time DaySuper Rod · Lv. 40 · 30% · Time Morning

Cerulean Cave (B1F)

FireRed max 40%
Super Rod · Lv. 20–30 · 40%
HeartGold max 60%
Super Rod · Lv. 40 · 30% · Time DaySuper Rod · Lv. 40 · 30% · Time Morning
LeafGreen max 40%
Super Rod · Lv. 20–30 · 40%
Lets Go Eevee max 100%
Overworld Water · Lv. 51–56 · 100%
Lets Go Pikachu max 100%
Overworld Water · Lv. 51–56 · 100%
SoulSilver max 60%
Super Rod · Lv. 40 · 30% · Time DaySuper Rod · Lv. 40 · 30% · Time Morning
Four Island · KantoSuper Rod · version details vary

Four Island

FireRed max 40%
Super Rod · Lv. 20–30 · 40%
LeafGreen max 40%
Super Rod · Lv. 20–30 · 40%
Icefall Cave · KantoSuper Rod · version details vary

Icefall Cave (entrance)

FireRed max 40%
Super Rod · Lv. 20–30 · 40%
LeafGreen max 40%
Super Rod · Lv. 20–30 · 40%
Route 10 · KantoSuper Rod · version details vary

Road 10

Blue max 50%
Super Rod · Lv. 23 · 25%Super Rod · Lv. 23 · 17%Super Rod · Lv. 23 · 8%
Green Japan max 50%
Super Rod · Lv. 23 · 25%Super Rod · Lv. 23 · 17%Super Rod · Lv. 23 · 8%
Red max 50%
Super Rod · Lv. 23 · 25%Super Rod · Lv. 23 · 17%Super Rod · Lv. 23 · 8%
Red Japan max 50%
Super Rod · Lv. 23 · 25%Super Rod · Lv. 23 · 17%Super Rod · Lv. 23 · 8%
Route 22 · KantoSurf, Super Rod, Overworld Water · version details vary

Road 22

Crystal max 10%
Surf · Lv. 10–14 · 10%
FireRed max 40%
Super Rod · Lv. 20–30 · 40%
Gold max 10%
Surf · Lv. 10–14 · 10%
HeartGold max 10%
Surf · Lv. 10 · 5%Surf · Lv. 10 · 4%Surf · Lv. 10 · 1%
LeafGreen max 40%
Super Rod · Lv. 20–30 · 40%
Lets Go Eevee max 100%
Overworld Water · Lv. 3–4 · 100%
Lets Go Pikachu max 100%
Overworld Water · Lv. 3–4 · 100%
Silver max 10%
Surf · Lv. 10–14 · 10%
SoulSilver max 10%
Surf · Lv. 10 · 5%Surf · Lv. 10 · 4%Surf · Lv. 10 · 1%
Yellow max 10%
Super Rod · Lv. 15 · 10%
Route 23 · KantoSuper Rod, Overworld Water · version details vary

Road 23

FireRed max 40%
Super Rod · Lv. 20–30 · 40%
LeafGreen max 40%
Super Rod · Lv. 20–30 · 40%
Lets Go Eevee max 100%
Overworld Water · Lv. 41–46 · 100%
Lets Go Pikachu max 100%
Overworld Water · Lv. 41–46 · 100%
Yellow max 30%
Super Rod · Lv. 30 · 20%Super Rod · Lv. 40 · 10%
Route 25 · KantoSuper Rod, Overworld Water · version details vary

Road 25

FireRed max 40%
Super Rod · Lv. 20–30 · 40%
LeafGreen max 40%
Super Rod · Lv. 20–30 · 40%
Lets Go Eevee max 100%
Overworld Water · Lv. 9–14 · 100%
Lets Go Pikachu max 100%
Overworld Water · Lv. 9–14 · 100%
Route 28 · KantoSurf, Walking · version details vary

Road 28

Crystal max 50%
Surf · Lv. 40–44 · 10%Walking · Lv. 40 · 30% · Time NightWalking · Lv. 40 · 10% · Time Night
Gold max 10%
Surf · Lv. 40–44 · 10%
HeartGold max 10%
Surf · Lv. 40 · 5%Surf · Lv. 40 · 4%Surf · Lv. 40 · 1%
Silver max 10%
Surf · Lv. 40–44 · 10%
SoulSilver max 10%
Surf · Lv. 40 · 5%Surf · Lv. 40 · 4%Surf · Lv. 40 · 1%
Route 6 · KantoSuper Rod · version details vary

Road 6

FireRed max 40%
Super Rod · Lv. 20–30 · 40%
LeafGreen max 40%
Super Rod · Lv. 20–30 · 40%
Ruin Valley · KantoSuper Rod · version details vary

Ruin Valley

FireRed max 40%
Super Rod · Lv. 20–30 · 40%
LeafGreen max 40%
Super Rod · Lv. 20–30 · 40%
Viridian City · KantoSurf, Super Rod · version details vary

Viridian City

Crystal max 10%
Surf · Lv. 10–14 · 10%
FireRed max 40%
Super Rod · Lv. 20–30 · 40%
Gold max 10%
Surf · Lv. 10–14 · 10%
HeartGold max 10%
Surf · Lv. 10 · 5%Surf · Lv. 10 · 4%Surf · Lv. 10 · 1%
LeafGreen max 40%
Super Rod · Lv. 20–30 · 40%
Silver max 10%
Surf · Lv. 10–14 · 10%
SoulSilver max 10%
Surf · Lv. 10 · 5%Surf · Lv. 10 · 4%Surf · Lv. 10 · 1%
Route 225 · SinnohSuper Rod, Surf · version details vary

Road 225

Diamond max 75%
Super Rod · Lv. 30–40 · 40%Super Rod · Lv. 35–55 · 4%Super Rod · Lv. 35–55 · 1%Surf · Lv. 40–50 · 30%
Pearl max 75%
Super Rod · Lv. 30–40 · 40%Super Rod · Lv. 35–55 · 4%Super Rod · Lv. 35–55 · 1%Surf · Lv. 40–50 · 30%
Route 227 · SinnohSurf · version details vary

Road 227

Diamond max 70%
Surf · Lv. 40–50 · 60%Surf · Lv. 45–55 · 5%Surf · Lv. 45–55 · 4%Surf · Lv. 45–55 · 1%
Pearl max 70%
Surf · Lv. 40–50 · 60%Surf · Lv. 45–55 · 5%Surf · Lv. 45–55 · 4%Surf · Lv. 45–55 · 1%
Platinum max 70%
Surf · Lv. 35–55 · 60%Surf · Lv. 35–55 · 5%Surf · Lv. 35–55 · 4%Surf · Lv. 35–55 · 1%
Route 228 · SinnohSurf · version details vary

Road 228

Diamond max 70%
Surf · Lv. 40–50 · 60%Surf · Lv. 45–55 · 5%Surf · Lv. 45–55 · 4%Surf · Lv. 45–55 · 1%
Pearl max 70%
Surf · Lv. 40–50 · 60%Surf · Lv. 45–55 · 5%Surf · Lv. 45–55 · 4%Surf · Lv. 45–55 · 1%
Platinum max 70%
Surf · Lv. 35–55 · 60%Surf · Lv. 35–55 · 5%Surf · Lv. 35–55 · 4%Surf · Lv. 35–55 · 1%
Challenger's Cave · UnovaSuper Rod, Super Rod Spots · version details vary

Challengers Cave (B2F)

Black max 70%
Super Rod · Lv. 35–55 · 15%Super Rod Spots · Lv. 35–60 · 40%Super Rod Spots · Lv. 35–70 · 15%
White max 70%
Super Rod · Lv. 35–55 · 15%Super Rod Spots · Lv. 35–60 · 40%Super Rod Spots · Lv. 35–70 · 15%
Clay Tunnel · UnovaSuper Rod Spots · version details vary

Clay Tunnel

Black 2 max 55%
Super Rod Spots · Lv. 50–60 · 40%Super Rod Spots · Lv. 60 · 15%
White 2 max 55%
Super Rod Spots · Lv. 50–60 · 40%Super Rod Spots · Lv. 60 · 15%
Floccesy Ranch · UnovaSuper Rod Spots · version details vary

Floccesy Ranch (inner)

Black 2 max 55%
Super Rod Spots · Lv. 40–60 · 40%Super Rod Spots · Lv. 50–70 · 15%
White 2 max 55%
Super Rod Spots · Lv. 40–60 · 40%Super Rod Spots · Lv. 50–70 · 15%

Floccesy Ranch (outer)

Black 2 max 55%
Super Rod Spots · Lv. 40–60 · 40%Super Rod Spots · Lv. 50–70 · 15%
White 2 max 55%
Super Rod Spots · Lv. 40–60 · 40%Super Rod Spots · Lv. 50–70 · 15%
Giant Chasm · UnovaSuper Rod, Super Rod Spots · version details vary

Giant Chasm

Black max 70%
Super Rod · Lv. 35–55 · 15%Super Rod Spots · Lv. 35–60 · 40%Super Rod Spots · Lv. 35–70 · 15%
Black 2 max 55%
Super Rod Spots · Lv. 40–60 · 40%Super Rod Spots · Lv. 50–70 · 15%
White max 70%
Super Rod · Lv. 35–55 · 15%Super Rod Spots · Lv. 35–60 · 40%Super Rod Spots · Lv. 35–70 · 15%
White 2 max 55%
Super Rod Spots · Lv. 40–60 · 40%Super Rod Spots · Lv. 50–70 · 15%

Giant Chasm (forest cave)

Black max 70%
Super Rod · Lv. 35–55 · 15%Super Rod Spots · Lv. 35–60 · 40%Super Rod Spots · Lv. 45–70 · 15%
White max 70%
Super Rod · Lv. 35–55 · 15%Super Rod Spots · Lv. 35–60 · 40%Super Rod Spots · Lv. 45–70 · 15%
Lostlorn Forest · UnovaSuper Rod Spots · version details vary

Lostlorn Forest

Black 2 max 55%
Super Rod Spots · Lv. 40–60 · 40%Super Rod Spots · Lv. 50–70 · 15%
White 2 max 55%
Super Rod Spots · Lv. 40–60 · 40%Super Rod Spots · Lv. 50–70 · 15%
Pinwheel Forest · UnovaHidden Grotto · version details vary

Pinwheel Forest (Hidden Grotto – Outer area)

Black 2 max 5%
Hidden Grotto · Lv. 55–59 · 5%
White 2 max 5%
Hidden Grotto · Lv. 55–59 · 5%
Relic Passage · UnovaSuper Rod Spots · version details vary

Relic Tunnel (Relic Castle entrance)

Black 2 max 55%
Super Rod Spots · Lv. 40–60 · 40%Super Rod Spots · Lv. 50–70 · 15%
White 2 max 55%
Super Rod Spots · Lv. 40–60 · 40%Super Rod Spots · Lv. 50–70 · 15%
Route 19 · UnovaSuper Rod Spots · version details vary

Road 19

Black 2 max 55%
Super Rod Spots · Lv. 40–60 · 40%Super Rod Spots · Lv. 50–70 · 15%
White 2 max 55%
Super Rod Spots · Lv. 40–60 · 40%Super Rod Spots · Lv. 50–70 · 15%
Route 20 · UnovaSuper Rod Spots · version details vary

Road 20

Black 2 max 55%
Super Rod Spots · Lv. 40–60 · 40%Super Rod Spots · Lv. 50–70 · 15%
White 2 max 55%
Super Rod Spots · Lv. 40–60 · 40%Super Rod Spots · Lv. 50–70 · 15%
Route 23 · UnovaSuper Rod Spots · version details vary

Road 23

Black 2 max 55%
Super Rod Spots · Lv. 40–60 · 40%Super Rod Spots · Lv. 50–70 · 15%
White 2 max 55%
Super Rod Spots · Lv. 40–60 · 40%Super Rod Spots · Lv. 50–70 · 15%
Route 6 · UnovaSuper Rod, Super Rod Spots · version details vary

Road 6

Black max 70%
Super Rod · Lv. 35–55 · 15%Super Rod Spots · Lv. 35–60 · 40%Super Rod Spots · Lv. 35–70 · 15%
Black 2 max 55%
Super Rod Spots · Lv. 40–60 · 40%Super Rod Spots · Lv. 50–70 · 15%
White max 70%
Super Rod · Lv. 35–55 · 15%Super Rod Spots · Lv. 35–60 · 40%Super Rod Spots · Lv. 35–70 · 15%
White 2 max 55%
Super Rod Spots · Lv. 40–60 · 40%Super Rod Spots · Lv. 50–70 · 15%
Victory Road · UnovaSuper Rod, Super Rod Spots · version details vary

Victory Road (unknown area 53)

Black max 70%
Super Rod · Lv. 35–55 · 15%Super Rod Spots · Lv. 35–60 · 40%Super Rod Spots · Lv. 35–70 · 15%
White max 70%
Super Rod · Lv. 35–55 · 15%Super Rod Spots · Lv. 35–60 · 40%Super Rod Spots · Lv. 35–70 · 15%

Victory Road (unknown area 58)

Black max 70%
Super Rod · Lv. 35–55 · 15%Super Rod Spots · Lv. 35–60 · 40%Super Rod Spots · Lv. 35–70 · 15%
White max 70%
Super Rod · Lv. 35–55 · 15%Super Rod Spots · Lv. 35–60 · 40%Super Rod Spots · Lv. 35–70 · 15%
Victory Road · UnovaSuper Rod Spots · version details vary

Victory Road 2 (unknown area 71)

Black 2 max 55%
Super Rod Spots · Lv. 40–60 · 40%Super Rod Spots · Lv. 50–60 · 15%
White 2 max 55%
Super Rod Spots · Lv. 40–60 · 40%Super Rod Spots · Lv. 50–60 · 15%

Victory Road 2 (unknown area 73)

Black 2 max 55%
Super Rod Spots · Lv. 40–60 · 40%Super Rod Spots · Lv. 50–70 · 15%
White 2 max 55%
Super Rod Spots · Lv. 40–60 · 40%Super Rod Spots · Lv. 50–70 · 15%

Victory Road 2 (unknown area 75)

Black 2 max 55%
Super Rod Spots · Lv. 40–60 · 40%Super Rod Spots · Lv. 50–70 · 15%
White 2 max 55%
Super Rod Spots · Lv. 40–60 · 40%Super Rod Spots · Lv. 50–70 · 15%

Victory Road 2 (unknown area 78)

Black 2 max 55%
Super Rod Spots · Lv. 40–60 · 40%Super Rod Spots · Lv. 50–70 · 15%
White 2 max 55%
Super Rod Spots · Lv. 40–60 · 40%Super Rod Spots · Lv. 50–70 · 15%

Victory Road 2 (unknown area 79)

Black 2 max 55%
Super Rod Spots · Lv. 40–60 · 40%Super Rod Spots · Lv. 50–70 · 15%
White 2 max 55%
Super Rod Spots · Lv. 40–60 · 40%Super Rod Spots · Lv. 50–70 · 15%
Wellspring Cave · UnovaSuper Rod, Super Rod Spots · version details vary

Wellspring Cave

Black max 70%
Super Rod · Lv. 35–55 · 15%Super Rod Spots · Lv. 35–60 · 40%Super Rod Spots · Lv. 35–60 · 15%
Black 2 max 55%
Super Rod Spots · Lv. 50–60 · 40%Super Rod Spots · Lv. 60 · 15%
White max 70%
Super Rod · Lv. 35–55 · 15%Super Rod Spots · Lv. 35–60 · 40%Super Rod Spots · Lv. 35–60 · 15%
White 2 max 55%
Super Rod Spots · Lv. 50–60 · 40%Super Rod Spots · Lv. 60 · 15%

Held Items

1 items
King’s Rock
  • Ruby: 5% chance
  • Sapphire: 5% chance
  • Emerald: 5% chance
  • Diamond: 5% chance
  • Pearl: 5% chance
  • Platinum: 5% chance
  • Heartgold: 5% chance
  • Soulsilver: 5% chance
  • Black: 5% chance
  • White: 5% chance
  • Black 2: 5% chance
  • White 2: 5% chance
  • X: 5% chance
  • Y: 5% chance
  • Omega Ruby: 5% chance
  • Alpha Sapphire: 5% chance
  • Sun: 5% chance
  • Moon: 5% chance
  • Ultra Sun: 5% chance
  • Ultra Moon: 5% chance

Additional Images

PokeAPI sprites

Open this section to load extra PokeAPI sprite images.

Poliwhirl Biology and Behavior

Poliwhirl can live on land but prefers freshwater, where it faces fewer natural enemies. When outside water it secretes an oily mucus that keeps its skin moist and makes its body extremely slippery, allowing it to escape predators that grab it. The visible spiral on its abdomen slowly undulates and can induce drowsiness in creatures that stare at it, a property Poliwhirl uses defensively and that has also been used to make children sleep. It hunts both fish and insect Pokemon, sometimes leaving the water to catch insects before returning underwater to consume them.

Poliwhirl Biological Data

National Pokédex
#61
Species
Tadpole Pokémon
Height
3' 3" (1.0 m)
Weight
44.1 lbs (20.0 kg)
Habitat
Waters Edge
Color
Blue
Body Style
Humanoid
Gender
50% female / 50% male

Misc

Catch Rate: 120

Base Experience: 135 Exp

Hatch Counter: 20

Poliwhirl Size Comparison: BETA

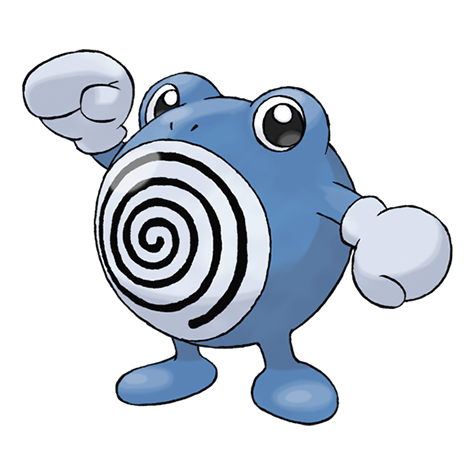
Poliwhirl is listed at 3' 3" (1.0 m); this chart uses a pose-adjusted visual scale.
7 ft6 ft5 ft4 ft3 ft2 ft1 ft0 ft
poliwhirl
Professor Oak
How is visual size determined?

Pokédex height is treated as the official listed measurement, but the chart uses pose-aware visual scaling so each sprite looks reasonable in a direct comparison.

For long or coiled Pokémon, the listed height may represent total body length rather than upright height. For Pokémon with floppy ears, leaves, feathers, antennae, wings, or other flexible features, the chart usually measures to the top of the solid, substantial part of the head or body instead of the tallest decorative feature.

The goal is not to replace the official height, but to make the artwork compare naturally at the size it appears to occupy.

Poliwhirl currently uses a pose-adjusted visual scale.