Wishiwashi Solo is a Water-type Pokémon introduced in Generation VII, with a base stat total of 175 and no standard evolutions.
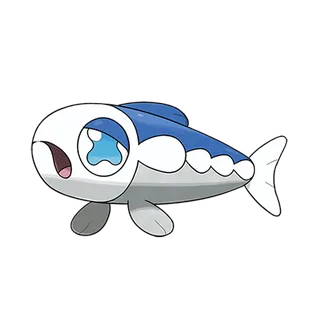
Wishiwashi Solo

Abilities
When it has a lot of HP, the Pokémon forms a powerful school. It stops schooling when its HP is low.
Base Stats
Wishiwashi Solo's Weaknesses and Resistances



Evolution Chain
Wishiwashi Solo does not evolve into or from any other Pokémon.
 Wishiwashi Solo
Forms
 Wishiwashi School
Wishiwashi Solo Playthrough, Competitive, and Nuzlocke Usage
Using Wishiwashi Solo in a Playthrough
Wishiwashi is mechanically unusual because it never evolves, but from level 20 onward its Schooling Ability can transform it into School Form whenever it enters battle or ends a turn above 25% of its maximum HP. That transformation is the entire reason to use it: Solo Form has extremely poor combat stats, while School Form jumps to base 140 Attack, 140 Special Attack, 130 Defense, and 135 Special Defense, giving it extraordinary offensive and defensive numbers for the point at which the mechanic becomes available. The tradeoff is that School Form still has only base 45 HP and base 30 Speed, so Wishiwashi usually takes a hit before attacking and can abruptly collapse back into its extremely frail Solo Form if its HP falls to 25% or lower. Its equal physical and special attacking stats make either Waterfall or Liquidation and Surf or Hydro Pump legitimate STAB approaches, while Ice Beam and U-turn can provide useful coverage or momentum where available. Pure Water typing is straightforward but effective, leaving only Grass and Electric weaknesses while resisting Fire, Ice, Steel, and Water, and its huge School Form defenses often allow it to absorb strong neutral attacks despite its low HP. A Brave or Quiet Nature can suit deliberately slow physical or special sets, while mixed playthrough sets often benefit more from keeping both attacking stats usable than from forcing a single specialized Nature.
Wishiwashi Solo in Competitive Pokémon
Wishiwashi never became a high-tier singles staple, but its School Form has repeatedly supported a real lower-tier niche because its enormous mixed bulk and attacking stats make it function more like a slow heavyweight than its tiny Solo Form suggests. In Generation VII it was placed in ZU, where defensive RestTalk and slow-pivot sets used Scald and U-turn to exploit School Form's bulk while minimizing the risk of dropping below the Schooling threshold. Generation VIII was considerably kinder to it: Wishiwashi rose to PU, and Smogon described it as one of the tier's best bulky pivots because it could absorb attacks from common threats, threaten them with strong Water moves, and use a very slow U-turn to bring frailer teammates in safely. Its greatest competitive flaw has always been the Schooling threshold itself; once Wishiwashi falls to 25% HP or less, its defenses and offenses collapse so severely that the opponent can often force it out immediately. It also lacks dependable instant recovery and is vulnerable to common Grass- and Electric-types, so repeated switching, entry hazards, and chip damage can undermine the very bulk that gives it a niche. Wishiwashi is not available in standard Scarlet and Violet play, so it has no ordinary Generation IX usage-tier history there; its established competitive reputation remains primarily that of a specialized slow pivot and tank from Generations VII and VIII.
Wishiwashi Solo in Nuzlockes
Wishiwashi can be extremely powerful in a Nuzlocke once it reaches level 20, but it must be managed around the 25% HP threshold rather than treated like a conventional bulky Water-type. Above the threshold, School Form's enormous defenses give it substantial margin for error against neutral attacks, while its huge Attack and Special Attack let it retaliate without needing setup. The danger is that a strong hit can push it to 25% HP or lower at the end of the turn, immediately returning it to Solo Form with drastically worse defenses and leaving it exposed to a follow-up attack if it cannot be healed or switched safely. Its low Speed means it often has to absorb damage before acting, so blind matchups against Grass- or Electric-type coverage are particularly dangerous even when School Form appears healthy. A slow U-turn can be valuable because Wishiwashi can take the opponent's attack first and then bring in a teammate without exposing that teammate to the same hit, provided Wishiwashi remains above the Schooling threshold. Reliable Water STAB and only two type weaknesses make it a strong Nuzlocke asset, but the run should always track its current HP percentage rather than judging safety only by how impressive School Form's defensive stats look.
Learnsets
14 moves · Sword Shield
Level Up — Sword Shield





Pokédex Entries
6 entries
When it’s in trouble, its eyes moisten and begin to shine. The shining light attracts its comrades, and they stand together against their enemies.
It’s awfully weak and notably tasty, so everyone is always out to get it. As it happens, anyone trying to bully it receives a painful lesson.
They’re weak, so they move in schools. However, they can also often be seen all alone, having strayed from the school.
When it’s in a jam, its shining eyes attract others of its kind. The light from its eyes is visible almost 25 miles away.
Individually, they’re incredibly weak. It’s by gathering up into schools that they’re able to confront opponents.
When it senses danger, its eyes tear up. The sparkle of its tears signals other Wishiwashi to gather.
Where To Find Wishiwashi Solo
14 locations
Akala Outskirts · AlolaBubbling Spots, Super Rod · version details vary
Akala Outskirts Area
Brooklet Hill · AlolaBubbling Spots, Super Rod · version details vary
Brooklet Hill Totems Den
Hau'oli City · AlolaBubbling Spots, Super Rod · version details vary
Hauoli City Beachfront
Kala’e Bay · AlolaBubbling Spots, Super Rod · version details vary
Kalae Bay Area
Melemele Sea · AlolaBubbling Spots, Super Rod · version details vary
Melemele Sea Area
Route 13 · AlolaSuper Rod · version details vary
Alola Route 13 Area
Route 14 · AlolaBubbling Spots, Super Rod · version details vary
Alola Route 14 Area
Route 15 · AlolaBubbling Spots, Super Rod · version details vary
Alola Route 15 Main
Route 7 · AlolaSuper Rod, Bubbling Spots · version details vary
Alola Route 7 Area
Route 8 · AlolaBubbling Spots, Super Rod · version details vary
Alola Route 8 Main
Route 9 · AlolaSuper Rod · version details vary
Alola Route 9 Main
Secluded Shore · AlolaSuper Rod · version details vary
Secluded Shore Area
Tapu Village · AlolaBubbling Spots, Super Rod · version details vary
Tapu Village Area
Hulbury · GalarBubbling Spots · version details vary
Hulbury
Additional Images
PokeAPI sprites
Open this section to load extra PokeAPI sprite images.
Wishiwashi Solo Biology and Behavior
An individual Wishiwashi is exceptionally small and weak and is described as notably tasty, making it prey for numerous species including Dewgong, Wailmer, Wailord, Wingull, Pelipper, and even humans. Although Wishiwashi often travel in schools, individuals may also be found alone after straying from the group. When threatened, a Wishiwashi's eyes tear up and shine brightly, producing an SOS signal visible from nearly 25 miles away that summons others of its species. This response turns a species that is individually easy prey into one whose predators risk attracting an entire defensive school.
Wishiwashi Solo Biological Data
- National Pokédex
- #746
- Species
- Small Fry Pokémon
- Height
- 0' 8" (0.2 m)
- Weight
- 0.7 lbs (0.3 kg)
- Habitat
- Currently Unknown
- Color
- Blue
- Body Style
- Fish
- Gender
- 50% female / 50% male
Misc
Catch Rate: 60
Base Experience: 61 Exp
Hatch Counter: 15
Wishiwashi Solo Size Comparison: BETA
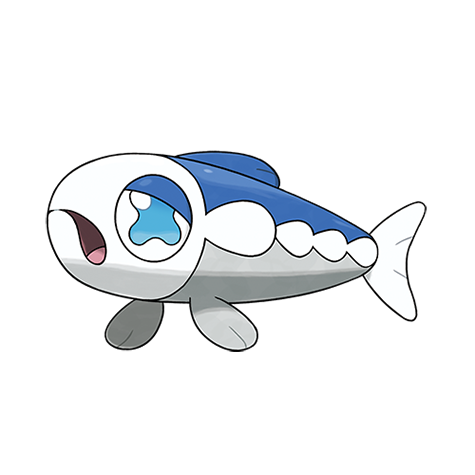
Wishiwashi Solo is listed at 0' 8" (0.2 m) and shown in an in-chart visual comparison.

How is visual size determined?
Pokédex height is treated as the official listed measurement, but the chart uses pose-aware visual scaling so each sprite looks reasonable in a direct comparison.
For long or coiled Pokémon, the listed height may represent total body length rather than upright height. For Pokémon with floppy ears, leaves, feathers, antennae, wings, or other flexible features, the chart usually measures to the top of the solid, substantial part of the head or body instead of the tallest decorative feature.
The goal is not to replace the official height, but to make the artwork compare naturally at the size it appears to occupy.