Barboach is a Water/Ground-type Pokémon introduced in Generation III and the first stage of its evolution line, with a base stat total of 288.
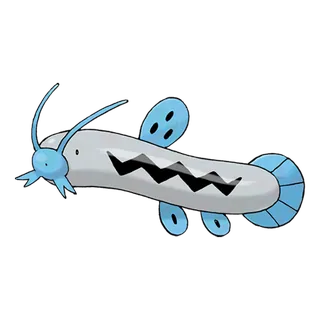
Barboach


Barboach

Abilities

Oblivious

Prevents attraction.

Anticipation

Senses the foe’s dangerous moves.

Hydration

Heals status problems if it is raining.

Hidden Ability

Base Stats

Total: 288
EV Yield: 1 HP
HP: 50
Attack: 48
Defense: 43
Sp. Atk: 46
Sp. Def: 41
Speed: 60

Barboach's Weaknesses and Resistances

Evolution Chain

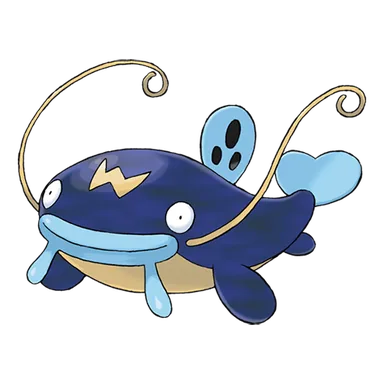
Barboach evolves into Whiscash at level 30.
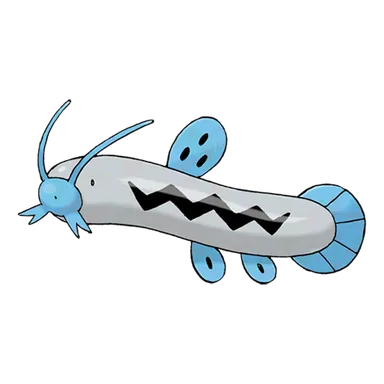
Barboach Playthrough, Competitive, and Nuzlocke Usage

Using Barboach in a Playthrough

Barboach evolves into Whiscash at level 30, producing a Water/Ground Pokemon whose greatest practical strength is an excellent defensive typing rather than exceptional raw stats. The combination grants a complete Electric immunity and resistances to Fire, Poison, Rock, and Steel while leaving Grass as its only ordinary weakness, although Grass attacks deal devastating quadruple damage. Whiscash has base 110 HP but only middling defenses and offenses, with base 78 Attack and 76 Special Attack; in Generation III this balance works reasonably well because Water attacks are special while Ground attacks such as Earthquake are physical. Later games can add tools such as Dragon Dance, Waterfall, Aqua Tail, Zen Headbutt, Stone Edge, Ice coverage, and utility, while Hydration can remove status during rain and Anticipation can warn the player when an opponent carries a super-effective or one-hit-knockout move. Whiscash is therefore a comfortable story Pokemon when exploiting its Electric immunity and broad STAB coverage, but its modest power and Speed mean it rarely sweeps without setup and any suspected Grass coverage should be treated as an emergency.

Barboach in Competitive Pokémon

Whiscash has generally remained in the lowest competitive tiers because Water/Ground is an excellent typing attached to underwhelming offensive and defensive numbers. Base 110 HP looks impressive, but 73 Defense and 71 Special Defense make the actual bulk only moderate, while base 78 Attack, 76 Special Attack, and 60 Speed provide little immediate pressure. Dragon Dance gives Whiscash a rare setup option that can raise both Attack and Speed, but Smogon analyses have repeatedly noted that even after a boost it often lacks the power and Speed to clean teams as reliably as stronger setup sweepers. Later formats have also used Stealth Rock, Spikes, Earthquake, Water STAB, and utility to give it a more supportive identity, while Hydration can theoretically support Rest or status recovery in rain. Its defining competitive problem is therefore not a lack of useful mechanics but efficiency: many other Water/Ground Pokemon possess the same excellent typing alongside stronger stats, recovery, or utility.

Barboach in Nuzlockes

Whiscash is a generally safe Nuzlocke Pokemon because Water/Ground typing compresses its defensive risks into one glaring category: Grass. The Electric immunity creates excellent switch opportunities, base 110 HP gives useful insurance against neutral attacks, and Water plus Ground STAB can cover a large portion of ordinary opponents. Anticipation can be especially useful in a blind or partially blind run because a warning on entry may reveal that an apparently harmless opponent carries a super-effective or one-hit-knockout move. The danger is absolute when Grass coverage appears, since quadruple damage can erase Whiscash even from high health and its mediocre Speed often prevents it from escaping by simply attacking first. Used with disciplined coverage checking, the line offers far more Nuzlocke safety than its modest competitive reputation would suggest.

Learnsets

56 moves · Scarlet Violet

Level Up

1 Water Gun water type 40 100 special move
1 Mud-Slap ground type 20 100 special move
6 Rest psychic type --- --- status move
6 Snore normal type 50 100 special move
12 Water Pulse water type 60 100 special move
18 Amnesia psychic type --- --- status move
24 Aqua Tail water type 90 90 physical move
31 Muddy Water water type 90 85 special move
36 Earthquake ground type 100 100 physical move
42 Future Sight psychic type 120 100 special move
48 Fissure ground type --- 30 physical move

Machine

- Take Down normal type 90 85 physical move
- Double-Edge normal type 120 100 physical move
- Hydro Pump water type 110 80 special move
- Surf water type 90 100 special move
- Ice Beam ice type 90 100 special move
- Blizzard ice type 110 70 special move
- Earthquake ground type 100 100 physical move
- Waterfall water type 80 100 physical move
- Swift normal type 60 --- special move
- Amnesia psychic type --- --- status move
- Rest psychic type --- --- status move
- Rock Slide rock type 75 90 physical move
- Substitute normal type --- --- status move
- Protect normal type --- --- status move
- Mud-Slap ground type 20 100 special move
- Icy Wind ice type 55 95 special move
- Outrage dragon type 120 100 physical move
- Sandstorm rock type --- --- status move
- Endure normal type --- --- status move
- Sleep Talk normal type --- --- status move
- Rain Dance water type --- --- status move
- Sunny Day fire type --- --- status move
- Future Sight psychic type 120 100 special move
- Whirlpool water type 35 85 special move
- Facade normal type 70 100 physical move
- Helping Hand normal type --- --- status move
- Rock Tomb rock type 60 95 physical move
- Muddy Water water type 90 85 special move
- Mud Shot ground type 55 95 special move
- Dragon Dance dragon type --- --- status move
- Water Pulse water type 60 100 special move
- Earth Power ground type 90 100 special move
- Zen Headbutt psychic type 80 90 physical move
- Stone Edge rock type 100 80 physical move
- Stealth Rock rock type --- --- status move
- Bulldoze ground type 60 100 physical move
- High Horsepower ground type 95 95 physical move
- Stomping Tantrum ground type 75 100 physical move
- Liquidation water type 85 100 physical move
- Tera Blast normal type 80 100 special move
- Chilling Water water type 50 100 special move

Egg

- Take Down normal type 90 85 physical move
- Thrash normal type 120 100 physical move
- Flail normal type --- 100 physical move
- Spark electric type 65 100 physical move

Pokédex Entries

15 entries
Ruby

BARBOACH’s sensitive whiskers serve as a superb radar system. This POKéMON hides in mud, leaving only its two whiskers exposed while it waits for prey to come along.

Sapphire

BARBOACH’s body is covered with a slimy film. If a foe grabs it, this POKéMON just slips out of the enemy’s grip. This POKéMON grows weak if the slimy coating dries up.

Emerald

Its body is covered with a slimy film. The film acts as a barrier to prevent germs in muddy water from entering the BARBOACH’s body.

Firered / Leafgreen / Shield

It probes muddy riverbeds with its two long whiskers. A slimy film protects its body.

Diamond / X

It coats its entire body with a slimy fluid so it can squirm and slip away if grabbed.

Pearl / Y

Its whiskers make a superb radar. They are used to locate prey, even in the murkiest of water.

Platinum / Black / White / Black 2 / White 2 / Sword

Its slimy body is hard to grasp. In one region, it is said to have been born from hardened mud.

Heartgold / Soulsilver

BARBOACH uses its whiskers to taste things just as a person uses his or her tongue to taste things.

Omega Ruby

Barboach’s sensitive whiskers serve as a superb radar system. This Pokémon hides in mud, leaving only its two whiskers exposed while it waits for prey to come along.

Alpha Sapphire

Barboach’s body is covered with a slimy film. If a foe grabs it, this Pokémon just slips out of the enemy’s grip. This Pokémon grows weak if the slimy coating dries up.

Sun

Its two whiskers provide a sensitive radar. Even in muddy waters, it can detect its prey’s location.

Moon

Its slippery body is hard to grasp, so much so that there are festivals where people compete to see how many they can catch barehanded.

Ultra Sun

Its entire body is gooey. When pecked at by bird Pokémon, it slips and slides its way to freedom.

Ultra Moon

Its whiskers are filled with nerves. They can sense smells and flavors just as a person’s nose or tongue would.

Legends Arceus

Makes its home in swamps with murky water. The poor visibility hides this Pokémon from predators, and the slime on its body makes grasping it difficult.

Where To Find Barboach

31 locations
Paniola Town · AlolaBubbling Spots, Super Rod · version details vary

Paniola Town Area

Moon max 51%
Bubbling Spots · Lv. 10–18 · 50%Super Rod · Lv. 10–18 · 1%
Sun max 51%
Bubbling Spots · Lv. 10–18 · 50%Super Rod · Lv. 10–18 · 1%
Ultra Moon max 70%
Bubbling Spots · Lv. 10–22 · 60%Super Rod · Lv. 10–17 · 10%
Ultra Sun max 70%
Bubbling Spots · Lv. 10–22 · 60%Super Rod · Lv. 10–17 · 10%
Poni Gauntlet · AlolaBubbling Spots, Super Rod · version details vary

Poni Gauntlet Area

Moon max 80%
Bubbling Spots · Lv. 10–59 · 40%Super Rod · Lv. 10–59 · 40%
Sun max 80%
Bubbling Spots · Lv. 10–59 · 40%Super Rod · Lv. 10–59 · 40%
Ultra Moon max 80%
Bubbling Spots · Lv. 10–66 · 40%Super Rod · Lv. 10–61 · 40%
Ultra Sun max 80%
Bubbling Spots · Lv. 10–66 · 40%Super Rod · Lv. 10–61 · 40%
Poni Meadow · AlolaBubbling Spots, Super Rod · version details vary

Poni Meadow Area

Moon max 80%
Bubbling Spots · Lv. 10–57 · 40%Super Rod · Lv. 10–57 · 40%
Sun max 80%
Bubbling Spots · Lv. 10–57 · 40%Super Rod · Lv. 10–57 · 40%
Ultra Moon max 80%
Bubbling Spots · Lv. 10–62 · 40%Super Rod · Lv. 10–57 · 40%
Ultra Sun max 80%
Bubbling Spots · Lv. 10–62 · 40%Super Rod · Lv. 10–57 · 40%
Royal Avenue · AlolaNpc Trade · version details vary

Royal Avenue Area

Ultra Moon max 100%
Npc Trade · Lv. 21 · 100%
Ultra Sun max 100%
Npc Trade · Lv. 21 · 100%
Seaward Cave · AlolaBubbling Spots, Super Rod · version details vary

Seaward Cave Area

Moon max 51%
Bubbling Spots · Lv. 10–15 · 50%Super Rod · Lv. 10–15 · 1%
Sun max 51%
Bubbling Spots · Lv. 10–15 · 50%Super Rod · Lv. 10–15 · 1%
Ultra Moon max 70%
Bubbling Spots · Lv. 10–22 · 60%Super Rod · Lv. 10–17 · 10%
Ultra Sun max 70%
Bubbling Spots · Lv. 10–22 · 60%Super Rod · Lv. 10–17 · 10%
Vast Poni Canyon · AlolaBubbling Spots, Super Rod · version details vary

Vast Poni Canyon Northwest

Moon max 80%
Bubbling Spots · Lv. 10–44 · 40%Super Rod · Lv. 10–44 · 40%
Sun max 80%
Bubbling Spots · Lv. 10–44 · 40%Super Rod · Lv. 10–44 · 40%
Ultra Moon max 45%
Bubbling Spots · Lv. 10–51 · 20%Super Rod · Lv. 10–46 · 25%
Ultra Sun max 45%
Bubbling Spots · Lv. 10–51 · 20%Super Rod · Lv. 10–46 · 25%
Galar Mine No. 2 · GalarBubbling Spots · version details vary

Galar Mine No. 2

Shield max 55%
Bubbling Spots · Lv. 20–24 · 55%
Sword max 55%
Bubbling Spots · Lv. 20–24 · 55%
Motostoke · GalarBubbling Spots · version details vary

Motostoke

Shield max 10%
Bubbling Spots · Lv. 7–11 · 10%
Sword max 10%
Bubbling Spots · Lv. 7–11 · 10%
Meteor Falls · HoennGood Rod, Super Rod · version details vary

Meteor Falls

Emerald max 120%
Good Rod · Lv. 10–30 · 20%Super Rod · Lv. 20–25 · 15%Super Rod · Lv. 25–30 · 40%Super Rod · Lv. 30–35 · 40%Super Rod · Lv. 35–40 · 4%Super Rod · Lv. 40–45 · 1%
Ruby max 120%
Good Rod · Lv. 10–30 · 20%Super Rod · Lv. 20–25 · 15%Super Rod · Lv. 25–30 · 40%Super Rod · Lv. 30–35 · 40%Super Rod · Lv. 35–40 · 4%Super Rod · Lv. 40–45 · 1%
Sapphire max 120%
Good Rod · Lv. 10–30 · 20%Super Rod · Lv. 20–25 · 15%Super Rod · Lv. 25–30 · 40%Super Rod · Lv. 30–35 · 40%Super Rod · Lv. 35–40 · 4%Super Rod · Lv. 40–45 · 1%

Meteor Falls (B1F)

Emerald max 100%
Good Rod · Lv. 10–30 · 20%Super Rod · Lv. 25–30 · 40%Super Rod · Lv. 30–35 · 40%
Ruby max 100%
Good Rod · Lv. 10–30 · 20%Super Rod · Lv. 25–30 · 40%Super Rod · Lv. 30–35 · 40%
Sapphire max 100%
Good Rod · Lv. 10–30 · 20%Super Rod · Lv. 25–30 · 40%Super Rod · Lv. 30–35 · 40%

Meteor Falls (back)

Emerald max 100%
Good Rod · Lv. 10–30 · 20%Super Rod · Lv. 25–30 · 40%Super Rod · Lv. 30–35 · 40%
Ruby max 100%
Good Rod · Lv. 10–30 · 20%Super Rod · Lv. 25–30 · 40%Super Rod · Lv. 30–35 · 40%
Sapphire max 100%
Good Rod · Lv. 10–30 · 20%Super Rod · Lv. 25–30 · 40%Super Rod · Lv. 30–35 · 40%

Meteor Falls (back/small room)

Emerald max 100%
Good Rod · Lv. 10–30 · 20%Super Rod · Lv. 25–30 · 40%Super Rod · Lv. 30–35 · 40%
Ruby max 100%
Good Rod · Lv. 10–30 · 20%Super Rod · Lv. 25–30 · 40%Super Rod · Lv. 30–35 · 40%
Sapphire max 100%
Good Rod · Lv. 10–30 · 20%Super Rod · Lv. 25–30 · 40%Super Rod · Lv. 30–35 · 40%
Route 111 · HoennGood Rod, Super Rod · version details vary

Road 111

Emerald max 120%
Good Rod · Lv. 10–30 · 20%Super Rod · Lv. 20–25 · 15%Super Rod · Lv. 25–30 · 40%Super Rod · Lv. 30–35 · 40%Super Rod · Lv. 35–40 · 4%Super Rod · Lv. 40–45 · 1%
Ruby max 120%
Good Rod · Lv. 10–30 · 20%Super Rod · Lv. 20–25 · 15%Super Rod · Lv. 25–30 · 40%Super Rod · Lv. 30–35 · 40%Super Rod · Lv. 35–40 · 4%Super Rod · Lv. 40–45 · 1%
Sapphire max 120%
Good Rod · Lv. 10–30 · 20%Super Rod · Lv. 20–25 · 15%Super Rod · Lv. 25–30 · 40%Super Rod · Lv. 30–35 · 40%Super Rod · Lv. 35–40 · 4%Super Rod · Lv. 40–45 · 1%
Route 114 · HoennGood Rod, Super Rod · version details vary

Road 114

Emerald max 120%
Good Rod · Lv. 10–30 · 20%Super Rod · Lv. 20–25 · 15%Super Rod · Lv. 25–30 · 40%Super Rod · Lv. 30–35 · 40%Super Rod · Lv. 35–40 · 4%Super Rod · Lv. 40–45 · 1%
Ruby max 120%
Good Rod · Lv. 10–30 · 20%Super Rod · Lv. 20–25 · 15%Super Rod · Lv. 25–30 · 40%Super Rod · Lv. 30–35 · 40%Super Rod · Lv. 35–40 · 4%Super Rod · Lv. 40–45 · 1%
Sapphire max 120%
Good Rod · Lv. 10–30 · 20%Super Rod · Lv. 20–25 · 15%Super Rod · Lv. 25–30 · 40%Super Rod · Lv. 30–35 · 40%Super Rod · Lv. 35–40 · 4%Super Rod · Lv. 40–45 · 1%
Route 120 · HoennGood Rod, Super Rod · version details vary

Road 120

Emerald max 120%
Good Rod · Lv. 10–30 · 20%Super Rod · Lv. 20–25 · 15%Super Rod · Lv. 25–30 · 40%Super Rod · Lv. 30–35 · 40%Super Rod · Lv. 35–40 · 4%Super Rod · Lv. 40–45 · 1%
Ruby max 120%
Good Rod · Lv. 10–30 · 20%Super Rod · Lv. 20–25 · 15%Super Rod · Lv. 25–30 · 40%Super Rod · Lv. 30–35 · 40%Super Rod · Lv. 35–40 · 4%Super Rod · Lv. 40–45 · 1%
Sapphire max 120%
Good Rod · Lv. 10–30 · 20%Super Rod · Lv. 20–25 · 15%Super Rod · Lv. 25–30 · 40%Super Rod · Lv. 30–35 · 40%Super Rod · Lv. 35–40 · 4%Super Rod · Lv. 40–45 · 1%
Victory Road · HoennGood Rod, Super Rod · version details vary

Victory Road (B2F)

Emerald max 100%
Good Rod · Lv. 10–30 · 20%Super Rod · Lv. 25–30 · 40%Super Rod · Lv. 30–35 · 40%
Ruby max 100%
Good Rod · Lv. 10–30 · 20%Super Rod · Lv. 25–30 · 40%Super Rod · Lv. 30–35 · 40%
Sapphire max 100%
Good Rod · Lv. 10–30 · 20%Super Rod · Lv. 25–30 · 40%Super Rod · Lv. 30–35 · 40%
Route 14 · KalosGood Rod · version details vary

Road 14

X max 65%
Good Rod · Lv. 25 · 60%Good Rod · Lv. 35 · 5%
Y max 65%
Good Rod · Lv. 25 · 60%Good Rod · Lv. 35 · 5%
Route 19 · KalosGood Rod · version details vary

Road 19

X max 65%
Good Rod · Lv. 35 · 60%Good Rod · Lv. 35 · 5%
Y max 65%
Good Rod · Lv. 35 · 60%Good Rod · Lv. 35 · 5%
Celestic Town · SinnohGood Rod · version details vary

Celestic Town

Diamond max 45%
Good Rod · Lv. 10–25 · 4%Good Rod · Lv. 10–25 · 1%Good Rod · Lv. 15–20 · 40%
Pearl max 45%
Good Rod · Lv. 10–25 · 4%Good Rod · Lv. 10–25 · 1%Good Rod · Lv. 15–20 · 40%
Eterna City · SinnohGood Rod · version details vary

Eterna City

Diamond max 45%
Good Rod · Lv. 10–25 · 4%Good Rod · Lv. 10–25 · 1%Good Rod · Lv. 15–20 · 40%
Pearl max 45%
Good Rod · Lv. 10–25 · 4%Good Rod · Lv. 10–25 · 1%Good Rod · Lv. 15–20 · 40%
Platinum max 45%
Good Rod · Lv. 10–25 · 4%Good Rod · Lv. 10–25 · 1%Good Rod · Lv. 15–20 · 40%
Great Marsh · SinnohGood Rod · version details vary

Great Marsh Area 1

Diamond max 40%
Good Rod · Lv. 15–20 · 40%
Pearl max 40%
Good Rod · Lv. 15–20 · 40%
Platinum max 45%
Good Rod · Lv. 10–25 · 4%Good Rod · Lv. 10–25 · 1%Good Rod · Lv. 15–20 · 40%

Great Marsh Area 2

Diamond max 40%
Good Rod · Lv. 15–20 · 40%
Pearl max 40%
Good Rod · Lv. 15–20 · 40%
Platinum max 45%
Good Rod · Lv. 10–25 · 4%Good Rod · Lv. 10–25 · 1%Good Rod · Lv. 15–20 · 40%

Great Marsh Area 3

Diamond max 40%
Good Rod · Lv. 15–20 · 40%
Pearl max 40%
Good Rod · Lv. 15–20 · 40%
Platinum max 45%
Good Rod · Lv. 10–25 · 4%Good Rod · Lv. 10–25 · 1%Good Rod · Lv. 15–20 · 40%

Great Marsh Area 4

Diamond max 40%
Good Rod · Lv. 15–20 · 40%
Pearl max 40%
Good Rod · Lv. 15–20 · 40%
Platinum max 45%
Good Rod · Lv. 10–25 · 4%Good Rod · Lv. 10–25 · 1%Good Rod · Lv. 15–20 · 40%

Great Marsh Area 5

Platinum max 45%
Good Rod · Lv. 10–25 · 4%Good Rod · Lv. 10–25 · 1%Good Rod · Lv. 15–20 · 40%

Great Marsh Area 6

Diamond max 40%
Good Rod · Lv. 15–20 · 40%
Pearl max 40%
Good Rod · Lv. 15–20 · 40%
Platinum max 45%
Good Rod · Lv. 10–25 · 4%Good Rod · Lv. 10–25 · 1%Good Rod · Lv. 15–20 · 40%
Mt. Coronet · SinnohGood Rod · version details vary

Mount Coronet (1F Road 207)

Diamond max 45%
Good Rod · Lv. 10–25 · 4%Good Rod · Lv. 10–25 · 1%Good Rod · Lv. 15–20 · 40%
Pearl max 45%
Good Rod · Lv. 10–25 · 4%Good Rod · Lv. 10–25 · 1%Good Rod · Lv. 15–20 · 40%
Platinum max 45%
Good Rod · Lv. 10–25 · 4%Good Rod · Lv. 10–25 · 1%Good Rod · Lv. 15–20 · 40%

Mount Coronet (4F)

Diamond max 45%
Good Rod · Lv. 10–25 · 4%Good Rod · Lv. 10–25 · 1%Good Rod · Lv. 15–20 · 40%
Pearl max 45%
Good Rod · Lv. 10–25 · 4%Good Rod · Lv. 10–25 · 1%Good Rod · Lv. 15–20 · 40%
Platinum max 45%
Good Rod · Lv. 10–25 · 4%Good Rod · Lv. 10–25 · 1%Good Rod · Lv. 15–20 · 40%

Mount Coronet (B1F)

Diamond max 45%
Good Rod · Lv. 10–25 · 4%Good Rod · Lv. 10–25 · 1%Good Rod · Lv. 15–20 · 40%
Pearl max 45%
Good Rod · Lv. 10–25 · 4%Good Rod · Lv. 10–25 · 1%Good Rod · Lv. 15–20 · 40%
Platinum max 45%
Good Rod · Lv. 10–25 · 4%Good Rod · Lv. 10–25 · 1%Good Rod · Lv. 15–20 · 40%
Oreburgh Gate · SinnohGood Rod · version details vary

Oreburgh Gate (B1F)

Diamond max 45%
Good Rod · Lv. 10–25 · 4%Good Rod · Lv. 10–25 · 1%Good Rod · Lv. 15–20 · 40%
Pearl max 45%
Good Rod · Lv. 10–25 · 4%Good Rod · Lv. 10–25 · 1%Good Rod · Lv. 15–20 · 40%
Platinum max 45%
Good Rod · Lv. 10–25 · 4%Good Rod · Lv. 10–25 · 1%Good Rod · Lv. 15–20 · 40%
Ravaged Path · SinnohGood Rod · version details vary

Ravaged Path

Diamond max 45%
Good Rod · Lv. 10–25 · 4%Good Rod · Lv. 10–25 · 1%Good Rod · Lv. 15–20 · 40%
Pearl max 45%
Good Rod · Lv. 10–25 · 4%Good Rod · Lv. 10–25 · 1%Good Rod · Lv. 15–20 · 40%
Platinum max 45%
Good Rod · Lv. 10–25 · 4%Good Rod · Lv. 10–25 · 1%Good Rod · Lv. 15–20 · 40%
Route 205 · SinnohGood Rod · version details vary

Road 205 (east, towards Eterna City)

Diamond max 45%
Good Rod · Lv. 10–25 · 4%Good Rod · Lv. 10–25 · 1%Good Rod · Lv. 15–20 · 40%
Pearl max 45%
Good Rod · Lv. 10–25 · 4%Good Rod · Lv. 10–25 · 1%Good Rod · Lv. 15–20 · 40%
Platinum max 45%
Good Rod · Lv. 10–25 · 4%Good Rod · Lv. 10–25 · 1%Good Rod · Lv. 15–20 · 40%
Route 208 · SinnohGood Rod · version details vary

Road 208

Diamond max 45%
Good Rod · Lv. 10–25 · 4%Good Rod · Lv. 10–25 · 1%Good Rod · Lv. 15–20 · 40%
Pearl max 45%
Good Rod · Lv. 10–25 · 4%Good Rod · Lv. 10–25 · 1%Good Rod · Lv. 15–20 · 40%
Route 210 · SinnohGood Rod · version details vary

Road 210 (west, towards Celestic Town)

Diamond max 45%
Good Rod · Lv. 10–25 · 4%Good Rod · Lv. 10–25 · 1%Good Rod · Lv. 15–20 · 40%
Pearl max 45%
Good Rod · Lv. 10–25 · 4%Good Rod · Lv. 10–25 · 1%Good Rod · Lv. 15–20 · 40%
Platinum max 40%
Good Rod · Lv. 15–20 · 40%
Route 212 · SinnohGood Rod · version details vary

Road 212 (east, towards Pastoria City)

Diamond max 45%
Good Rod · Lv. 10–25 · 4%Good Rod · Lv. 10–25 · 1%Good Rod · Lv. 15–20 · 40%
Pearl max 45%
Good Rod · Lv. 10–25 · 4%Good Rod · Lv. 10–25 · 1%Good Rod · Lv. 15–20 · 40%
Route 225 · SinnohGood Rod · version details vary

Road 225

Platinum max 45%
Good Rod · Lv. 10–25 · 4%Good Rod · Lv. 10–25 · 1%Good Rod · Lv. 15–20 · 40%
Route 227 · SinnohGood Rod · version details vary

Road 227

Diamond max 45%
Good Rod · Lv. 10–25 · 4%Good Rod · Lv. 10–25 · 1%Good Rod · Lv. 15–20 · 40%
Pearl max 45%
Good Rod · Lv. 10–25 · 4%Good Rod · Lv. 10–25 · 1%Good Rod · Lv. 15–20 · 40%
Platinum max 45%
Good Rod · Lv. 10–25 · 4%Good Rod · Lv. 10–25 · 1%Good Rod · Lv. 15–20 · 40%
Route 228 · SinnohGood Rod · version details vary

Road 228

Diamond max 45%
Good Rod · Lv. 10–25 · 4%Good Rod · Lv. 10–25 · 1%Good Rod · Lv. 15–20 · 40%
Pearl max 45%
Good Rod · Lv. 10–25 · 4%Good Rod · Lv. 10–25 · 1%Good Rod · Lv. 15–20 · 40%
Platinum max 40%
Good Rod · Lv. 15–20 · 40%
Icirrus City · UnovaSuper Rod, Super Rod Spots · version details vary

Icirrus City

Black max 100%
Super Rod · Lv. 35–55 · 40%Super Rod · Lv. 35–55 · 15%Super Rod · Lv. 35–55 · 4%Super Rod · Lv. 35–55 · 1%Super Rod Spots · Lv. 35–60 · 40%
Black 2 max 160%
Super Rod · Lv. 45–60 · 40%Super Rod · Lv. 50–60 · 15% · Season WinterSuper Rod · Lv. 50–60 · 4% · Season WinterSuper Rod · Lv. 50–60 · 1% · Season WinterSuper Rod · Lv. 60 · 15% · Season AutumnSuper Rod · Lv. 60 · 15% · Season SpringSuper Rod · Lv. 60 · 15% · Season SummerSuper Rod · Lv. 60 · 4% · Season AutumnSuper Rod · Lv. 60 · 4% · Season SpringSuper Rod · Lv. 60 · 4% · Season SummerSuper Rod · Lv. 60 · 1% · Season AutumnSuper Rod · Lv. 60 · 1% · Season SpringSuper Rod · Lv. 60 · 1% · Season SummerSuper Rod Spots · Lv. 45–60 · 40%
White max 100%
Super Rod · Lv. 35–55 · 40%Super Rod · Lv. 35–55 · 15%Super Rod · Lv. 35–55 · 4%Super Rod · Lv. 35–55 · 1%Super Rod Spots · Lv. 35–60 · 40%
White 2 max 160%
Super Rod · Lv. 45–60 · 40%Super Rod · Lv. 50–60 · 15% · Season WinterSuper Rod · Lv. 50–60 · 4% · Season WinterSuper Rod · Lv. 50–60 · 1% · Season WinterSuper Rod · Lv. 60 · 15% · Season AutumnSuper Rod · Lv. 60 · 15% · Season SpringSuper Rod · Lv. 60 · 15% · Season SummerSuper Rod · Lv. 60 · 4% · Season AutumnSuper Rod · Lv. 60 · 4% · Season SpringSuper Rod · Lv. 60 · 4% · Season SummerSuper Rod · Lv. 60 · 1% · Season AutumnSuper Rod · Lv. 60 · 1% · Season SpringSuper Rod · Lv. 60 · 1% · Season SummerSuper Rod Spots · Lv. 45–60 · 40%
Moor of Icirrus · UnovaSuper Rod, Super Rod Spots · version details vary

Moor of Icirrus

Black max 100%
Super Rod · Lv. 35–55 · 40%Super Rod · Lv. 35–55 · 15%Super Rod · Lv. 35–55 · 4%Super Rod · Lv. 35–55 · 1%Super Rod Spots · Lv. 35–60 · 40%
Black 2 max 160%
Super Rod · Lv. 45–60 · 40%Super Rod · Lv. 50–60 · 15% · Season WinterSuper Rod · Lv. 50–60 · 4% · Season WinterSuper Rod · Lv. 50–60 · 1% · Season WinterSuper Rod · Lv. 60 · 15% · Season AutumnSuper Rod · Lv. 60 · 15% · Season SpringSuper Rod · Lv. 60 · 15% · Season SummerSuper Rod · Lv. 60 · 4% · Season AutumnSuper Rod · Lv. 60 · 4% · Season SpringSuper Rod · Lv. 60 · 4% · Season SummerSuper Rod · Lv. 60 · 1% · Season AutumnSuper Rod · Lv. 60 · 1% · Season SpringSuper Rod · Lv. 60 · 1% · Season SummerSuper Rod Spots · Lv. 45–60 · 40%
White max 100%
Super Rod · Lv. 35–55 · 40%Super Rod · Lv. 35–55 · 15%Super Rod · Lv. 35–55 · 4%Super Rod · Lv. 35–55 · 1%Super Rod Spots · Lv. 35–60 · 40%
White 2 max 160%
Super Rod · Lv. 45–60 · 40%Super Rod · Lv. 50–60 · 15% · Season WinterSuper Rod · Lv. 50–60 · 4% · Season WinterSuper Rod · Lv. 50–60 · 1% · Season WinterSuper Rod · Lv. 60 · 15% · Season AutumnSuper Rod · Lv. 60 · 15% · Season SpringSuper Rod · Lv. 60 · 15% · Season SummerSuper Rod · Lv. 60 · 4% · Season AutumnSuper Rod · Lv. 60 · 4% · Season SpringSuper Rod · Lv. 60 · 4% · Season SummerSuper Rod · Lv. 60 · 1% · Season AutumnSuper Rod · Lv. 60 · 1% · Season SpringSuper Rod · Lv. 60 · 1% · Season SummerSuper Rod Spots · Lv. 45–60 · 40%
Route 8 · UnovaSuper Rod, Super Rod Spots · version details vary

Road 8

Black max 100%
Super Rod · Lv. 35–55 · 40%Super Rod · Lv. 35–55 · 15%Super Rod · Lv. 35–55 · 4%Super Rod · Lv. 35–55 · 1%Super Rod Spots · Lv. 35–60 · 40%
Black 2 max 160%
Super Rod · Lv. 45–60 · 40%Super Rod · Lv. 50–60 · 15% · Season AutumnSuper Rod · Lv. 50–60 · 15% · Season SummerSuper Rod · Lv. 50–60 · 15% · Season WinterSuper Rod · Lv. 50–60 · 4% · Season AutumnSuper Rod · Lv. 50–60 · 4% · Season SummerSuper Rod · Lv. 50–60 · 4% · Season WinterSuper Rod · Lv. 50–60 · 1% · Season AutumnSuper Rod · Lv. 50–60 · 1% · Season SummerSuper Rod · Lv. 50–60 · 1% · Season WinterSuper Rod · Lv. 60 · 15% · Season SpringSuper Rod · Lv. 60 · 4% · Season SpringSuper Rod · Lv. 60 · 1% · Season SpringSuper Rod Spots · Lv. 45–60 · 40%
White max 100%
Super Rod · Lv. 35–55 · 40%Super Rod · Lv. 35–55 · 15%Super Rod · Lv. 35–55 · 4%Super Rod · Lv. 35–55 · 1%Super Rod Spots · Lv. 35–60 · 40%
White 2 max 160%
Super Rod · Lv. 45–60 · 40%Super Rod · Lv. 50–60 · 15% · Season AutumnSuper Rod · Lv. 50–60 · 15% · Season SummerSuper Rod · Lv. 50–60 · 15% · Season WinterSuper Rod · Lv. 50–60 · 4% · Season AutumnSuper Rod · Lv. 50–60 · 4% · Season SummerSuper Rod · Lv. 50–60 · 4% · Season WinterSuper Rod · Lv. 50–60 · 1% · Season AutumnSuper Rod · Lv. 50–60 · 1% · Season SummerSuper Rod · Lv. 50–60 · 1% · Season WinterSuper Rod · Lv. 60 · 15% · Season SpringSuper Rod · Lv. 60 · 4% · Season SpringSuper Rod · Lv. 60 · 1% · Season SpringSuper Rod Spots · Lv. 45–60 · 40%

Additional Images

PokeAPI sprites

Open this section to load extra PokeAPI sprite images.

Barboach Biology and Behavior

Barboach is a mud-dwelling fish whose long whiskers are packed with sensory nerves and function as an extraordinary radar system in water too murky for vision to be useful. The whiskers can detect the location of nearby prey and even sense smell and flavor in a manner compared with a human nose and tongue, allowing Barboach to remain buried with only the barbels exposed while hunting. A thick slimy film covers the entire body, protecting it from bacteria in stagnant mud and making the Pokemon so slippery that predators have difficulty holding onto it. That coating must remain moist; if it dries out Barboach becomes weak, which keeps the species closely tied to swamps, muddy riverbeds, and other wet habitats. In some regions its extreme slipperiness has even become the basis of festivals in which people compete to catch Barboach with their bare hands.

Barboach Biological Data

National Pokédex
#339
Species
Whiskers Pokémon
Height
1' 4" (0.4 m)
Weight
4.2 lbs (1.9 kg)
Habitat
Waters Edge
Color
Gray
Body Style
Fish
Gender
50% female / 50% male

Misc

Catch Rate: 190

Base Experience: 58 Exp

Hatch Counter: 20

Barboach Size Comparison: BETA

Barboach is listed at 1' 4" (0.4 m) and shown in an in-chart visual comparison.
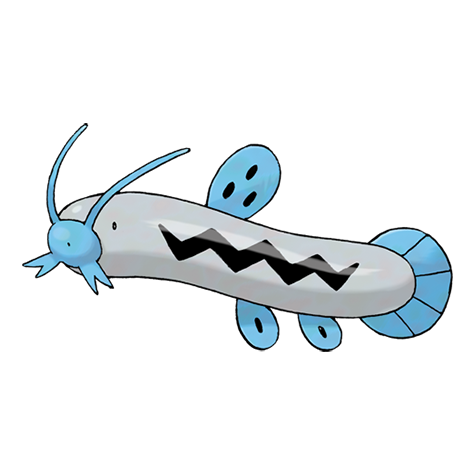
7 ft6 ft5 ft4 ft3 ft2 ft1 ft0 ft
barboach
Professor Oak
How is visual size determined?

Pokédex height is treated as the official listed measurement, but the chart uses pose-aware visual scaling so each sprite looks reasonable in a direct comparison.

For long or coiled Pokémon, the listed height may represent total body length rather than upright height. For Pokémon with floppy ears, leaves, feathers, antennae, wings, or other flexible features, the chart usually measures to the top of the solid, substantial part of the head or body instead of the tallest decorative feature.

The goal is not to replace the official height, but to make the artwork compare naturally at the size it appears to occupy.