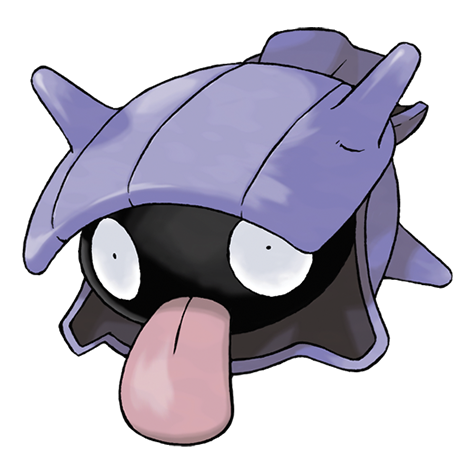
Shellder is a Water-type Pokémon introduced in Generation I and the first stage of its evolution line, with a base stat total of 305.
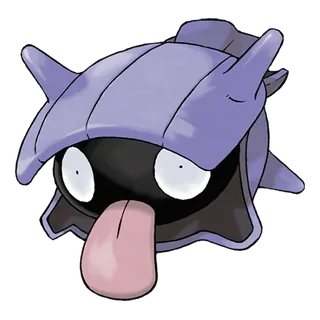
Shellder

Shellder

Abilities

Shell Armor

Blocks critical hits.

Skill Link

Increases the frequency of multi-strike moves.

Overcoat

Protects the Pokémon from damage from weather.

Hidden Ability

Base Stats

Total: 305
EV Yield: 1 Defense
HP: 30
Attack: 65
Defense: 100
Sp. Atk: 45
Sp. Def: 25
Speed: 40

Shellder's Weaknesses and Resistances

Evolution Chain

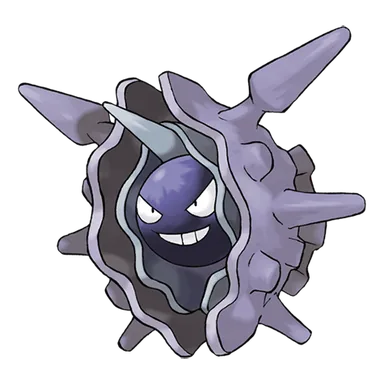
Shellder evolves into Cloyster with a Water Stone.
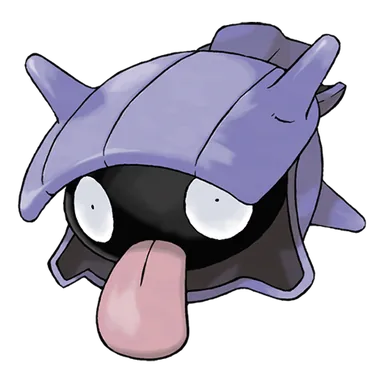
Shellder Playthrough, Competitive, and Nuzlocke Usage
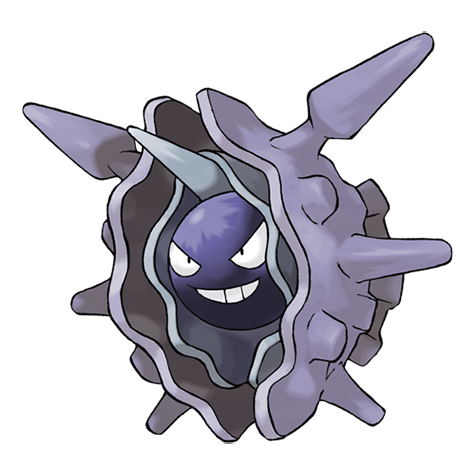
Using Shellder in a Playthrough

The Shellder line develops into Cloyster, a Water/Ice Pokemon defined by enormous physical Defense and strong offensive potential. Its 180 Defense allows Cloyster to withstand physical attacks exceptionally well, while Water and Ice STAB provide valuable coverage, particularly against Ground-, Flying-, and Dragon-type opponents. Its Special Defense is extremely poor, however, making strong special attacks dangerous regardless of its impressive physical durability. From Generation V onward, Shell Smash greatly increases Cloyster's offensive ceiling, and Skill Link makes multi-hit attacks such as Icicle Spear consistently powerful; Water Stone evolution can also require some move-planning depending on the game.

Shellder in Competitive Pokémon

Cloyster's modern competitive identity is built primarily around Shell Smash and Skill Link. Shell Smash sharply raises its Attack, Special Attack, and Speed at the cost of defensive reductions, while Skill Link guarantees the maximum number of hits from moves such as Icicle Spear and Rock Blast, allowing Cloyster to become a dangerous sweeper after a single setup turn. Its enormous physical Defense can create setup opportunities against physical attackers and also historically supported more defensive or hazard-oriented roles before Shell Smash became central to its identity. Extremely low Special Defense remains its largest structural weakness, allowing strong special attackers and priority or revenge-killing strategies to stop it even after setup.

Shellder in Nuzlockes

Cloyster has unusually polarized Nuzlocke value because its physical Defense is exceptional while its Special Defense is extremely poor. Against known physical attackers it can function as one of the safest available switches, and its Ice STAB can be valuable against Dragon-heavy late-game battles, but special Electric-, Grass-, Fire-, or other strong neutral attacks can be far more dangerous than its overall Defense might suggest. FireRed and LeafGreen community discussion consequently rates it as useful but matchup-dependent rather than universally safe. In later generations Shell Smash provides enormous sweeping potential, but lowering Cloyster's defenses in a permadeath format introduces additional risk if the intended sweep fails.

Learnsets

48 moves · Scarlet Violet

Level Up

1 Tackle normal type 40 100 physical move
1 Water Gun water type 40 100 special move
4 Withdraw water type --- --- status move
8 Ice Shard ice type 40 100 physical move
12 Leer normal type --- 100 status move
16 Whirlpool water type 35 85 special move
20 Supersonic normal type --- 55 status move
24 Aurora Beam ice type 65 100 special move
28 Protect normal type --- --- status move
32 Razor Shell water type 75 95 physical move
36 Iron Defense steel type --- --- status move
40 Ice Beam ice type 90 100 special move
44 Shell Smash normal type --- --- status move
48 Hydro Pump water type 110 80 special move

Machine

- Take Down normal type 90 85 physical move
- Hydro Pump water type 110 80 special move
- Surf water type 90 100 special move
- Ice Beam ice type 90 100 special move
- Blizzard ice type 110 70 special move
- Waterfall water type 80 100 physical move
- Swift normal type 60 --- special move
- Rest psychic type --- --- status move
- Substitute normal type --- --- status move
- Protect normal type --- --- status move
- Spikes ground type --- --- status move
- Icy Wind ice type 55 95 special move
- Endure normal type --- --- status move
- Sleep Talk normal type --- --- status move
- Rain Dance water type --- --- status move
- Whirlpool water type 35 85 special move
- Facade normal type 70 100 physical move
- Helping Hand normal type --- --- status move
- Icicle Spear ice type 25 100 physical move
- Iron Defense steel type --- --- status move
- Mud Shot ground type 55 95 special move
- Rock Blast rock type 25 90 physical move
- Water Pulse water type 60 100 special move
- Toxic Spikes poison type --- --- status move
- Avalanche ice type 60 100 physical move
- Liquidation water type 85 100 physical move
- Tera Blast normal type 80 100 special move
- Ice Spinner ice type 80 100 physical move
- Snowscape ice type --- --- status move
- Chilling Water water type 50 100 special move

Egg

- Bubble Beam water type 65 100 special move
- Water Pulse water type 60 100 special move
- Aqua Ring water type --- --- status move
- Life Dew water type --- --- status move

Pokédex Entries

15 entries
Red / Blue / Leafgreen / X / Shield

Its hard shell repels any kind of attack. It is vulnerable only when its shell is open.

Yellow / Lets Go Pikachu / Lets Go Eevee

The shell can withstand any attack. However, when it is open, the tender body is exposed.

Gold

It swims facing backward by opening and closing its two-piece shell. It is surprisingly fast.

Silver / Soulsilver

Grains of sand trapped in its shells mix with its body fluids to form beautiful pearls.

Crystal / Y

Clamping on to an opponent reveals its vulnerable parts, so it uses this move only as a last resort.

Ruby / Sapphire

At night, this POKéMON uses its broad tongue to burrow a hole in the seafloor sand and then sleep in it. While it is sleeping, SHELLDER closes its shell, but leaves its tongue hanging out.

Emerald

At night, it burrows a hole in the seafloor with its broad tongue to make a place to sleep. While asleep, it closes its shell, but leaves its tongue hanging out.

Firered

It is encased in a shell that is harder than diamond. Inside, however, it is surprisingly tender.

Diamond / Pearl / Platinum / Black / White / Black 2 / White 2

It swims backward by opening and closing its two shells. Its large tongue is always kept hanging out.

Heartgold / Sword

It swims facing backward by opening and closing its two-piece shell. It is surprisingly fast.

Omega Ruby / Alpha Sapphire

At night, this Pokémon uses its broad tongue to burrow a hole in the seafloor sand and then sleep in it. While it is sleeping, Shellder closes its shell, but leaves its tongue hanging out.

Sun

The hardness of its shell surpasses the hardness of a diamond. In days gone by, people used the shells to make shields.

Moon

This Pokémon’s tongue is always hanging out. It uses its tongue with great dexterity to dig up sand from the seabed in its search for food.

Ultra Sun

The sand that accumulates inside its shell eventually becomes a pearl. But the pearl gets in the way, so it spits it out and discards it.

Ultra Moon

Even when its shell is closed, its tongue still hangs out. If you give its tongue a good yank, the shock will cause Shellder to open its shell.

Where To Find Shellder

32 locations
Kala’e Bay · AlolaBubbling Spots, Super Rod · version details vary

Kalae Bay Area

Moon max 21%
Bubbling Spots · Lv. 10–15 · 20%Super Rod · Lv. 10–15 · 1%
Sun max 21%
Bubbling Spots · Lv. 10–15 · 20%Super Rod · Lv. 10–15 · 1%
Ultra Moon max 40%
Bubbling Spots · Lv. 10–22 · 35%Super Rod · Lv. 10–17 · 5%
Ultra Sun max 40%
Bubbling Spots · Lv. 10–22 · 35%Super Rod · Lv. 10–17 · 5%
Poké Pelago · AlolaGift · version details vary

Poke Pelago Elite Four Defeated

Moon max 4%
Gift · Lv. 49–55 · 4%
Sun max 4%
Gift · Lv. 49–55 · 4%

Poke Pelago Poni Island Reached

Moon max 5%
Gift · Lv. 37–43 · 5%
Sun max 5%
Gift · Lv. 37–43 · 5%

Poke Pelago Ulaula Island Reached

Moon max 6%
Gift · Lv. 21–27 · 6%
Sun max 6%
Gift · Lv. 21–27 · 6%
New Bark Town · JohtoGood Rod, Super Rod · version details vary

New Bark Town

Crystal max 40%
Good Rod · Lv. 20 · 10%Super Rod · Lv. 40 · 30%
Gold max 40%
Good Rod · Lv. 20 · 10%Super Rod · Lv. 40 · 30%
HeartGold max 40%
Good Rod · Lv. 20 · 10%Super Rod · Lv. 40 · 30%
Silver max 40%
Good Rod · Lv. 20 · 10%Super Rod · Lv. 40 · 30%
SoulSilver max 40%
Good Rod · Lv. 20 · 10%Super Rod · Lv. 40 · 30%
Route 47 · JohtoGood Rod, Super Rod · version details vary

Road 47

HeartGold max 40%
Good Rod · Lv. 20 · 10%Super Rod · Lv. 40 · 30%
SoulSilver max 40%
Good Rod · Lv. 20 · 10%Super Rod · Lv. 40 · 30%
Sea Route 41 · JohtoGood Rod, Super Rod · version details vary

Road 41

Crystal max 40%
Good Rod · Lv. 20 · 10%Super Rod · Lv. 40 · 30%
Gold max 40%
Good Rod · Lv. 20 · 10%Super Rod · Lv. 40 · 30%
HeartGold max 40%
Good Rod · Lv. 20 · 10%Super Rod · Lv. 40 · 30%
Silver max 40%
Good Rod · Lv. 20 · 10%Super Rod · Lv. 40 · 30%
SoulSilver max 40%
Good Rod · Lv. 20 · 10%Super Rod · Lv. 40 · 30%
Route 8 · KalosGood Rod · version details vary

Road 8

Y max 35%
Good Rod · Lv. 25 · 35%
Cinnabar Island · KantoSuper Rod, Good Rod · version details vary

Cinnabar Island

Blue max 25%
Super Rod · Lv. 15 · 17%Super Rod · Lv. 15 · 8%
Crystal max 40%
Good Rod · Lv. 20 · 10%Super Rod · Lv. 40 · 30%
FireRed max 40%
Super Rod · Lv. 15–25 · 40%
Gold max 40%
Good Rod · Lv. 20 · 10%Super Rod · Lv. 40 · 30%
Green Japan max 25%
Super Rod · Lv. 15 · 17%Super Rod · Lv. 15 · 8%
HeartGold max 40%
Good Rod · Lv. 20 · 10%Super Rod · Lv. 40 · 30%
Red max 25%
Super Rod · Lv. 15 · 17%Super Rod · Lv. 15 · 8%
Red Japan max 25%
Super Rod · Lv. 15 · 17%Super Rod · Lv. 15 · 8%
Silver max 40%
Good Rod · Lv. 20 · 10%Super Rod · Lv. 40 · 30%
SoulSilver max 40%
Good Rod · Lv. 20 · 10%Super Rod · Lv. 40 · 30%
Five Island · KantoSuper Rod · version details vary

Five Island

FireRed max 40%
Super Rod · Lv. 15–25 · 40%
Icefall Cave · KantoSuper Rod · version details vary

Icefall Cave (waterfall)

FireRed max 40%
Super Rod · Lv. 15–25 · 40%
One Island · KantoSuper Rod · version details vary

One Island

FireRed max 40%
Super Rod · Lv. 15–25 · 40%
Pallet Town · KantoGood Rod, Super Rod · version details vary

Pallet Town

Crystal max 40%
Good Rod · Lv. 20 · 10%Super Rod · Lv. 40 · 30%
FireRed max 40%
Super Rod · Lv. 15–25 · 40%
Gold max 40%
Good Rod · Lv. 20 · 10%Super Rod · Lv. 40 · 30%
HeartGold max 40%
Good Rod · Lv. 20 · 10%Super Rod · Lv. 40 · 30%
Silver max 40%
Good Rod · Lv. 20 · 10%Super Rod · Lv. 40 · 30%
SoulSilver max 40%
Good Rod · Lv. 20 · 10%Super Rod · Lv. 40 · 30%
Route 11 · KantoSuper Rod · version details vary

Road 11

Blue max 50%
Super Rod · Lv. 15 · 25%Super Rod · Lv. 15 · 17%Super Rod · Lv. 15 · 8%
Green Japan max 50%
Super Rod · Lv. 15 · 25%Super Rod · Lv. 15 · 17%Super Rod · Lv. 15 · 8%
Red max 50%
Super Rod · Lv. 15 · 25%Super Rod · Lv. 15 · 17%Super Rod · Lv. 15 · 8%
Red Japan max 50%
Super Rod · Lv. 15 · 25%Super Rod · Lv. 15 · 17%Super Rod · Lv. 15 · 8%
Route 17 · KantoSuper Rod · version details vary

Road 17

Yellow max 30%
Super Rod · Lv. 25 · 20%Super Rod · Lv. 35 · 10%
Route 18 · KantoSuper Rod · version details vary

Road 18

Yellow max 60%
Super Rod · Lv. 20 · 30%Super Rod · Lv. 30 · 20%Super Rod · Lv. 40 · 10%
Route 26 · KantoGood Rod, Super Rod · version details vary

Road 26

Crystal max 40%
Good Rod · Lv. 20 · 10%Super Rod · Lv. 40 · 30%
Gold max 40%
Good Rod · Lv. 20 · 10%Super Rod · Lv. 40 · 30%
HeartGold max 40%
Good Rod · Lv. 20 · 10%Super Rod · Lv. 40 · 30%
Silver max 40%
Good Rod · Lv. 20 · 10%Super Rod · Lv. 40 · 30%
SoulSilver max 40%
Good Rod · Lv. 20 · 10%Super Rod · Lv. 40 · 30%
Route 27 · KantoGood Rod, Super Rod · version details vary

Road 27

Crystal max 40%
Good Rod · Lv. 20 · 10%Super Rod · Lv. 40 · 30%
Gold max 40%
Good Rod · Lv. 20 · 10%Super Rod · Lv. 40 · 30%
HeartGold max 40%
Good Rod · Lv. 20 · 10%Super Rod · Lv. 40 · 30%
Silver max 40%
Good Rod · Lv. 20 · 10%Super Rod · Lv. 40 · 30%
SoulSilver max 40%
Good Rod · Lv. 20 · 10%Super Rod · Lv. 40 · 30%
Route 6 · KantoSuper Rod · version details vary

Road 6

Blue max 50%
Super Rod · Lv. 15 · 25%Super Rod · Lv. 15 · 17%Super Rod · Lv. 15 · 8%
Green Japan max 50%
Super Rod · Lv. 15 · 25%Super Rod · Lv. 15 · 17%Super Rod · Lv. 15 · 8%
Red max 50%
Super Rod · Lv. 15 · 25%Super Rod · Lv. 15 · 17%Super Rod · Lv. 15 · 8%
Red Japan max 50%
Super Rod · Lv. 15 · 25%Super Rod · Lv. 15 · 17%Super Rod · Lv. 15 · 8%
S.S. Anne · KantoSuper Rod · version details vary

S.S. Anne

FireRed max 40%
Super Rod · Lv. 15–25 · 40%
Sea Route 19 · KantoSuper Rod · version details vary

Road 19

Blue max 25%
Super Rod · Lv. 15 · 17%Super Rod · Lv. 15 · 8%
Green Japan max 25%
Super Rod · Lv. 15 · 17%Super Rod · Lv. 15 · 8%
Red max 25%
Super Rod · Lv. 15 · 17%Super Rod · Lv. 15 · 8%
Red Japan max 25%
Super Rod · Lv. 15 · 17%Super Rod · Lv. 15 · 8%
Sea Route 20 · KantoSuper Rod, Good Rod · version details vary

Road 20

Blue max 25%
Super Rod · Lv. 15 · 17%Super Rod · Lv. 15 · 8%
Crystal max 40%
Good Rod · Lv. 20 · 10%Super Rod · Lv. 40 · 30%
Gold max 40%
Good Rod · Lv. 20 · 10%Super Rod · Lv. 40 · 30%
Green Japan max 25%
Super Rod · Lv. 15 · 17%Super Rod · Lv. 15 · 8%
HeartGold max 40%
Good Rod · Lv. 20 · 10%Super Rod · Lv. 40 · 30%
Red max 25%
Super Rod · Lv. 15 · 17%Super Rod · Lv. 15 · 8%
Red Japan max 25%
Super Rod · Lv. 15 · 17%Super Rod · Lv. 15 · 8%
Silver max 40%
Good Rod · Lv. 20 · 10%Super Rod · Lv. 40 · 30%
SoulSilver max 40%
Good Rod · Lv. 20 · 10%Super Rod · Lv. 40 · 30%
Sea Route 21 · KantoSuper Rod, Good Rod · version details vary

Road 21

Blue max 25%
Super Rod · Lv. 15 · 17%Super Rod · Lv. 15 · 8%
Crystal max 40%
Good Rod · Lv. 20 · 10%Super Rod · Lv. 40 · 30%
Gold max 40%
Good Rod · Lv. 20 · 10%Super Rod · Lv. 40 · 30%
Green Japan max 25%
Super Rod · Lv. 15 · 17%Super Rod · Lv. 15 · 8%
HeartGold max 40%
Good Rod · Lv. 20 · 10%Super Rod · Lv. 40 · 30%
Red max 25%
Super Rod · Lv. 15 · 17%Super Rod · Lv. 15 · 8%
Red Japan max 25%
Super Rod · Lv. 15 · 17%Super Rod · Lv. 15 · 8%
Silver max 40%
Good Rod · Lv. 20 · 10%Super Rod · Lv. 40 · 30%
SoulSilver max 40%
Good Rod · Lv. 20 · 10%Super Rod · Lv. 40 · 30%
Seafoam Islands · KantoWalking, Super Rod, Overworld Water · version details vary

Seafoam Islands (1F)

Red max 19%
Walking · Lv. 28 · 4%Walking · Lv. 30 · 15%
Red Japan max 19%
Walking · Lv. 28 · 4%Walking · Lv. 30 · 15%

Seafoam Islands (B1F)

Blue max 20%
Walking · Lv. 30 · 20%
Green Japan max 20%
Walking · Lv. 30 · 20%
Red max 15%
Walking · Lv. 32 · 15%
Red Japan max 15%
Walking · Lv. 32 · 15%

Seafoam Islands (B2F)

Blue max 10%
Walking · Lv. 30 · 10%
Green Japan max 10%
Walking · Lv. 30 · 10%
Red max 5%
Walking · Lv. 28 · 5%
Red Japan max 5%
Walking · Lv. 28 · 5%

Seafoam Islands (B3F)

Blue max 25%
Super Rod · Lv. 15 · 17%Super Rod · Lv. 15 · 8%
Green Japan max 25%
Super Rod · Lv. 15 · 17%Super Rod · Lv. 15 · 8%
Lets Go Eevee max 100%
Overworld Water · Lv. 39–44 · 100%
Lets Go Pikachu max 100%
Overworld Water · Lv. 39–44 · 100%
Red max 40%
Super Rod · Lv. 15 · 17%Super Rod · Lv. 15 · 8%Walking · Lv. 29 · 5%Walking · Lv. 31 · 10%
Red Japan max 40%
Super Rod · Lv. 15 · 17%Super Rod · Lv. 15 · 8%Walking · Lv. 29 · 5%Walking · Lv. 31 · 10%

Seafoam Islands (B4F)

Blue max 25%
Super Rod · Lv. 15 · 17%Super Rod · Lv. 15 · 8%
Green Japan max 25%
Super Rod · Lv. 15 · 17%Super Rod · Lv. 15 · 8%
Lets Go Eevee max 100%
Overworld Water · Lv. 39–44 · 100%
Lets Go Pikachu max 100%
Overworld Water · Lv. 39–44 · 100%
Red max 55%
Super Rod · Lv. 15 · 17%Super Rod · Lv. 15 · 8%Walking · Lv. 31 · 20%Walking · Lv. 33 · 10%
Red Japan max 55%
Super Rod · Lv. 15 · 17%Super Rod · Lv. 15 · 8%Walking · Lv. 31 · 20%Walking · Lv. 33 · 10%
Vermilion City · KantoSuper Rod, Good Rod · version details vary

S.S. Anne dock

Blue max 50%
Super Rod · Lv. 15 · 25%Super Rod · Lv. 15 · 17%Super Rod · Lv. 15 · 8%
Crystal max 40%
Good Rod · Lv. 20 · 10%Super Rod · Lv. 40 · 30%
Gold max 40%
Good Rod · Lv. 20 · 10%Super Rod · Lv. 40 · 30%
Green Japan max 50%
Super Rod · Lv. 15 · 25%Super Rod · Lv. 15 · 17%Super Rod · Lv. 15 · 8%
HeartGold max 40%
Good Rod · Lv. 20 · 10%Super Rod · Lv. 40 · 30%
Red max 50%
Super Rod · Lv. 15 · 25%Super Rod · Lv. 15 · 17%Super Rod · Lv. 15 · 8%
Red Japan max 50%
Super Rod · Lv. 15 · 25%Super Rod · Lv. 15 · 17%Super Rod · Lv. 15 · 8%
Silver max 40%
Good Rod · Lv. 20 · 10%Super Rod · Lv. 40 · 30%
SoulSilver max 40%
Good Rod · Lv. 20 · 10%Super Rod · Lv. 40 · 30%
Yellow max 10%
Super Rod · Lv. 10 · 10%

Vermilion City

Blue max 50%
Super Rod · Lv. 15 · 25%Super Rod · Lv. 15 · 17%Super Rod · Lv. 15 · 8%
Crystal max 40%
Good Rod · Lv. 20 · 10%Super Rod · Lv. 40 · 30%
FireRed max 40%
Super Rod · Lv. 15–25 · 40%
Gold max 40%
Good Rod · Lv. 20 · 10%Super Rod · Lv. 40 · 30%
Green Japan max 50%
Super Rod · Lv. 15 · 25%Super Rod · Lv. 15 · 17%Super Rod · Lv. 15 · 8%
HeartGold max 40%
Good Rod · Lv. 20 · 10%Super Rod · Lv. 40 · 30%
Red max 50%
Super Rod · Lv. 15 · 25%Super Rod · Lv. 15 · 17%Super Rod · Lv. 15 · 8%
Red Japan max 50%
Super Rod · Lv. 15 · 25%Super Rod · Lv. 15 · 17%Super Rod · Lv. 15 · 8%
Silver max 40%
Good Rod · Lv. 20 · 10%Super Rod · Lv. 40 · 30%
SoulSilver max 40%
Good Rod · Lv. 20 · 10%Super Rod · Lv. 40 · 30%
Cipher Key Lair · OrreSnag · version details vary

Cipher Key Lair 2F

XD max 100%
Snag · Lv. 29 · 100%
Fuego Ironworks · SinnohSuper Rod · version details vary

Fuego Ironworks

Diamond max 15%
Super Rod · Lv. 20–40 · 15%
Pearl max 15%
Super Rod · Lv. 20–40 · 15%
Platinum max 15%
Super Rod · Lv. 20–50 · 15%
Route 205 · SinnohSuper Rod · version details vary

Road 205 (south, towards Floaroma Town)

Diamond max 15%
Super Rod · Lv. 20–40 · 15%
Pearl max 15%
Super Rod · Lv. 20–40 · 15%
Platinum max 15%
Super Rod · Lv. 20–50 · 15%
Valley Windworks · SinnohSuper Rod · version details vary

Valley Windworks

Diamond max 15%
Super Rod · Lv. 20–40 · 15%
Pearl max 15%
Super Rod · Lv. 20–40 · 15%
Platinum max 15%
Super Rod · Lv. 20–50 · 15%
Humilau City · UnovaSuper Rod, Super Rod Spots · version details vary

Humilau City

Black 2 max 95%
Super Rod · Lv. 40–60 · 40%Super Rod Spots · Lv. 40–60 · 40%Super Rod Spots · Lv. 50–70 · 15%
White 2 max 95%
Super Rod · Lv. 40–60 · 40%Super Rod Spots · Lv. 40–60 · 40%Super Rod Spots · Lv. 50–70 · 15%
Route 13 · UnovaSuper Rod, Super Rod Spots · version details vary

Road 13

Black max 80%
Super Rod · Lv. 35–55 · 40%Super Rod Spots · Lv. 35–60 · 40%
Black 2 max 95%
Super Rod · Lv. 40–60 · 40%Super Rod Spots · Lv. 40–60 · 40%Super Rod Spots · Lv. 50–70 · 15%
White max 80%
Super Rod · Lv. 35–55 · 40%Super Rod Spots · Lv. 35–60 · 40%
White 2 max 95%
Super Rod · Lv. 40–60 · 40%Super Rod Spots · Lv. 40–60 · 40%Super Rod Spots · Lv. 50–70 · 15%
Seaside Cave · UnovaSuper Rod, Super Rod Spots · version details vary

Seaside Cave (1F)

Black 2 max 95%
Super Rod · Lv. 40–60 · 40%Super Rod Spots · Lv. 40–60 · 40%Super Rod Spots · Lv. 50–70 · 15%
White 2 max 95%
Super Rod · Lv. 40–60 · 40%Super Rod Spots · Lv. 40–60 · 40%Super Rod Spots · Lv. 50–70 · 15%
Undella Bay · UnovaSuper Rod, Super Rod Spots · version details vary

Undella Bay

Black max 80%
Super Rod · Lv. 35–55 · 40%Super Rod Spots · Lv. 35–60 · 40%
White max 80%
Super Rod · Lv. 35–55 · 40%Super Rod Spots · Lv. 35–60 · 40%
Undella Town · UnovaSuper Rod, Super Rod Spots · version details vary

Undella Town

Black max 80%
Super Rod · Lv. 35–55 · 40%Super Rod Spots · Lv. 35–60 · 40%
Black 2 max 95%
Super Rod · Lv. 40–60 · 40%Super Rod Spots · Lv. 40–60 · 40%Super Rod Spots · Lv. 50–70 · 15%
White max 80%
Super Rod · Lv. 35–55 · 40%Super Rod Spots · Lv. 35–60 · 40%
White 2 max 95%
Super Rod · Lv. 40–60 · 40%Super Rod Spots · Lv. 40–60 · 40%Super Rod Spots · Lv. 50–70 · 15%

Held Items

2 items
Big Pearl
  • Ruby: 5% chance
  • Sapphire: 5% chance
  • Emerald: 5% chance
  • Firered: 5% chance
  • Leafgreen: 5% chance
  • Diamond: 5% chance
  • Pearl: 5% chance
  • Platinum: 5% chance
  • Heartgold: 5% chance
  • Soulsilver: 5% chance
  • Black: 5% chance
  • White: 5% chance
  • Black 2: 5% chance
  • White 2: 5% chance
  • X: 5% chance
  • Y: 5% chance
  • Omega Ruby: 5% chance
  • Alpha Sapphire: 5% chance
  • Sun: 5% chance
  • Moon: 5% chance
  • Ultra Sun: 5% chance
  • Ultra Moon: 5% chance
Pearl
  • Ruby: 50% chance
  • Sapphire: 50% chance
  • Emerald: 50% chance
  • Firered: 50% chance
  • Leafgreen: 50% chance
  • Diamond: 50% chance
  • Pearl: 50% chance
  • Platinum: 50% chance
  • Heartgold: 50% chance
  • Soulsilver: 50% chance
  • Black: 50% chance
  • White: 50% chance
  • Black 2: 50% chance
  • White 2: 50% chance
  • X: 50% chance
  • Y: 50% chance
  • Omega Ruby: 50% chance
  • Alpha Sapphire: 50% chance
  • Sun: 50% chance
  • Moon: 50% chance
  • Ultra Sun: 50% chance
  • Ultra Moon: 50% chance

Additional Images

PokeAPI sprites

Open this section to load extra PokeAPI sprite images.

Shellder Biology and Behavior

Shellder is protected by an extremely durable shell described as harder than diamond, while its exposed inner body remains soft and vulnerable. Its long tongue is used both to burrow into sand while sleeping and to lure and capture prey; the tongue remains exposed even when the shell is closed, and pulling it can force the shell open. Shellder also produces pearls from grains of sand but normally discards them because they interfere with its body. It has a strong attraction to Slowpoke tails and can form a symbiotic relationship by attaching to Slowpoke, triggering the transformations associated with Slowbro or Slowking.

Shellder Biological Data

National Pokédex
#90
Species
Bivalve Pokémon
Height
1' 0" (0.3 m)
Weight
8.8 lbs (4.0 kg)
Habitat
Sea
Color
Purple
Body Style
Ball
Gender
50% female / 50% male

Misc

Catch Rate: 190

Base Experience: 61 Exp

Hatch Counter: 20

Shellder Size Comparison: BETA

Shellder is listed at 1' 0" (0.3 m); this chart uses a pose-adjusted visual scale.
7 ft6 ft5 ft4 ft3 ft2 ft1 ft0 ft
shellder
Professor Oak
How is visual size determined?

Pokédex height is treated as the official listed measurement, but the chart uses pose-aware visual scaling so each sprite looks reasonable in a direct comparison.

For long or coiled Pokémon, the listed height may represent total body length rather than upright height. For Pokémon with floppy ears, leaves, feathers, antennae, wings, or other flexible features, the chart usually measures to the top of the solid, substantial part of the head or body instead of the tallest decorative feature.

The goal is not to replace the official height, but to make the artwork compare naturally at the size it appears to occupy.

Shellder currently uses a pose-adjusted visual scale.