Basculin Red Striped is a Water-type Pokémon introduced in Generation V and the first stage of its evolution line, with a base stat total of 460.
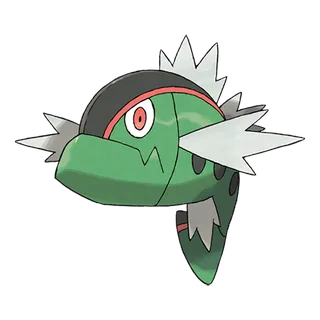
Basculin Red Striped

Basculin Red Striped

Abilities

Reckless

Powers up moves that have recoil damage.

Adaptability

Powers up moves of the same type.

Mold Breaker

Moves can be used regardless of abilities.

Hidden Ability

Base Stats

Total: 460
EV Yield: 2 Speed
HP: 70
Attack: 92
Defense: 65
Sp. Atk: 80
Sp. Def: 55
Speed: 98

Basculin Red Striped's Weaknesses and Resistances

Evolution Chain

Basculin Red Striped does not evolve into or from any other Pokémon.
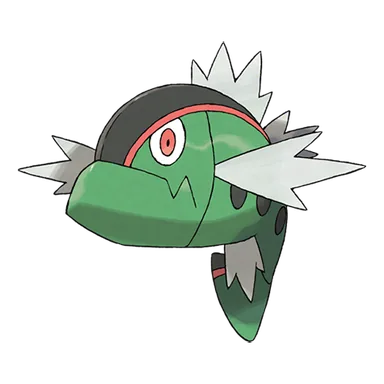
Forms

Basculin Red Striped Playthrough, Competitive, and Nuzlocke Usage

Using Basculin Red Striped in a Playthrough

Basculin is a fast, aggressive pure Water Pokemon with base 92 Attack and 98 Speed, but only the White-Striped Form can evolve. Red-Striped Basculin commonly uses Reckless or Adaptability, Blue-Striped Basculin can use Rock Head or Adaptability, and White-Striped Basculin instead has Rattled or Adaptability; all three can have Mold Breaker as a Hidden Ability in modern games. White-Striped Basculin evolves into Basculegion after accumulating at least 294 HP of recoil damage without fainting, with the exact level-up requirement differing slightly in Legends: Arceus. Basculegion becomes Water/Ghost and gains enormous base 120 HP; males emphasize physical offense with base 112 Attack and 80 Special Attack, while females have base 92 Attack and 100 Special Attack. Swift Swim doubles Speed in rain, Adaptability increases the same-type attack bonus from 1.5 to 2 times, and Mold Breaker bypasses opposing abilities, giving either sex several viable approaches. Wave Crash, Aqua Jet, Shadow Ball, Hydro Pump, Flip Turn, and other coverage make the family dangerous, but recoil-heavy evolution and attacks require much more caution in ordinary story play than the raw offensive numbers suggest.

Basculin Red Striped in Competitive Pokémon

Red- and Blue-Striped Basculin were always niche lower-tier attackers, valued mostly for base 98 Speed, Adaptability-boosted Water STAB, and aggressive options such as Aqua Jet or recoil moves. Basculegion raised the family's competitive ceiling dramatically in Generation IX. Male Basculegion is the stronger physical wallbreaker, using base 112 Attack, Adaptability or Swift Swim, Wave Crash, and Aqua Jet, while female Basculegion trades 20 Attack for 20 Special Attack and functions more naturally as a special wallbreaker with Hydro Pump, Shadow Ball, and Flip Turn. Last Respects was so powerful on Basculegion and Houndstone that Smogon ultimately banned the move itself from SV OU after Pokémon HOME rather than leaving the Pokemon banned solely because of that one attack. Without Last Respects, the forms settled into more ordinary lower-tier roles—male Basculegion is currently NU and female Basculegion RU—but both remain dangerous rain abusers and Adaptability wallbreakers. Their middling base 78 Speed outside rain and limited defensive stats besides HP keep them manageable without the banned move.

Basculin Red Striped in Nuzlockes

The Basculin family presents an unusual Nuzlocke dilemma because the evolution requirement itself asks White-Striped Basculin to take large amounts of recoil damage. The required 294 HP can be accumulated across battles and healed between them, but fainting resets the progress in ordinary modern mechanics—and in a permadeath run fainting would end the attempt entirely. Once evolved, Basculegion is much safer because base 120 HP, Normal and Fighting immunities, and Water/Ghost resistances create useful defensive opportunities, while Aqua Jet can finish weakened opponents before they move. Adaptability is the most straightforward damage ability, whereas Swift Swim can make Basculegion extremely fast in rain; Wave Crash is powerful but its recoil should be reserved for situations where the extra damage is truly necessary. The quadruple-free typing is useful, but Electric, Grass, Ghost, and Dark moves still hit super effectively, so its large HP pool should not encourage careless switching.

Learnsets

55 moves · Scarlet Violet

Level Up

1 Tail Whip normal type --- 100 status move
1 Water Gun water type 40 100 special move
4 Tackle normal type 40 100 physical move
8 Flail normal type --- 100 physical move
12 Aqua Jet water type 40 100 physical move
16 Bite dark type 60 100 physical move
20 Scary Face normal type --- 100 status move
24 Headbutt normal type 70 100 physical move
28 Soak water type --- 100 status move
32 Crunch dark type 80 100 physical move
36 Take Down normal type 90 85 physical move
40 Final Gambit fighting type --- 100 special move
44 Wave Crash water type 120 100 physical move
48 Thrash normal type 120 100 physical move
52 Double-Edge normal type 120 100 physical move
56 Head Smash rock type 150 80 physical move

Machine

- Take Down normal type 90 85 physical move
- Double-Edge normal type 120 100 physical move
- Hydro Pump water type 110 80 special move
- Surf water type 90 100 special move
- Ice Beam ice type 90 100 special move
- Blizzard ice type 110 70 special move
- Hyper Beam normal type 150 90 special move
- Agility psychic type --- --- status move
- Waterfall water type 80 100 physical move
- Swift normal type 60 --- special move
- Rest psychic type --- --- status move
- Substitute normal type --- --- status move
- Reversal fighting type --- 100 physical move
- Protect normal type --- --- status move
- Scary Face normal type --- 100 status move
- Icy Wind ice type 55 95 special move
- Endure normal type --- --- status move
- Sleep Talk normal type --- --- status move
- Rain Dance water type --- --- status move
- Crunch dark type 80 100 physical move
- Whirlpool water type 35 85 special move
- Facade normal type 70 100 physical move
- Taunt dark type --- 100 status move
- Endeavor normal type --- 100 physical move
- Muddy Water water type 90 85 special move
- Mud Shot ground type 55 95 special move
- Water Pulse water type 60 100 special move
- Giga Impact normal type 150 90 physical move
- Ice Fang ice type 65 95 physical move
- Zen Headbutt psychic type 80 90 physical move
- Psychic Fangs psychic type 85 100 physical move
- Liquidation water type 85 100 physical move
- Scale Shot dragon type 25 90 physical move
- Flip Turn water type 60 100 physical move
- Tera Blast normal type 80 100 special move
- Snowscape ice type --- --- status move
- Chilling Water water type 50 100 special move

Egg

- Bubble Beam water type 65 100 special move
- Endeavor normal type --- 100 physical move

Pokédex Entries

8 entries
Black

Red and blue Basculin get along so poorly, they’ll start fighting instantly. These Pokémon are very hostile.

White / Y / Alpha Sapphire

Red and blue Basculin usually do not get along, but sometimes members of one school mingle with the other’s school.

Black 2 / White 2 / X / Omega Ruby

Red- and blue-striped Basculin are very violent and always fighting. They are also remarkably tasty.

Ultra Sun

Savage, violent Pokémon, red and blue Basculin are always fighting each other over territory.

Ultra Moon

When a school of Basculin appears in a lake, everything else disappears, except for Corphish and Crawdaunt. That’s how violent Basculin are.

Sword

Anglers love the fight this Pokémon puts up on the hook. And there are always more to catch— many people release them into lakes illicitly.

Shield

In the past, it often appeared on the dinner table. The meat of red-striped Basculin is on the fatty side, and it’s more popular with the youth.

Legends Arceus

Though it differs from other Basculin in several respects, including demeanor—this one is gentle—I have categorized it as a regional form given the vast array of shared qualities.

Where To Find Basculin Red Striped

40 locations
Brooklet Hill · AlolaBubbling Spots, Super Rod · version details vary

Brooklet Hill North

Ultra Moon max 50%
Bubbling Spots · Lv. 10–21 · 25%Super Rod · Lv. 10–16 · 25%
Ultra Sun max 50%
Bubbling Spots · Lv. 10–21 · 25%Super Rod · Lv. 10–16 · 25%

Brooklet Hill South

Ultra Moon max 50%
Bubbling Spots · Lv. 10–21 · 25%Super Rod · Lv. 10–16 · 25%
Ultra Sun max 50%
Bubbling Spots · Lv. 10–21 · 25%Super Rod · Lv. 10–16 · 25%
Malie Garden · AlolaBubbling Spots, Super Rod · version details vary

Malie Garden Area

Ultra Moon max 40%
Bubbling Spots · Lv. 10–33 · 15%Super Rod · Lv. 10–28 · 25%
Ultra Sun max 40%
Bubbling Spots · Lv. 10–33 · 15%Super Rod · Lv. 10–28 · 25%
Vast Poni Canyon · AlolaBubbling Spots, Super Rod · version details vary

Vast Poni Canyon Northwest

Ultra Moon max 45%
Bubbling Spots · Lv. 10–51 · 20%Super Rod · Lv. 10–46 · 25%
Ultra Sun max 45%
Bubbling Spots · Lv. 10–51 · 20%Super Rod · Lv. 10–46 · 25%
Hulbury · GalarBubbling Spots · version details vary

Hulbury

Shield max 10%
Bubbling Spots · Lv. 20–24 · 10%
Sword max 10%
Bubbling Spots · Lv. 20–24 · 10%
Couriway Town · KalosSuper Rod, Good Rod · version details vary

Couriway Town

X max 35%
Super Rod · Lv. 45 · 35%
Y max 65%
Good Rod · Lv. 35 · 60%Good Rod · Lv. 35 · 5%
Frost Cavern · KalosSuper Rod, Good Rod · version details vary

Frost Cavern (unknown area 313)

X max 35%
Super Rod · Lv. 40 · 35%
Y max 65%
Good Rod · Lv. 30 · 60%Good Rod · Lv. 30 · 5%

Frost Cavern (unknown area 315)

X max 35%
Super Rod · Lv. 40 · 35%
Y max 65%
Good Rod · Lv. 30 · 60%Good Rod · Lv. 30 · 5%
Laverre City · KalosSuper Rod, Good Rod · version details vary

Laverre City

X max 35%
Super Rod · Lv. 35 · 35%
Y max 65%
Good Rod · Lv. 25 · 60%Good Rod · Lv. 25 · 5%
Pokémon Village · KalosSuper Rod, Good Rod · version details vary

Pokemon Village

X max 35%
Super Rod · Lv. 50 · 35%
Y max 65%
Good Rod · Lv. 40 · 60%Good Rod · Lv. 40 · 5%
Route 15 · KalosSuper Rod, Good Rod · version details vary

Road 15

X max 35%
Super Rod · Lv. 35 · 35%
Y max 65%
Good Rod · Lv. 25 · 60%Good Rod · Lv. 25 · 5%
Route 16 · KalosSuper Rod, Good Rod · version details vary

Road 16

X max 35%
Super Rod · Lv. 35 · 35%
Y max 65%
Good Rod · Lv. 25 · 60%Good Rod · Lv. 25 · 5%
Route 21 · KalosGood Rod, Super Rod · version details vary

Road 21

X max 95%
Good Rod · Lv. 40 · 60%Super Rod · Lv. 50 · 35%
Y max 95%
Good Rod · Lv. 40 · 60%Super Rod · Lv. 50 · 35%
Victory Road · KalosSuper Rod, Good Rod · version details vary

Victory Road (unknown area 322)

X max 35%
Super Rod · Lv. 55 · 35%
Y max 65%
Good Rod · Lv. 45 · 60%Good Rod · Lv. 45 · 5%

Victory Road (unknown area 327)

X max 35%
Super Rod · Lv. 55 · 35%
Y max 65%
Good Rod · Lv. 45 · 60%Good Rod · Lv. 45 · 5%

Victory Road (unknown area 328)

X max 35%
Super Rod · Lv. 55 · 35%
Y max 65%
Good Rod · Lv. 45 · 60%Good Rod · Lv. 45 · 5%
Abundant Shrine · UnovaSuper Rod, Surf, Super Rod Spots, Surf Spots · version details vary

Abundant Shrine

Black max 110%
Super Rod · Lv. 35–55 · 40%Surf · Lv. 25–55 · 60%Surf · Lv. 25–55 · 5%Surf · Lv. 25–55 · 4%Surf · Lv. 25–55 · 1%
Black 2 max 110%
Super Rod · Lv. 40–60 · 40%Surf · Lv. 25–40 · 60%Surf · Lv. 30–40 · 5%Surf · Lv. 30–40 · 4%Surf · Lv. 30–40 · 1%
White max 70%
Super Rod Spots · Lv. 35–60 · 40%Surf Spots · Lv. 25–60 · 30%
White 2 max 75%
Super Rod Spots · Lv. 40–60 · 40%Surf Spots · Lv. 25–40 · 30%Surf Spots · Lv. 30–40 · 5%
Aspertia City · UnovaSuper Rod, Surf, Super Rod Spots, Surf Spots · version details vary

Aspertia City

Black 2 max 140%
Super Rod · Lv. 40–60 · 40%Surf · Lv. 5–15 · 60%Surf · Lv. 5–15 · 30%Surf · Lv. 5–15 · 5%Surf · Lv. 5–15 · 4%Surf · Lv. 5–15 · 1%
White 2 max 140%
Super Rod Spots · Lv. 40–60 · 40%Surf Spots · Lv. 5–15 · 60%Surf Spots · Lv. 5–15 · 30%Surf Spots · Lv. 5–15 · 5%Surf Spots · Lv. 5–15 · 4%Surf Spots · Lv. 5–15 · 1%
Challenger's Cave · UnovaSuper Rod, Surf, Super Rod Spots, Surf Spots · version details vary

Challengers Cave (B2F)

Black max 140%
Super Rod · Lv. 35–55 · 40%Surf · Lv. 25–55 · 60%Surf · Lv. 25–55 · 30%Surf · Lv. 25–55 · 5%Surf · Lv. 25–55 · 4%Surf · Lv. 25–55 · 1%
White max 140%
Super Rod Spots · Lv. 35–60 · 40%Surf Spots · Lv. 25–70 · 60%Surf Spots · Lv. 25–70 · 30%Surf Spots · Lv. 25–70 · 5%Surf Spots · Lv. 25–70 · 4%Surf Spots · Lv. 25–70 · 1%
Clay Tunnel · UnovaSuper Rod, Surf, Super Rod Spots, Surf Spots · version details vary

Clay Tunnel

Black 2 max 140%
Super Rod · Lv. 50–60 · 40%Surf · Lv. 45–60 · 60%Surf · Lv. 45–60 · 30%Surf · Lv. 50–60 · 5%Surf · Lv. 50–60 · 4%Surf · Lv. 50–60 · 1%
White 2 max 140%
Super Rod Spots · Lv. 50–60 · 40%Surf Spots · Lv. 45–60 · 60%Surf Spots · Lv. 45–60 · 30%Surf Spots · Lv. 50–60 · 5%Surf Spots · Lv. 50–60 · 4%Surf Spots · Lv. 50–60 · 1%
Dragonspiral Tower · UnovaSuper Rod, Surf, Super Rod Spots, Surf Spots · version details vary

Dragonspiral Tower (outside)

Black max 140%
Super Rod · Lv. 35–55 · 40%Surf · Lv. 15–35 · 60%Surf · Lv. 15–35 · 30%Surf · Lv. 15–35 · 5%Surf · Lv. 15–35 · 4%Surf · Lv. 15–35 · 1%
Black 2 max 140%
Super Rod · Lv. 40–60 · 40%Surf · Lv. 45–60 · 60%Surf · Lv. 45–60 · 30%Surf · Lv. 50–60 · 5%Surf · Lv. 50–60 · 4%Surf · Lv. 50–60 · 1%
White max 140%
Super Rod Spots · Lv. 35–60 · 40%Surf Spots · Lv. 15–40 · 60%Surf Spots · Lv. 15–40 · 30%Surf Spots · Lv. 15–40 · 5%Surf Spots · Lv. 15–40 · 4%Surf Spots · Lv. 15–40 · 1%
White 2 max 140%
Super Rod Spots · Lv. 40–60 · 40%Surf Spots · Lv. 45–60 · 60%Surf Spots · Lv. 45–60 · 30%Surf Spots · Lv. 50–60 · 5%Surf Spots · Lv. 50–60 · 4%Surf Spots · Lv. 50–60 · 1%
Floccesy Ranch · UnovaSuper Rod, Surf, Super Rod Spots, Surf Spots · version details vary

Floccesy Ranch (inner)

Black 2 max 110%
Super Rod · Lv. 40–60 · 40%Surf · Lv. 5–15 · 60%Surf · Lv. 5–15 · 5%Surf · Lv. 5–15 · 4%Surf · Lv. 5–15 · 1%
White 2 max 105%
Super Rod Spots · Lv. 40–60 · 40%Surf Spots · Lv. 5–15 · 60%Surf Spots · Lv. 5–15 · 5%

Floccesy Ranch (outer)

Black 2 max 110%
Super Rod · Lv. 40–60 · 40%Surf · Lv. 5–15 · 60%Surf · Lv. 5–15 · 5%Surf · Lv. 5–15 · 4%Surf · Lv. 5–15 · 1%
White 2 max 105%
Super Rod Spots · Lv. 40–60 · 40%Surf Spots · Lv. 5–15 · 60%Surf Spots · Lv. 5–15 · 5%
Giant Chasm · UnovaSuper Rod, Surf, Super Rod Spots, Surf Spots · version details vary

Giant Chasm

Black max 110%
Super Rod · Lv. 35–55 · 40%Surf · Lv. 25–55 · 60%Surf · Lv. 25–55 · 5%Surf · Lv. 25–55 · 4%Surf · Lv. 25–55 · 1%
Black 2 max 110%
Super Rod · Lv. 40–60 · 40%Surf · Lv. 35–50 · 60%Surf · Lv. 40–50 · 5%Surf · Lv. 40–50 · 4%Surf · Lv. 40–50 · 1%
White max 70%
Super Rod Spots · Lv. 35–60 · 40%Surf Spots · Lv. 25–60 · 30%
White 2 max 70%
Super Rod Spots · Lv. 40–60 · 40%Surf Spots · Lv. 35–50 · 30%

Giant Chasm (forest cave)

Black max 110%
Super Rod · Lv. 35–55 · 40%Surf · Lv. 25–55 · 60%Surf · Lv. 25–55 · 5%Surf · Lv. 25–55 · 4%Surf · Lv. 25–55 · 1%
White max 70%
Super Rod Spots · Lv. 35–60 · 40%Surf Spots · Lv. 25–60 · 30%
Humilau City · UnovaSurf, Surf Spots · version details vary

Humilau City

Black 2 max 5%
Surf · Lv. 35–45 · 5%
White 2 max 5%
Surf Spots · Lv. 35–45 · 5%
Lostlorn Forest · UnovaSuper Rod, Surf, Super Rod Spots, Surf Spots · version details vary

Lostlorn Forest

Black max 140%
Super Rod · Lv. 35–55 · 40%Surf · Lv. 5–20 · 60%Surf · Lv. 5–20 · 30%Surf · Lv. 5–20 · 5%Surf · Lv. 5–20 · 4%Surf · Lv. 5–20 · 1%
Black 2 max 110%
Super Rod · Lv. 40–60 · 40%Surf · Lv. 10–25 · 60%Surf · Lv. 10–25 · 5%Surf · Lv. 10–25 · 4%Surf · Lv. 10–25 · 1%
White max 140%
Super Rod Spots · Lv. 35–60 · 40%Surf Spots · Lv. 5–20 · 60%Surf Spots · Lv. 5–20 · 30%Surf Spots · Lv. 5–20 · 5%Surf Spots · Lv. 5–20 · 4%Surf Spots · Lv. 5–20 · 1%
White 2 max 70%
Super Rod Spots · Lv. 40–60 · 40%Surf Spots · Lv. 10–30 · 30%
Nature Sanctuary · UnovaSuper Rod, Surf, Super Rod Spots, Surf Spots · version details vary

Nature Sanctuary

Black 2 max 110%
Super Rod · Lv. 40–60 · 40%Surf · Lv. 45–60 · 60%Surf · Lv. 50–60 · 5%Surf · Lv. 50–60 · 4%Surf · Lv. 50–60 · 1%
White 2 max 75%
Super Rod Spots · Lv. 40–60 · 40%Surf Spots · Lv. 45–60 · 30%Surf Spots · Lv. 50–60 · 5%
Pinwheel Forest · UnovaSuper Rod, Surf, Super Rod Spots, Surf Spots · version details vary

Pinwheel Forest (inside)

Black max 140%
Super Rod · Lv. 35–55 · 40%Surf · Lv. 5–20 · 60%Surf · Lv. 5–20 · 30%Surf · Lv. 5–20 · 5%Surf · Lv. 5–20 · 4%Surf · Lv. 5–20 · 1%
Black 2 max 110%
Super Rod · Lv. 40–60 · 40%Surf · Lv. 45–60 · 60%Surf · Lv. 50–60 · 5%Surf · Lv. 50–60 · 4%Surf · Lv. 50–60 · 1%
White max 140%
Super Rod Spots · Lv. 35–60 · 40%Surf Spots · Lv. 5–20 · 60%Surf Spots · Lv. 5–20 · 30%Surf Spots · Lv. 5–20 · 5%Surf Spots · Lv. 5–20 · 4%Surf Spots · Lv. 5–20 · 1%
White 2 max 75%
Super Rod Spots · Lv. 35–60 · 40%Surf Spots · Lv. 45–60 · 30%Surf Spots · Lv. 50–60 · 5%
Relic Passage · UnovaSuper Rod, Surf, Super Rod Spots, Surf Spots · version details vary

Relic Tunnel (Relic Castle entrance)

Black 2 max 110%
Super Rod · Lv. 40–60 · 40%Surf · Lv. 10–30 · 60%Surf · Lv. 10–30 · 5%Surf · Lv. 10–30 · 4%Surf · Lv. 10–30 · 1%
White 2 max 75%
Super Rod Spots · Lv. 40–60 · 40%Surf Spots · Lv. 10–30 · 30%Surf Spots · Lv. 10–30 · 5%
Route 1 · UnovaSuper Rod, Surf, Super Rod Spots, Surf Spots · version details vary

Road 1

Black max 195%
Super Rod · Lv. 35–55 · 40%Super Rod · Lv. 35–55 · 15%Surf · Lv. 5–15 · 60%Surf · Lv. 5–15 · 30%Surf · Lv. 5–15 · 5%Surf · Lv. 5–15 · 4%Surf · Lv. 5–15 · 1%
Black 2 max 195%
Super Rod · Lv. 40–60 · 40%Super Rod · Lv. 50–70 · 15%Surf · Lv. 45–60 · 60%Surf · Lv. 45–60 · 30%Surf · Lv. 50–60 · 5%Surf · Lv. 50–60 · 4%Surf · Lv. 50–60 · 1%
White max 155%
Super Rod Spots · Lv. 35–60 · 40%Super Rod Spots · Lv. 35–70 · 15%Surf Spots · Lv. 5–20 · 60%Surf Spots · Lv. 5–20 · 30%Surf Spots · Lv. 5–20 · 5%Surf Spots · Lv. 5–20 · 4%Surf Spots · Lv. 5–20 · 1%
White 2 max 140%
Super Rod Spots · Lv. 40–60 · 40%Surf Spots · Lv. 45–60 · 60%Surf Spots · Lv. 45–60 · 30%Surf Spots · Lv. 50–60 · 5%Surf Spots · Lv. 50–60 · 4%Surf Spots · Lv. 50–60 · 1%
Route 11 · UnovaSuper Rod, Surf, Super Rod Spots, Surf Spots · version details vary

Road 11

Black max 110%
Super Rod · Lv. 35–55 · 40%Surf · Lv. 25–55 · 60%Surf · Lv. 25–55 · 5%Surf · Lv. 25–55 · 4%Surf · Lv. 25–55 · 1%
Black 2 max 110%
Super Rod · Lv. 40–50 · 40%Surf · Lv. 25–40 · 60%Surf · Lv. 30–40 · 5%Surf · Lv. 30–40 · 4%Surf · Lv. 30–40 · 1%
White max 70%
Super Rod Spots · Lv. 35–60 · 40%Surf Spots · Lv. 25–60 · 30%
White 2 max 70%
Super Rod Spots · Lv. 40–60 · 40%Surf Spots · Lv. 25–40 · 30%
Route 13 · UnovaSurf, Surf Spots · version details vary

Road 13

Black 2 max 5%
Surf · Lv. 30–40 · 5%
White 2 max 5%
Surf Spots · Lv. 30–40 · 5%
Route 14 · UnovaSuper Rod, Surf, Super Rod Spots, Surf Spots · version details vary

Road 14

Black max 110%
Super Rod · Lv. 35–55 · 40%Surf · Lv. 25–55 · 60%Surf · Lv. 25–55 · 5%Surf · Lv. 25–55 · 4%Surf · Lv. 25–55 · 1%
Black 2 max 110%
Super Rod · Lv. 40–60 · 40%Surf · Lv. 15–35 · 60%Surf · Lv. 15–35 · 5%Surf · Lv. 15–35 · 4%Surf · Lv. 15–35 · 1%
White max 70%
Super Rod Spots · Lv. 35–60 · 40%Surf Spots · Lv. 25–60 · 30%
White 2 max 70%
Super Rod Spots · Lv. 40–60 · 40%Surf Spots · Lv. 25–40 · 30%
Route 19 · UnovaSuper Rod, Surf, Super Rod Spots, Surf Spots · version details vary

Road 19

Black 2 max 140%
Super Rod · Lv. 40–60 · 40%Surf · Lv. 5–15 · 60%Surf · Lv. 5–15 · 30%Surf · Lv. 5–15 · 5%Surf · Lv. 5–15 · 4%Surf · Lv. 5–15 · 1%
White 2 max 140%
Super Rod Spots · Lv. 40–60 · 40%Surf Spots · Lv. 5–15 · 60%Surf Spots · Lv. 5–15 · 30%Surf Spots · Lv. 5–15 · 5%Surf Spots · Lv. 5–15 · 4%Surf Spots · Lv. 5–15 · 1%
Route 20 · UnovaSuper Rod, Surf, Super Rod Spots, Surf Spots · version details vary

Road 20

Black 2 max 110%
Super Rod · Lv. 40–60 · 40%Surf · Lv. 5–15 · 60%Surf · Lv. 5–15 · 5%Surf · Lv. 5–15 · 4%Surf · Lv. 5–15 · 1%
White 2 max 105%
Super Rod Spots · Lv. 40–60 · 40%Surf Spots · Lv. 5–15 · 60%Surf Spots · Lv. 5–15 · 5%
Route 22 · UnovaSuper Rod, Surf, Super Rod Spots, Surf Spots · version details vary

Road 22

Black 2 max 110%
Super Rod · Lv. 40–60 · 40%Surf · Lv. 15–40 · 60%Surf · Lv. 15–40 · 5%Surf · Lv. 15–40 · 4%Surf · Lv. 15–40 · 1%
White 2 max 75%
Super Rod Spots · Lv. 40–60 · 40%Surf Spots · Lv. 15–40 · 30%Surf Spots · Lv. 25–45 · 5%
Route 23 · UnovaSuper Rod, Surf, Super Rod Spots, Surf Spots · version details vary

Road 23

Black 2 max 110%
Super Rod · Lv. 40–60 · 40%Surf · Lv. 40–55 · 60%Surf · Lv. 45–55 · 5%Surf · Lv. 45–55 · 4%Surf · Lv. 45–55 · 1%
White 2 max 70%
Super Rod Spots · Lv. 40–60 · 40%Surf Spots · Lv. 40–55 · 30%
Route 3 · UnovaSuper Rod, Surf, Super Rod Spots, Surf Spots · version details vary

Road 3

Black max 140%
Super Rod · Lv. 35–55 · 40%Surf · Lv. 5–15 · 60%Surf · Lv. 5–15 · 30%Surf · Lv. 5–15 · 5%Surf · Lv. 5–15 · 4%Surf · Lv. 5–15 · 1%
Black 2 max 110%
Super Rod · Lv. 40–60 · 40%Surf · Lv. 45–60 · 60%Surf · Lv. 50–60 · 5%Surf · Lv. 50–60 · 4%Surf · Lv. 50–60 · 1%
White max 140%
Super Rod Spots · Lv. 35–60 · 40%Surf Spots · Lv. 5–20 · 60%Surf Spots · Lv. 5–20 · 30%Surf Spots · Lv. 5–20 · 5%Surf Spots · Lv. 5–20 · 4%Surf Spots · Lv. 5–20 · 1%
White 2 max 70%
Super Rod Spots · Lv. 40–60 · 40%Surf Spots · Lv. 45–60 · 30%
Route 6 · UnovaSuper Rod, Surf, Super Rod Spots, Surf Spots · version details vary

Road 6

Black max 140%
Super Rod · Lv. 35–55 · 40%Surf · Lv. 10–25 · 60%Surf · Lv. 10–25 · 30%Surf · Lv. 10–25 · 5%Surf · Lv. 10–25 · 4%Surf · Lv. 10–25 · 1%
Black 2 max 110%
Super Rod · Lv. 40–60 · 40%Surf · Lv. 10–25 · 60%Surf · Lv. 10–25 · 5%Surf · Lv. 10–25 · 4%Surf · Lv. 10–25 · 1%
White max 140%
Super Rod Spots · Lv. 35–60 · 40%Surf Spots · Lv. 10–30 · 60%Surf Spots · Lv. 10–30 · 30%Surf Spots · Lv. 10–30 · 5%Surf Spots · Lv. 10–30 · 4%Surf Spots · Lv. 10–30 · 1%
White 2 max 75%
Super Rod Spots · Lv. 40–60 · 40%Surf Spots · Lv. 10–35 · 30%Surf Spots · Lv. 10–35 · 5%
Striaton City · UnovaSuper Rod, Surf, Super Rod Spots, Surf Spots · version details vary

Striaton City

Black max 140%
Super Rod · Lv. 35–55 · 40%Surf · Lv. 5–15 · 60%Surf · Lv. 5–15 · 30%Surf · Lv. 5–15 · 5%Surf · Lv. 5–15 · 4%Surf · Lv. 5–15 · 1%
Black 2 max 110%
Super Rod · Lv. 40–60 · 40%Surf · Lv. 45–60 · 60%Surf · Lv. 50–60 · 5%Surf · Lv. 50–60 · 4%Surf · Lv. 50–60 · 1%
White max 140%
Super Rod Spots · Lv. 35–60 · 40%Surf Spots · Lv. 5–20 · 60%Surf Spots · Lv. 5–20 · 30%Surf Spots · Lv. 5–20 · 5%Surf Spots · Lv. 5–20 · 4%Surf Spots · Lv. 5–20 · 1%
White 2 max 130%
Super Rod Spots · Lv. 40–60 · 40%Surf Spots · Lv. 45–60 · 60%Surf Spots · Lv. 45–60 · 30%
Undella Town · UnovaSurf, Surf Spots · version details vary

Undella Town

Black 2 max 5%
Surf · Lv. 30–40 · 5%
White 2 max 5%
Surf Spots · Lv. 30–40 · 5%
Victory Road · UnovaSuper Rod, Surf, Super Rod Spots, Surf Spots · version details vary

Victory Road (unknown area 53)

Black max 140%
Super Rod · Lv. 35–55 · 40%Surf · Lv. 20–45 · 60%Surf · Lv. 20–45 · 30%Surf · Lv. 20–45 · 5%Surf · Lv. 20–45 · 4%Surf · Lv. 20–45 · 1%
White max 140%
Super Rod Spots · Lv. 35–60 · 40%Surf Spots · Lv. 20–50 · 60%Surf Spots · Lv. 20–50 · 30%Surf Spots · Lv. 20–50 · 5%Surf Spots · Lv. 20–50 · 4%Surf Spots · Lv. 20–50 · 1%

Victory Road (unknown area 58)

Black max 140%
Super Rod · Lv. 35–55 · 40%Surf · Lv. 20–45 · 60%Surf · Lv. 20–45 · 30%Surf · Lv. 20–45 · 5%Surf · Lv. 20–45 · 4%Surf · Lv. 20–45 · 1%
White max 140%
Super Rod Spots · Lv. 35–60 · 40%Surf Spots · Lv. 20–50 · 60%Surf Spots · Lv. 20–50 · 30%Surf Spots · Lv. 20–50 · 5%Surf Spots · Lv. 20–50 · 4%Surf Spots · Lv. 20–50 · 1%
Victory Road · UnovaSuper Rod, Surf, Super Rod Spots, Surf Spots · version details vary

Victory Road 2 (unknown area 71)

Black 2 max 110%
Super Rod · Lv. 40–55 · 40%Surf · Lv. 35–50 · 60%Surf · Lv. 40–50 · 5%Surf · Lv. 40–50 · 4%Surf · Lv. 40–50 · 1%
White 2 max 75%
Super Rod Spots · Lv. 40–60 · 40%Surf Spots · Lv. 35–50 · 30%Surf Spots · Lv. 40–50 · 5%

Victory Road 2 (unknown area 73)

Black 2 max 110%
Super Rod · Lv. 40–60 · 40%Surf · Lv. 35–50 · 60%Surf · Lv. 40–50 · 5%Surf · Lv. 40–50 · 4%Surf · Lv. 40–50 · 1%
White 2 max 70%
Super Rod Spots · Lv. 40–60 · 40%Surf Spots · Lv. 35–50 · 30%

Victory Road 2 (unknown area 75)

Black 2 max 110%
Super Rod · Lv. 40–60 · 40%Surf · Lv. 35–50 · 60%Surf · Lv. 40–50 · 5%Surf · Lv. 40–50 · 4%Surf · Lv. 40–50 · 1%
White 2 max 75%
Super Rod Spots · Lv. 40–60 · 40%Surf Spots · Lv. 35–50 · 30%Surf Spots · Lv. 40–50 · 5%

Victory Road 2 (unknown area 78)

Black 2 max 110%
Super Rod · Lv. 40–60 · 40%Surf · Lv. 35–50 · 60%Surf · Lv. 40–50 · 5%Surf · Lv. 40–50 · 4%Surf · Lv. 40–50 · 1%
White 2 max 75%
Super Rod Spots · Lv. 40–60 · 40%Surf Spots · Lv. 35–50 · 30%Surf Spots · Lv. 40–50 · 5%

Victory Road 2 (unknown area 79)

Black 2 max 110%
Super Rod · Lv. 40–60 · 40%Surf · Lv. 35–50 · 60%Surf · Lv. 40–50 · 5%Surf · Lv. 40–50 · 4%Surf · Lv. 40–50 · 1%
White 2 max 70%
Super Rod Spots · Lv. 40–60 · 40%Surf Spots · Lv. 35–50 · 30%
Village Bridge · UnovaSuper Rod, Surf, Super Rod Spots, Surf Spots · version details vary

Village Bridge

Black max 140%
Super Rod · Lv. 35–55 · 40%Surf · Lv. 25–55 · 60%Surf · Lv. 25–55 · 30%Surf · Lv. 25–55 · 5%Surf · Lv. 25–55 · 4%Surf · Lv. 25–55 · 1%
Black 2 max 110%
Super Rod · Lv. 40–60 · 40%Surf · Lv. 25–40 · 60%Surf · Lv. 30–40 · 5%Surf · Lv. 30–40 · 4%Surf · Lv. 30–40 · 1%
White max 135%
Super Rod Spots · Lv. 35–60 · 40%Surf Spots · Lv. 25–60 · 60%Surf Spots · Lv. 25–60 · 30%Surf Spots · Lv. 35–70 · 5%
White 2 max 70%
Super Rod Spots · Lv. 40–60 · 40%Surf Spots · Lv. 25–40 · 30%
Wellspring Cave · UnovaSuper Rod, Surf, Super Rod Spots, Surf Spots · version details vary

Wellspring Cave

Black max 140%
Super Rod · Lv. 35–55 · 40%Surf · Lv. 5–15 · 60%Surf · Lv. 5–15 · 30%Surf · Lv. 5–15 · 5%Surf · Lv. 5–15 · 4%Surf · Lv. 5–15 · 1%
Black 2 max 140%
Super Rod · Lv. 50–60 · 40%Surf · Lv. 45–60 · 60%Surf · Lv. 45–60 · 30%Surf · Lv. 50–60 · 5%Surf · Lv. 50–60 · 4%Surf · Lv. 50–60 · 1%
White max 140%
Super Rod Spots · Lv. 35–60 · 40%Surf Spots · Lv. 5–20 · 60%Surf Spots · Lv. 5–20 · 30%Surf Spots · Lv. 5–20 · 5%Surf Spots · Lv. 5–20 · 4%Surf Spots · Lv. 5–20 · 1%
White 2 max 140%
Super Rod Spots · Lv. 50–60 · 40%Surf Spots · Lv. 45–60 · 60%Surf Spots · Lv. 45–60 · 30%Surf Spots · Lv. 50–60 · 5%Surf Spots · Lv. 50–60 · 4%Surf Spots · Lv. 50–60 · 1%

Held Items

1 items
Deep Sea Tooth
  • Black: 5% chance
  • White: 5% chance
  • Black 2: 5% chance
  • White 2: 5% chance
  • X: 5% chance
  • Y: 5% chance
  • Omega Ruby: 5% chance
  • Alpha Sapphire: 5% chance
  • Sun: 5% chance
  • Moon: 5% chance
  • Ultra Sun: 5% chance
  • Ultra Moon: 5% chance

Additional Images

PokeAPI sprites

Open this section to load extra PokeAPI sprite images.

Basculin Red Striped Biology and Behavior

Red-Striped Basculin are extremely aggressive, energetic fish that form schools and frequently fight Blue-Striped Basculin over territory. Their vitality allows populations to multiply rapidly. They are sometimes called the 'Thug of the River,' although larger predators such as Dondozo and Bombirdier still prey on them.

Basculin Red Striped Biological Data

National Pokédex
#550
Species
Hostile Pokémon
Height
3' 3" (1.0 m)
Weight
39.7 lbs (18.0 kg)
Habitat
Currently Unknown
Color
Green
Body Style
Fish
Gender
50% female / 50% male

Misc

Catch Rate: 25

Base Experience: 161 Exp

Hatch Counter: 40

Basculin Red Striped Size Comparison: BETA

Basculin Red Striped is listed at 3' 3" (1.0 m) and shown in an in-chart visual comparison.
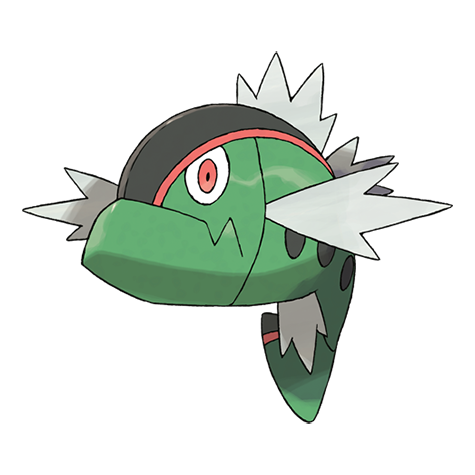
7 ft6 ft5 ft4 ft3 ft2 ft1 ft0 ft
basculin-red-striped
Professor Oak
How is visual size determined?

Pokédex height is treated as the official listed measurement, but the chart uses pose-aware visual scaling so each sprite looks reasonable in a direct comparison.

For long or coiled Pokémon, the listed height may represent total body length rather than upright height. For Pokémon with floppy ears, leaves, feathers, antennae, wings, or other flexible features, the chart usually measures to the top of the solid, substantial part of the head or body instead of the tallest decorative feature.

The goal is not to replace the official height, but to make the artwork compare naturally at the size it appears to occupy.